
Are you tired of breaking the bank on expensive commercial chicken feed? Do you want to provide your flock with fresh, nutritious food that’s kind to the environment too? Making chicken fodder at home is a game-changer for backyard chicken keepers like yourself. Not only is it cost-effective and eco-friendly, but it’s also incredibly easy to do. By growing your own nutrient-rich chicken feed, you can give your chickens the best possible diet while reducing waste and supporting sustainable farming practices. In this article, we’ll show you how to make nutritious chicken fodder at home, covering the benefits, types of fodder, and step-by-step process for creating fresh fodder for your flock.
What is Chicken Fodder and Why Make It?
Let’s dive into what exactly chicken fodder is and why it’s a game-changer for your flock, offering them a nutritious diet and happy health.
Benefits of Homemade Fodder
Making chicken fodder at home comes with numerous benefits that can significantly improve your overall experience of raising backyard chickens. One of the most significant advantages is cost-effectiveness. When you make fodder at home, you can choose the ingredients and quantities according to your flock’s needs, eliminating unnecessary expenses on commercial feeds. A pound of fodder, for instance, can be produced for as little as $0.25.
Another benefit of homemade chicken fodder is nutritional control. By selecting the ingredients, you have complete control over what nutrients your chickens receive. This becomes particularly important when it comes to managing health issues or special dietary needs in your flock.
Furthermore, making fodder at home reduces waste and environmental impact associated with commercial feed production and transportation. It also allows for more efficient use of available resources, which contributes positively to your backyard’s eco-footprint. Overall, incorporating homemade chicken fodder into your poultry care routine offers you greater control over costs, nutrition, and sustainability.
As a beginner, you can start by converting an old pallet or small container into a mini-greenhouse where you’ll grow the fodder. This will give you a good idea of how much it produces daily and how efficiently it fits your flock’s needs.
Common Types of Chicken Fodder
When it comes to making chicken fodder, you have several types of options to choose from. Each type has its unique characteristics and uses, which can impact the nutritional value and quality of your final product.
One popular choice is alfalfa fodder. Alfalfa is a legume that’s rich in protein, fiber, and calcium, making it an excellent option for laying hens. It’s also relatively easy to grow, as it thrives in a variety of conditions. However, keep in mind that alfalfa can be quite expensive, especially if you’re purchasing it from a feed store.
Oat grass fodder is another popular option. Oats are a low-cost, nutritious alternative that’s high in fiber and energy. They also have a lower protein content compared to alfalfa, making them more suitable for meat birds or birds with specific dietary needs. To grow oat grass, simply sow the seeds about 1-2 inches deep in a fodder tray.
Bale fodder is another type of chicken feed you can make at home. This involves purchasing compressed bales of hay, such as timothy or alfalfa, and placing them in a water trough to soak. As the bales absorb water, they’ll begin to sprout and become ready for your chickens to eat within 24-48 hours.
When choosing which type of fodder to make, consider factors like cost, nutritional needs, and ease of growth. For example, if you’re on a tight budget, oat grass might be a better option. However, if you’re looking for a higher-protein feed, alfalfa could be the way to go.
Setting Up Your Fodder Operation
To set up a successful fodder operation, you’ll need to acquire the right equipment and prepare your workspace for easy maintenance and cleaning. Let’s cover the essentials first.
Equipment Needed for Fodder Production
When setting up your fodder operation, you’ll need to invest in some essential equipment to ensure a successful and efficient process. Growing trays are the foundation of fodder production, and you can choose from various types such as plastic, metal, or recycled materials. Ensure that the trays are at least 6-8 inches deep to accommodate the growth cycle of your fodder.
A reliable irrigation system is also crucial for maintaining consistent moisture levels throughout the growing process. This typically involves a water reservoir, pumps, and tubing to deliver water directly to each tray. You can opt for an automated system or a manual one, depending on your operation’s size and budget.
Harvesting tools are also necessary for efficiently removing mature fodder from the trays. A simple kitchen knife or a dedicated fodder cutter will do the job. Additionally, consider investing in a fodder harvester, which can greatly speed up the process and minimize waste.
Choosing the Right Location for Your Fodder Setup
When it comes to setting up your fodder operation, choosing the right location is crucial for success. This may seem like a straightforward decision, but there are several factors to consider before making a final choice.
First and foremost, think about lighting. Fodder needs adequate light to grow, so ensure that the location you choose receives sufficient natural or artificial lighting. East- or west-facing windows are ideal, as they provide gentle, indirect light without causing overheating. Avoid locations with direct sunlight, which can scorch your fodder.
Temperature control is also essential. Most fodder setups thrive in temperatures between 60°F and 80°F (15°C to 27°C). If your location doesn’t have a stable temperature range, consider investing in a heating or cooling system.
Another critical factor is access to water. Your fodder setup will need a reliable source of clean water for irrigation. Make sure the location you choose has a nearby water supply or is close to a tap with easy access.
Consider these factors when selecting a location for your fodder operation, and you’ll be well on your way to growing healthy, nutritious fodder for your chickens.
Preparing Your Seed or Material
To get started, you’ll need to prepare your seed or material by cleaning and sterilizing it to ensure optimal germination and healthy growth for your chicken fodder. This step is crucial for a successful fodder operation.
Selecting High-Quality Seeds or Materials
When it comes to selecting high-quality seeds or materials for making chicken fodder, there are several key considerations to keep in mind. First and foremost, you’ll want to choose seeds that are specifically designed for poultry feed, as they will be higher in protein and lower in fiber than those intended for human consumption.
It’s also essential to consider the soil quality where your seeds were grown. Seeds produced on poor-quality soil may contain contaminants or heavy metals, which can negatively impact the health of your birds. Look for seed suppliers that adhere to strict standards for soil quality and use organic farming practices whenever possible.
In addition to soil quality, it’s crucial to evaluate the moisture content of your seeds or materials. This is particularly important when working with hay or silage, as excessive moisture can lead to mold growth and spoilage. Aim for a moisture level between 15-25% to ensure optimal fermentation and nutrient retention.
Finally, consider the microbial presence in your seeds or materials. Beneficial microbes play a critical role in breaking down complex nutrients and making them available to your birds. Opt for suppliers that offer high-microbe counts or take steps to promote microbial growth during storage and transportation.
Cleaning and Sanitizing Equipment and Work Area
Maintaining a clean environment is crucial when making chicken fodder to prevent contamination and ensure healthy microorganisms. Contaminated equipment and work area can lead to the growth of unwanted bacteria, mold, and yeast, which can compromise the quality and safety of your fodder.
Before starting, thoroughly clean your equipment with soap and water, paying attention to all surfaces that will come into contact with the feed material. Rinse everything well, then sanitize using a mixture of 1 part white vinegar to 9 parts water. This solution is effective against most bacteria and viruses.
Regularly sweep or vacuum the work area to prevent debris from accumulating and creating an environment conducive to contamination. Sanitize the floor at least once a week with the same vinegar solution used for equipment. Always wash your hands before handling feed materials, and consider wearing gloves to further minimize the risk of introducing contaminants. By following these simple steps, you’ll create a clean and safe space for producing healthy chicken fodder.
Growing and Harvesting Your Fodder
Now that you’ve got your fodder growing, it’s time to learn how to harvest and maintain its optimal quality for your chickens. This is where attention to detail really matters!
Optimizing Growing Conditions for Maximum Yield
Creating an ideal growing environment is crucial for maximum yield and healthy growth of your chicken fodder. Let’s start with temperature control – it’s essential to maintain a consistent temperature range between 65°F to 75°F (18°C to 24°C). This allows the fodder to germinate evenly, promoting robust growth.
Humidity management is also vital, as it affects seedling emergence and overall development. Maintain humidity levels around 50-60% during the first few days after sowing, then gradually decrease it to 30-40% as the plants mature. You can achieve this using a humidifier or by covering your growing area with a lid.
Proper light exposure is another critical factor. Most fodder crops require between 12-18 hours of daylight. If you’re growing indoors, consider investing in LED grow lights that mimic natural sunlight. This will promote healthy growth, increase yields, and reduce the risk of disease. Remember to monitor your plants’ response to these conditions and adjust as necessary – every batch is different!
Techniques for Harvesting and Drying Fodder
When it’s time to harvest and dry your fodder, you’ll want to do so in a way that preserves its nutritional value and extends its shelf life. One of the most effective methods for harvesting is to use a fodder mower or a string trimmer with a long handle. These tools allow you to cut the fodder at the base, making it easier to collect and dry.
For drying, you can either use a food dehydrator or set up a makeshift drying rack in your home or workshop. If using a dehydrator, follow the manufacturer’s guidelines for temperature and time settings. For a DIY approach, simply lay out the cut fodder in a single layer on wire racks or trays and place them in a warm, dry area with good air circulation.
Some popular methods for drying include:
* Using a combination of sun and wind: Lay out the fodder outside during the hottest part of the day, then bring it indoors to finish drying overnight.
* Utilizing a low-temperature oven: Set your oven to its lowest temperature setting (usually around 150°F) and dry the fodder in small batches.
Keep an eye on your fodder’s moisture levels by checking for flexibility – when it snaps easily, it’s ready. Properly dried fodder can be stored for several weeks or even months, allowing you to enjoy a fresh supply of nutritious feed year-round.
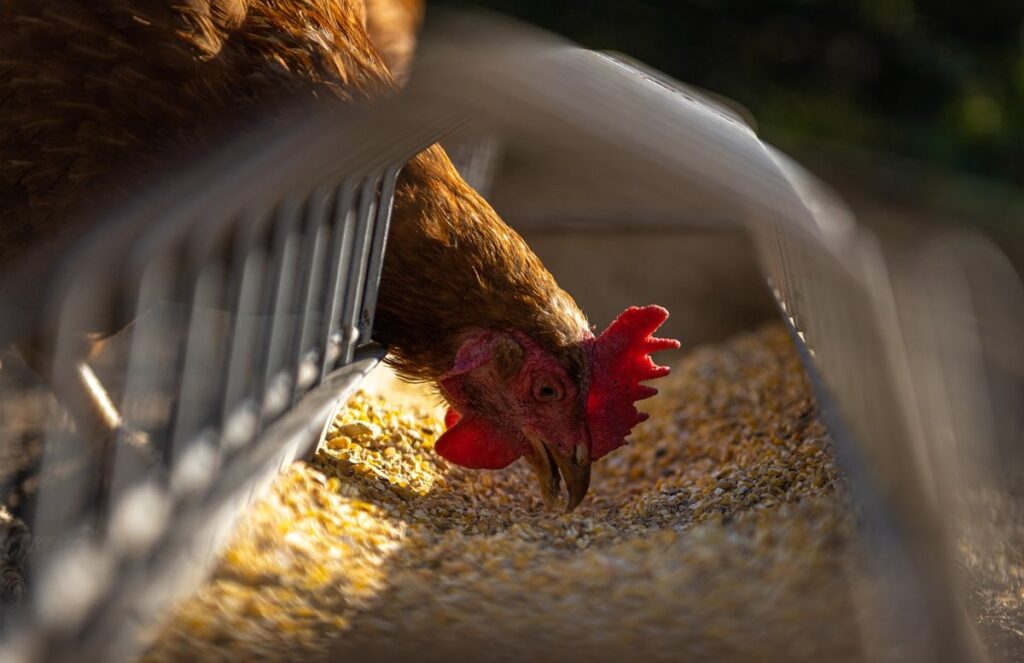
Feeding Your Chickens with Homemade Fodder
Now that you’ve made your homemade chicken fodder, it’s time to learn how to feed it to your flock safely and effectively, ensuring a healthy diet for your chickens. This section covers the basics of incorporating fodder into their daily meals.
Introduction to Fodder-Based Diets for Chickens
When it comes to feeding our chickens, we often reach for commercial feeds that are convenient but can be detrimental to their health. This is where fodder-based diets come in – a game-changer for backyard chicken keepers. Fodder refers to the food or feed grown on-site, specifically for your flock. It’s essentially a nutrient-dense food source made from hay, grains, and sometimes vegetables.
The benefits of incorporating fodder into your chickens’ diet are numerous. For one, it allows you to control what goes into their food, eliminating additives and preservatives found in commercial feeds. Fodder also provides essential nutrients that promote healthy growth, egg production, and overall well-being. Moreover, fodder-based diets can help reduce waste and environmental impact.
Incorporating fodder into your chickens’ daily feed is easier than you think. Start by setting aside a small area for fodder production, and invest in a simple fodder grower or tray. Choose a mix of hay, grains, and vegetables that suit your climate and available space. Water the mixture, and watch it sprout within 24 hours. Harvest the greens daily, and feed them to your flock along with their regular grain. With time, you’ll notice improvements in egg quality, size, and production, as well as a more robust flock overall.
Tips for Gradually Introducing Fodder into Your Chicken’s Diet
When introducing homemade fodder into your chicken’s diet, it’s essential to do so gradually to prevent digestive upset and ensure a smooth transition. The age and breed of your chickens play a significant role in determining the best approach.
For young chicks (0-12 weeks), start by mixing 10% fodder with their commercial feed. Gradually increase the proportion over the next few weeks until they’re eating 100% fodder. For older birds, you can introduce fodder more quickly, starting at 20-30% and increasing to 50-60% within a week.
Consider your flock’s breed and nutritional requirements as well. Some breeds, like Orpingtons, are more prone to obesity, so they may require more careful monitoring of their fodder intake. Similarly, birds that are laying eggs will need a balanced diet rich in calcium and protein, which can be achieved by providing a mix of hay, grains, and supplements.
Monitor your flock’s health and adjust the proportion of fodder accordingly. Remember, every bird is different, so be prepared to fine-tune your approach based on individual needs.
Troubleshooting Common Issues in Fodder Production
When things don’t go as planned, it’s time to troubleshoot! This section will walk you through common issues that might arise during your chicken fodder journey and how to overcome them.
Identifying and Addressing Pests and Diseases
As you tend to your chicken fodder operation, it’s essential to be vigilant about pests and diseases that can compromise its quality. Common issues like mold growth, fungal infections, and pest infestations can significantly impact the nutritional value of your fodder. Here are some common culprits:
Mold growth is often caused by excess moisture or poor air circulation in your fodder trays. Regularly inspect your setup for any signs of dampness or water accumulation, and ensure good airflow to prevent fungal spores from taking hold.
Some common pests you should watch out for include fungus gnats, springtails, and spider mites. To control these pesky insects, maintain a clean environment by regularly cleaning your fodder trays and changing the bedding material as needed. Avoid overcrowding your setup, which can create ideal breeding grounds for pests.
When it comes to fungal infections, consider using organic antifungal products or natural remedies like cinnamon powder to repel mold spores. Regularly monitor your fodder’s temperature and humidity levels, keeping them within optimal ranges to discourage disease growth.
To prevent pests and diseases from taking hold in the first place:
* Implement a strict cleaning schedule for your fodder trays and surrounding area
* Use physical barriers or row covers to keep pests at bay
* Rotate your crops regularly to avoid exhausting the soil of beneficial nutrients
Overcoming Challenges with Low Yield or Poor Quality Fodder
If you’re experiencing low yield or poor quality fodder, it can be frustrating and costly. Let’s tackle these issues together.
Firstly, low yield is often caused by factors like inconsistent moisture levels, inadequate light, or insufficient nutrients. To address this, ensure that your growing conditions are optimal. Make sure to monitor temperature, humidity, and light levels closely. You can also try adjusting the spacing of your fodder trays to promote healthy growth.
Poor quality fodder can be attributed to pests, diseases, or nutrient deficiencies. Regularly inspect your crop for signs of infestation or disease, such as mold, fungus, or insect eggs. For pests like aphids or whiteflies, consider using neem oil or introducing beneficial insects that prey on them. Nutrient deficiencies can often be resolved by adjusting the water’s pH level or adding supplements.
Inconsistent growth is another challenge many growers face. This may be due to varying temperatures, inadequate watering schedules, or insufficient carbon dioxide levels. To combat this, establish a routine for monitoring and controlling these factors. This will help you maintain a consistent environment that promotes healthy growth.
By implementing these strategies, you can overcome the common issues of low yield, poor quality, or inconsistent growth in your fodder crop.
Frequently Asked Questions
Can I make chicken fodder with any type of seed or material, or are there certain requirements?
Yes, not all seeds or materials can be used to make chicken fodder. It’s essential to choose high-quality seeds or materials that are free from contaminants and pests. Look for seeds that are specifically labeled as “fodder” or “chicken feed” quality. Materials like hay, grass, or aquatic plants can also be used, but they may require additional processing to ensure they’re safe and nutritious for your flock.
How do I prevent mold and spoilage in my homemade chicken fodder?
Mold and spoilage are common issues when making homemade chicken fodder. To prevent this, make sure to harvest and dry the fodder promptly after it’s ready. Store it in a well-ventilated area or use a dehydrator to preserve its quality. You can also add preservatives like calcium propionate or ascorbic acid to extend its shelf life.
Can I mix homemade chicken fodder with commercial feed, or should I switch completely?
You can definitely mix homemade chicken fodder with commercial feed, especially if you’re new to making your own fodder. However, it’s recommended to gradually introduce homemade fodder into your flock’s diet to ensure a smooth transition. Start by mixing 10-20% of the fodder with their regular feed and gradually increase the proportion over time.
How often should I harvest my chicken fodder, and what’s the ideal size for cutting?
The frequency of harvesting depends on the growth rate of your seeds or materials. Generally, you can harvest your fodder every 7-10 days, or when it reaches a height of about 6-8 inches. Cut the fodder just above the node to encourage new growth. Be sure to use sharp cutting tools to avoid damaging the plants and promoting disease.
Can I grow chicken fodder indoors during the winter months, or do I need outdoor space?
Yes, you can definitely grow chicken fodder indoors during the winter months. In fact, indoor growing can provide better control over temperature, humidity, and light conditions, which are essential for optimal growth. Use a well-ventilated area like a greenhouse or a large room with sufficient lighting to create an ideal environment for your fodder crops.