
As a backyard chicken keeper, you know that raising healthy chicks is crucial to a successful flock. One often overlooked but critical aspect of chick care is maintaining ideal room temperatures in your chicken brooder. You might be wondering: what’s the right temperature for my chicks? And how do I ensure it stays within a safe range without breaking the bank or stressing out about common issues like pecking order drama?
This article will guide you through understanding the impact of room temperature on chick health, troubleshooting common problems that can arise when temperatures get off-track, and practical tips for keeping your brooder clean and sanitized. By mastering these skills, you’ll be able to create a safe, thriving environment for your chicks to grow and flourish – setting them up for long, happy lives in the process!
Understanding the Importance of Room Temperature in Chicken Brooders
Maintaining a stable room temperature is crucial for your chicks’ growth and development, so let’s dive into why it matters most. Proper temperature regulation can make all the difference in their health and well-being.
The Impact of Temperature on Chick Health and Development
Maintaining an optimal temperature in the brooder is crucial for the overall health and development of chicks. As they grow and mature, their requirements change dramatically, and it’s essential to understand these critical temperatures to ensure a healthy start.
For chicks from 0-4 days old, a temperature range of around 90-95°F (32-35°C) is recommended. This high heat helps them conserve energy and maintain body warmth. After this stage, the temperature can be gradually reduced by 5°F every few days until it reaches a comfortable level for the chicks.
A safe lower limit for brooder temperatures is 60°F (15.5°C), beyond which chicks may suffer from cold stress. Conversely, excessively high temperatures above 100°F (37.8°C) can cause heat stress and be detrimental to their health.
Understanding these temperature requirements will help you create a suitable environment for your chicks to grow and thrive. By monitoring the temperature and making adjustments accordingly, you’ll ensure they stay healthy and develop properly.
Ideal Temperature Ranges for Different Ages of Chicks
When it comes to raising healthy and thriving chicks, maintaining the right room temperature is crucial. The ideal temperature range for chicks varies depending on their age, and understanding these specific needs will help you create a perfect brooding environment.
For the first 18 hours after hatching, chicks need a warm and humid space to dry off and absorb essential oils from their down feathers. A temperature range of 90-95°F (32-35°C) is recommended during this critical period, with a humidity level around 50-60%. As they grow and develop, the temperature needs to be gradually reduced.
By the time chicks reach one week old, the ideal temperature drops to 85-90°F (29-32°C). At two weeks, it’s 80-85°F (27-29°C), and by four weeks, you can safely reduce the temperature to a comfortable range of 70-75°F (21-24°C). Between five and six weeks, the chicks are almost fully feathered, so you can gradually lower the temperature further to 65-70°F (18-21°C). Finally, at eight weeks, the temperature should be around 60-65°F (16-18°C), allowing the chickens to acclimate to their new surroundings before transitioning to a coop.
Factors Affecting Room Temperature in Chicken Brooders
When it comes to maintaining a healthy and safe environment for your chicks, understanding the factors that affect room temperature is crucial. Proper temperature regulation can make all the difference in their growth and development.
Insulation and Ventilation: Balancing Heat Retention and Air Circulation
Maintaining an optimal room temperature for chicken brooders is crucial for their health and growth. Insulation and ventilation play a vital role in this process. Proper insulation helps retain heat within the brooder, reducing heat loss through walls, floors, and ceilings. On the other hand, adequate ventilation ensures a continuous exchange of fresh air with stale air, preventing ammonia buildup from droppings.
For chicken brooders, consider using materials like straw or shredded newspaper for bedding, which provide good insulation without hindering airflow. Insulated panels or foam boards can be installed on walls and ceilings to minimize heat loss. Ensure adequate ventilation by installing windows or vents that allow for air exchange. A minimum of 1-2 square feet of ventilation area is recommended per 100 square inches of floor space.
Regular cleaning of the brooder, including droppings removal, is essential to maintain optimal conditions. Monitor temperature and humidity levels regularly, adjusting insulation and ventilation as needed to prevent extreme fluctuations.
Location and Orientation: Choosing the Perfect Spot for Your Brooder
When choosing the location and orientation for your chicken brooder, it’s essential to consider its impact on room temperature. A poorly situated brooder can be susceptible to external temperature fluctuations, making it challenging to maintain a stable environment for your chicks.
To minimize these effects, position your brooder away from windows, exterior doors, and walls that receive direct sunlight or are exposed to the elements. These areas tend to experience significant temperature variations throughout the day, which can impact your chicks’ comfort and health.
Additionally, consider the direction of your brooder’s entrance. A north-facing orientation is ideal, as it receives gentle, indirect sunlight during the winter months but remains cooler in the summer. Avoid south-facing orientations, as they can overheat your chicks during the warmer seasons.
When possible, place your brooder near a reliable heat source, such as a basement or a utility room. This can help you regulate the temperature more effectively and reduce your reliance on heating equipment.
Measuring and Monitoring Room Temperature in Chicken Brooders
To ensure a healthy flock, it’s crucial to accurately measure and monitor room temperature in your chicken brooder. This involves using various tools to track temperature fluctuations throughout the day.
Thermometer Types and Placement: Ensuring Accurate Readings
When it comes to accurately measuring room temperature in chicken brooders, choosing the right thermometer and placing it correctly are crucial steps. There are two primary types of thermometers used for this purpose: digital and analog.
Digital thermometers offer high accuracy and precision, often displaying readings within ±0.1°C or 0.2°F. They usually come with additional features like data logging and alarm settings, making them ideal for monitoring temperature fluctuations over time. Analog thermometers, on the other hand, use a dial or needle to indicate temperature, requiring more interpretation but offering a simpler design.
Regardless of the type, it’s essential to place the thermometer in a location that ensures accurate readings. This typically involves positioning it at least 3 feet away from any heat source and at a height between 2-4 feet above the floor. Avoid placing thermometers near drafty areas or where they might be exposed to direct sunlight. By choosing the right thermometer type and placement, you’ll ensure reliable temperature data that helps maintain an optimal environment for your chicks.
Creating a Temperature-Recording Schedule: Tracking Progress and Adjustments
When it comes to maintaining optimal room temperature in chicken brooders, tracking progress and making adjustments as needed is crucial. A well-planned temperature-recording schedule will help you stay on top of this critical aspect of chicken care.
To start, decide how often to check the temperature readings. Some experts recommend checking temperatures every 30 minutes during peak hours (usually between 10am-4pm), while others suggest doing it at fixed times such as 7am, 12pm, and 5pm. Choose a schedule that works for you and stick to it.
In addition to frequency, also consider what data you’ll be collecting. A temperature-recording sheet or spreadsheet can help you track trends and identify patterns in the temperatures. This will enable you to make informed decisions about adjustments.
For example, if you notice a steady drop in temperature during the morning hours, you may need to adjust your heating source or increase the wattage of your heat lamps. Conversely, if temperatures are consistently running high during the afternoon, it may be time to reduce the number of heat sources or use them less frequently.
Remember to take note of any changes made and observe their impact on the chicken’s behavior and overall health. This will help you refine your temperature-recording schedule over time and ensure that your chickens have a comfortable environment to grow and thrive.
Managing Room Temperature in Chicken Brooders
When it comes to keeping your chicks healthy and thriving, managing room temperature is one of the most crucial factors to get right. Let’s explore some essential tips for maintaining optimal temperatures in your chicken brooder.
Strategies for Maintaining Optimal Temperatures During Power Outages
When the power goes out, maintaining a stable room temperature can be a challenge for chicken brooder owners. However, having a plan in place can help ensure the health and well-being of the chicks. One effective strategy is to invest in a backup generator that can provide electricity to essential equipment like heat lamps or space heaters.
In addition to backup generators, alternative heating sources such as kerosene heaters, propane heaters, or infrared heat lamps can also be used during power outages. These options may require more setup and maintenance but can be a reliable solution for maintaining optimal temperatures in the brooder room.
It’s essential to follow safety guidelines when using alternative heating sources, such as ensuring proper ventilation and keeping flammable materials away from the heat source. Always prioritize caution when dealing with open flames or combustible fuels. Having a backup plan in place will help you stay ahead of potential temperature fluctuations during power outages, giving your chicks the care they need to thrive.
Using Fans and Ventilation Systems to Regulate Room Temperature
When it comes to managing room temperature in chicken brooders, fans and ventilation systems play a crucial role. Not only do they help regulate the air quality but also contribute significantly to maintaining a comfortable environment for the chicks.
Firstly, ensure that you have an adequate ventilation system in place to provide fresh air exchange. This is especially important during hot weather when high temperatures can quickly build up inside the brooder. Aim for at least 1-2 square feet of ventilation area per chick to prevent overheating and moisture buildup.
When choosing fans, consider their size and CFM (cubic feet per minute) rating to ensure they are capable of moving sufficient air. A general rule of thumb is to provide one fan for every 10-15 chicks. Place the fan in a way that it blows directly over the chicks’ area to promote airflow.
In colder climates, use fans and heaters strategically to maintain a stable temperature range. Position fans so they blow away from the heat source, creating an “air curtain” effect to prevent cold air from entering. Regularly inspect your ventilation system to ensure all components are functioning correctly, adjusting settings as needed to maintain optimal room temperature for your chicks’ well-being.
Best Practices for Maintaining a Healthy Environment in Chicken Brooders
To keep your chickens thriving, it’s essential to establish a routine of regular cleaning and monitoring their environment to prevent health issues. This involves tasks like changing bedding and ensuring proper ventilation.
Humidity Control: The Forgotten Aspect of Brooder Care
Maintaining optimal humidity levels is often overlooked but crucial for chick health. Inadequate humidity control can lead to respiratory problems, such as tracheal irritation and pulmonary congestion, which are common issues in brooders.
For every degree of temperature increase above 70°F (21°C), the relative humidity should decrease by 5-10%. This means that in a hot environment, humidity levels must be closely monitored to prevent moisture buildup. A good starting point for humidity is between 40-60%.
To achieve optimal humidity, you can use a humidifier or misting system. However, over-humidification is just as problematic as under-humidification. Monitor your chicks’ behavior and adjust the humidity accordingly.
Some signs of inadequate humidity include: labored breathing, lethargy, and dry beaks. To prevent these issues, make sure to check the humidity levels at least twice a day. Keep in mind that humidity levels can fluctuate due to various factors such as temperature changes or air circulation.
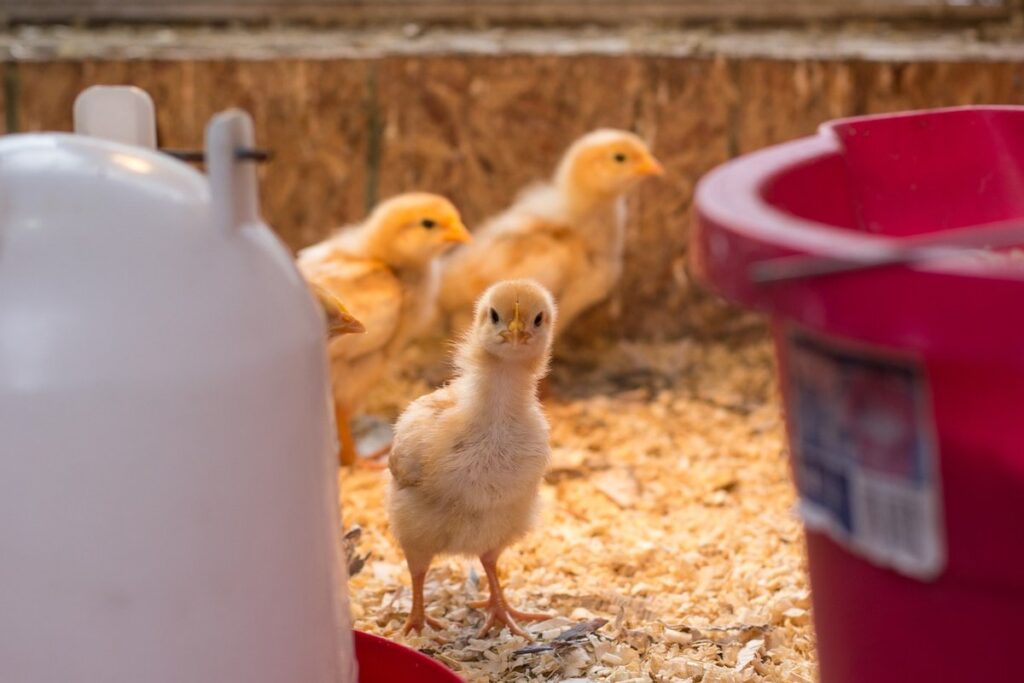
Keeping Your Brooder Clean and Sanitized: A Key to Preventing Disease
Keeping a clean and sanitized brooder is crucial to preventing disease outbreaks among your chicks. It’s essential to establish a regular cleaning routine that includes daily removal of soiled bedding, feeding, and water dishes. Use this opportunity to inspect the area for any signs of illness or stress in your chicks.
To sanitize the brooder effectively, mix 1 tablespoon of unscented bleach with 1 gallon of water. Dip a clean cloth into the solution, wring it out thoroughly, and wipe down all surfaces, including walls, floors, feeding and watering equipment, and any other areas that may have come into contact with manure or bodily fluids. Be sure to rinse your brooder thoroughly after sanitizing, as bleach residue can be toxic to chicks.
It’s also vital to change the bedding material regularly, ideally every 7-10 days, depending on the breed and age of your chicks. Use a dust-free, absorbent material like pine shavings or recycled paper products to minimize respiratory problems.
Troubleshooting Common Temperature-Related Issues in Chicken Brooders
We’ve all been there – a fussy chick, an inconsistent thermostat, and a room temperature that just won’t cooperate. Let’s tackle these common problems together.
Identifying and Addressing Temperature Fluctuations
Temperature fluctuations can be a significant concern for chicken brooders. To identify these issues, monitor the temperature using a thermometer placed in multiple locations within the brooder room. Take note of sudden changes, which may indicate inadequate ventilation or over-insulation.
A temperature swing of more than 5 degrees Fahrenheit between day and night temperatures is cause for concern. This can lead to stress, decreased immunity, and increased mortality rates among your flock.
To address these issues, reassess the brooder room’s insulation levels. Ensure it provides adequate protection without trapping heat inside. Check for gaps or openings around windows, doors, and vents that could be contributing to temperature fluctuations.
Consider relocating the brooder to a more stable environment with better climate control options, such as an enclosed porch or a well-insulated garage. Adjusting ventilation rates can also help regulate temperatures within the brooder room. By maintaining a consistent temperature range between 90-95°F (32-35°C) and reducing variations in humidity levels, you’ll be able to mitigate temperature-related stressors and promote healthier development among your young chickens.
Minimizing Stress on Chicks During Temperature Changes
When introducing temperature changes to your chicken brooder, it’s essential to prioritize the comfort and stress levels of your chicks. Sudden shifts can be overwhelming for them, affecting their growth, development, and overall well-being.
To minimize stress during temperature transitions, allow a comfortable period for acclimation. This means gradually adjusting the temperature over a set timeframe rather than making drastic changes overnight. For example, if you’re increasing the temperature by 5°F (3°C), do it in increments of 1-2°F (0.5-1°C) every few hours. Monitor your chicks’ behavior and adjust the rate of change as needed.
A recommended acclimation period is 24 to 48 hours for each 5°F (3°C) temperature increase or decrease. During this time, keep a close eye on your chicks’ water intake and ensure they have access to fresh food at all times. Provide a calm environment by maintaining consistent humidity levels and reducing stress triggers like loud noises.
By adopting a gradual approach to temperature changes, you can help your chicks adapt more smoothly, promoting their overall health and growth. Remember, it’s always better to err on the side of caution when introducing new temperatures to ensure your young flock remains comfortable and thriving.
Conclusion: Achieving Optimal Room Temperature in Chicken Brooders
Now that you’ve learned how to set up and maintain your chicken brooder’s ideal temperature, it’s time to put these principles into action. Here’s a summary of key takeaways to ensure optimal room conditions for your chicks’ growth.
Recap of Key Takeaways and Recommendations
To achieve optimal room temperatures in your chicken brooders, it’s essential to remember the key points discussed throughout this comprehensive guide. Let’s recap and provide actionable recommendations for you to take away.
Firstly, we established that maintaining a stable temperature is crucial for the health and well-being of your chicks. The ideal temperature range for chicken brooders is between 90°F (32°C) and 95°F (35°C), with some breed-specific variations. It’s also vital to consider the size of your brooder, as larger areas tend to have more stable temperatures.
Another critical aspect is the importance of monitoring temperature fluctuations throughout the day. You can use a thermometer specifically designed for poultry to track temperature changes accurately. Make sure to place it in a spot that’s representative of the overall temperature within the brooder.
We also discussed various methods for maintaining optimal temperatures, such as using heat lamps or ceramic heat emitters. It’s essential to remember that these devices should be used in conjunction with proper ventilation to prevent overheating and ensure air quality.
When it comes to creating a comfortable environment for your chicks, consider implementing some of the following recommendations:
* Provide adequate bedding materials, like straw or wood shavings, to absorb moisture and maintain a stable temperature.
* Ensure there’s sufficient space for your chicks to move around comfortably, with at least 1 square foot of space per chick.
* Monitor temperature levels closely during the first few weeks after hatching, as this is a critical period for growth and development.
By applying these takeaways and recommendations, you’ll be well on your way to creating an optimal environment for your chicken brooder. Remember to stay vigilant, monitor temperatures regularly, and adjust your approach as needed to ensure the health and happiness of your chicks.
Frequently Asked Questions
Can I use a thermometer with a temperature range of 32-120°F (0-49°C) for monitoring the brooder room temperature?
Yes, this type of thermometer is suitable for monitoring the brooder room temperature, but make sure to follow the manufacturer’s instructions and ensure it is calibrated correctly. Keep in mind that some thermometers may not provide accurate readings in extreme temperatures.
What are some common signs of temperature-related issues in my chicks, and how can I address them?
Common signs include lethargy, labored breathing, and huddling together for warmth. To address these issues, ensure the brooder is well-ventilated, maintain a consistent temperature range, and provide adequate shelter from drafts.
How often should I clean and disinfect my brooder to prevent disease transmission among my chicks?
Regular cleaning (daily or every other day) and disinfection of the brooder are essential. Focus on high-touch areas like feeding troughs, waterers, and nesting boxes. Use a 10% bleach solution for effective disinfection.
Can I use a humidifier in conjunction with insulation to regulate the brooder’s temperature and humidity levels?
Yes, using a humidifier can help maintain optimal humidity levels (around 40-60%) while preventing overheating or overcooling. However, ensure proper ventilation is maintained to prevent moisture buildup and potential health risks for your chicks.
How do I determine if my chicks are experiencing stress due to temperature fluctuations, and what steps can I take to mitigate it?
Look for behavioral changes like excessive pecking, vocalization, or aggression. To mitigate stress, maintain a consistent temperature range, provide adequate shelter, and ensure proper ventilation to prevent drafts.