
Are you tired of dealing with piles of animal waste on your homestead or small-scale farm? Do you want to reduce your reliance on commercial fertilizers and create a more sustainable gardening practice? Deep litter composting is the answer. This innovative method allows you to turn animal manure into a valuable resource for improving soil quality, reducing odors and pests, and minimizing waste. By understanding how to set up and manage a deep litter compost bin, you’ll be able to unlock its full potential. In this article, we’ll delve into the world of deep litter composting, exploring its benefits, requirements, and best practices for optimal resource efficiency. We’ll cover everything from initial setup to ongoing maintenance, so you can start experiencing the advantages of deep litter composting for yourself.
Understanding the Basics of Deep Litter Composting
Let’s start by covering the fundamentals of deep litter composting, a simple and effective way to turn waste into nutrient-rich soil. This process is perfect for small-scale farmers and backyard gardeners.
What is Deep Litter Composting?
Deep litter composting is an eco-friendly and cost-effective method of managing animal waste while creating nutrient-rich compost for gardening. At its core, deep litter composting involves maintaining a thick layer of dry bedding material, such as wood shavings or straw, within the enclosure of animals like chickens or rabbits.
The benefits of this method are numerous: it reduces odors and mess, minimizes fly populations, and decreases the need for frequent cleaning and waste removal. Over time, the organic matter in the litter breaks down into a rich compost that can be safely applied to plants as fertilizer.
Historically, deep litter composting dates back to ancient times when farmers would add manure to their fields to enhance soil fertility. This natural approach was more widespread until the advent of synthetic fertilizers and modern composting methods.
If you’re new to deep litter composting, start by introducing a thin layer of bedding material into your animal enclosure, gradually increasing its depth over time as the material breaks down.
Benefits of Deep Litter Composting for Small-Scale Farmers and Homesteaders
Deep litter composting can be a game-changer for small-scale farmers and homesteaders, offering numerous benefits that can transform their operations. One of the most significant advantages is resource efficiency – by using existing resources such as manure and bedding materials, you can significantly reduce the need for external inputs like fertilizers and soil amendments.
For example, if you’re keeping animals on your property, you can use their droppings as a natural fertilizer, reducing waste disposal costs and minimizing environmental impact. Similarly, bedding materials like straw or hay can be reused multiple times, further cutting down on resource usage.
Improved soil quality is another key benefit of deep litter composting. As the compost breaks down, it adds organic matter to your soil, improving its structure, fertility, and overall health. This leads to healthier plants, increased crop yields, and a more resilient ecosystem.
To get started with deep litter composting on your small-scale farm or homestead, begin by collecting bedding materials and animal droppings in a designated area. Add carbon-rich materials like straw or shredded newspaper to balance out the nitrogen levels, then turn and aerate the pile regularly to facilitate decomposition. With time and patience, you’ll be producing nutrient-rich compost that will elevate your soil quality and boost your farm’s productivity.
Setting Up Your Deep Litter Composting System
To set up a deep litter composting system, you’ll need to start by preparing your enclosure and gathering all the necessary materials, including bedding materials. Let’s go over these crucial steps together.
Choosing the Right Location for Your Deep Litter Compost Bin
When it comes to setting up your deep litter composting system, choosing the right location for your bin is crucial. You’ll want to select a spot that provides optimal conditions for decomposition, while also being easily accessible and convenient.
Consider placing your bin in an area with good sunlight, as this will help speed up the composting process. However, be mindful of direct sunlight, which can cause the litter to dry out quickly. Aim for partial shade or dappled light instead.
Drainage is another essential factor to consider. You’ll want to ensure that your bin is placed on a surface that allows water to drain freely, such as a concrete slab or a gravel base. This will prevent moisture from accumulating and causing odors.
Accessibility is also key when it comes to location. Place your bin in an area where you can easily add materials, turn the litter, and collect finished compost. Avoid tight spaces or areas with poor ventilation, which can hinder airflow and lead to unpleasant smells.
In terms of specific locations, consider placing your bin near a kitchen or back door for easy access. You may also want to choose a spot that is close to a water source, such as a hose or a watering can.
Building or Purchasing a Deep Litter Compost Bin
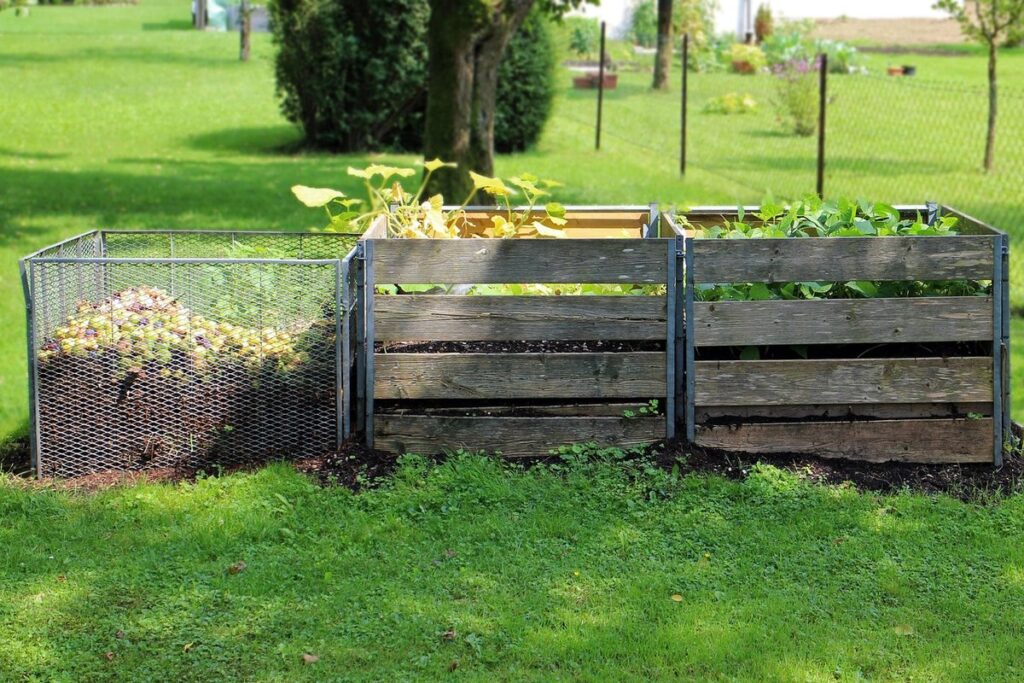
When it comes to building or purchasing a deep litter compost bin, you have several options. If you’re feeling crafty, you can try building one yourself using materials like reclaimed wood, plastic bins, or even repurposed pallets. A simple design involves creating a wooden frame with wire mesh sides and a lid, while a more complex setup might include features like automatic door openers or separate compartments for different types of waste.
For those who prefer not to DIY, there are many pre-made deep litter compost bin options available on the market. Consider factors like size, material, and price when making your decision. Some popular choices include wooden bins with built-in aerators and metal bins with secure latches. When selecting a store-bought option, look for features that promote airflow, moisture control, and pest management.
Regardless of which path you choose, ensure your compost bin is well-ventilated to prevent anaerobic conditions. A good rule of thumb is to leave at least 6 inches of space between the top of the waste and the lid to allow for adequate oxygen circulation.
Materials and Supplies Needed for Deep Litter Composting
To get started with deep litter composting, you’ll need to gather a few essential materials and supplies that will help you set up your system successfully. Below are some of the key items on this list.
Types of Bedding Materials Used in Deep Litter Composting
When it comes to deep litter composting, the type of bedding material used can make all the difference. Commonly used materials include straw, wood shavings, and shredded newspaper, each with its own set of advantages and disadvantages.
Straw is a popular choice for deep litter composting due to its abundance and affordability. It’s also relatively easy to find, making it a convenient option for many gardeners. However, straw can be prone to mold growth if not managed properly, which can lead to unpleasant odors and pests. To minimize this risk, it’s essential to ensure the straw is dry before adding it to the compost pile.
Wood shavings are another popular bedding material, often used in combination with other materials like straw or shredded newspaper. They’re relatively inexpensive and help to maintain airflow within the compost pile. However, wood shavings can be heavy on the carbon-to-nitrogen ratio, which may require adjustments to the composting process.
Shredded newspaper is a great option for those looking for an eco-friendly bedding material. It’s high in carbon content and adds structure to the compost pile, making it easier to turn and aerate. Newspaper also has natural antimicrobial properties that can help suppress pests and odor-causing bacteria. When using shredded newspaper, be sure to mix it with other materials to avoid creating too much carbon buildup.
Adding Organic Matter to Your Deep Litter Compost Bin
When it comes to deep litter composting, adding organic matter is a crucial step that helps create a thriving ecosystem. Organic matter like food waste, manure, and yard trimmings provides essential nutrients, improves soil structure, and supports the growth of beneficial microorganisms.
Aim to add 2-4% of organic matter to your compost bin daily. For example, if you have a 100-gallon bin, aim for 2-4 gallons of organic matter each day. You can mix different types of organic matter together, such as food waste and yard trimmings, to create a balanced blend.
Some examples of organic matter to add include:
• Fresh or dried grass clippings
• Vegetable and fruit peels
• Coffee grounds and tea bags
• Eggshells and shredded paper
• Manure from herbivores like horses or cows
When adding manure, be sure to mix it well with other materials to prevent any potential pathogens from dominating the ecosystem. Also, avoid adding cat or dog waste, as their manure can contain parasites that may harm humans.
Remember to balance your additions with regular carbon-rich materials like shredded newspaper or cardboard to maintain a healthy composting ratio.
Managing Moisture and Temperature in Your Deep Litter Composting System
To ensure a thriving composting system, it’s essential to maintain the right balance of moisture and temperature. Let’s dive into how to achieve this delicate balance.
Monitoring Moisture Levels in Your Compost Bin
Monitoring moisture levels in your compost bin is crucial to maintaining a healthy and thriving deep litter composting system. If it gets too dry, the carbon-rich materials will not break down properly, while excess water can lead to anaerobic conditions that produce unpleasant odors and harm microorganisms.
To prevent over-drying or waterlogging, start by checking the moisture levels in your bin regularly. You can do this by inserting a stick or probe into the pile; if it comes out dry, it’s time for a drink. Water the litter to maintain a consistency like a damp sponge – not too wet and not too dry.
Aim to keep the moisture level between 50-60% to promote optimal decomposition. If you notice water seeping from the bottom of the bin or an unpleasant odor, you may be dealing with over-watering. In this case, add more dry materials to absorb excess liquid and aerate the pile.
To prevent both under-drying and overwatering, it’s essential to balance the mix of ‘green’ (nitrogen-rich) and ‘brown’ (carbon-rich) materials in your bin.
Understanding the Importance of Temperature in Deep Litter Composting
Temperature plays a crucial role in deep litter composting, as it directly affects the decomposition rate and quality of the final product. When organic materials break down, heat is generated as microorganisms such as bacteria and fungi convert them into carbon dioxide, water vapor, and energy. This process can reach temperatures of up to 160°F (71°C) in ideal conditions.
However, if the temperature becomes too high or fluctuates excessively, it can lead to unpleasant odors, reduced microbial activity, and even fire hazards. To monitor temperature effectively, consider using a compost thermometer, which provides precise readings. Place the thermometer in the deepest part of the litter pile, avoiding direct sunlight and extreme moisture levels.
Maintaining a balanced decomposition rate requires observing temperature fluctuations and adjusting the system accordingly. For example, if temperatures exceed 140°F (60°C), it may be necessary to aerate the pile or add more bulking agents like straw or shredded newspaper. Conversely, if temperatures drop below 100°F (38°C), it might be beneficial to add warm materials like fresh manure or coffee grounds. By understanding and managing temperature fluctuations, you can optimize your deep litter composting system for efficient decomposition and high-quality output.
Harvesting Your Finished Compost
Now that you’ve built up a rich layer of compost, it’s time to harvest your finished product and put it to good use in your garden. This next step is just as important as setting up your deep litter system.
Knowing When Your Compost is Ready
When you’re done turning and aerating your deep litter compost pile, it’s time to check if it’s fully broken down. Finished compost should be a rich, earthy aroma that’s a far cry from the ammonia scent of fresh litter. To determine if your compost is ready, gently dig into the pile with a pitchfork or shovel.
Look for these signs: the materials have broken down into a uniform texture, without any recognizable chunks of litter or manure. The color should be dark brown to almost black, depending on the original materials. Check the moisture level – finished compost should be damp, but not soggy or dry. If it’s too wet, it will smell bad and attract pests; if it’s too dry, it won’t retain heat well.
Give your compost a squeeze: if it holds its shape, but crumbles easily when pressed, it’s ready to use as a nutrient-rich soil amendment for your garden beds. This texture is similar to that of potting soil. If it still feels coarse or lumpy, it needs more time in the composting process.
Using Your Deep Litter Compost in the Garden or as Mulch
Now that you have a batch of finished deep litter compost, it’s time to put it to good use! One of the best things about deep litter composting is that it can be used directly in your garden, providing a natural and nutrient-rich amendment for your soil. By incorporating your finished compost into your gardening routine, you’ll be able to improve the overall structure and fertility of your soil.
This will have a profound impact on plant growth, as healthy soil supports healthy roots. When plants are well-established in fertile soil, they’re better equipped to absorb nutrients and water, leading to more vibrant blooms and bountiful harvests. For example, adding 2-3 inches of compost to the topsoil can increase yields by up to 20% in a matter of weeks.
When using your deep litter compost as mulch, simply spread it evenly around plants, keeping a thin layer (about an inch or two) away from stems and leaves. This will help retain moisture, suppress weeds, and regulate soil temperature – all while providing essential nutrients for continued growth. Regularly replenish the mulch as needed to maintain its effectiveness.
Frequently Asked Questions
Can I start deep litter composting with a small flock or just one animal?
Start with a manageable number of animals, even if it’s just one or two chickens. This will help you gain experience and ensure the system is functioning as expected before scaling up. Consider starting with a 2×4 foot bin for smaller groups to maintain optimal moisture levels.
How often should I add new bedding material to my deep litter composting system?
Add new bedding material as needed, usually every 1-3 months depending on your animal’s production rate and desired depth of the litter bed. Monitor the moisture levels and temperature regularly to determine when it’s time for a refresh. This will help maintain a healthy balance between carbon and nitrogen-rich materials.
Can I mix different types of bedding materials together in my deep litter composting system?
Yes, mixing different bedding materials can create a diverse environment beneficial for decomposition and pest control. For example, you can combine wood shavings with straw or hay to achieve optimal carbon-to-nitrogen ratios. However, avoid using pine or cedar shavings as they may contain oils that inhibit microbial activity.
How do I manage pests and odors in my deep litter composting system?
Regular maintenance is key to minimizing pests and odors. Remove soiled bedding material promptly, ensure adequate ventilation, and monitor temperature fluctuations. If you notice pest issues or strong odors, reassess your carbon-to-nitrogen balance and make adjustments as needed.
Can I use deep litter compost in my indoor garden or as mulch around plants?
Yes, finished deep litter compost is a nutrient-rich resource perfect for indoor gardens or as mulch around plants. However, ensure it has reached optimal temperature (130-140°F) to kill pathogens and weed seeds. Mix the compost with other soil amendments to achieve the desired nutrient profile for your specific garden needs.