
If you’re an avid duck breeder or just starting out on your backyard poultry journey, you know that successfully hatching duck eggs is a thrilling experience. But have you ever stopped to think about the fascinating process that occurs within those tiny eggs before they crack open? From fertilization to hatch, duck egg development is a complex and intriguing journey that requires careful attention to detail.
In this expert guide, we’ll delve into the intricacies of duck egg development, covering everything from the critical first few days after laying to the crucial last stages leading up to hatch. We’ll also share essential tips for ensuring a healthy brood, including how to identify potential issues and what to expect on hatch day itself. Whether you’re an experienced breeder or just starting out, our expert advice will help you successfully raise your next batch of ducklings.
Understanding Duck Egg Development
Duck eggs undergo a remarkable journey from fertilization to hatching, and understanding their development is key to appreciating the miracle of duck egg hatch. Let’s dive into the intricacies of this fascinating process.
Stage 1: Fertilization and Incubation
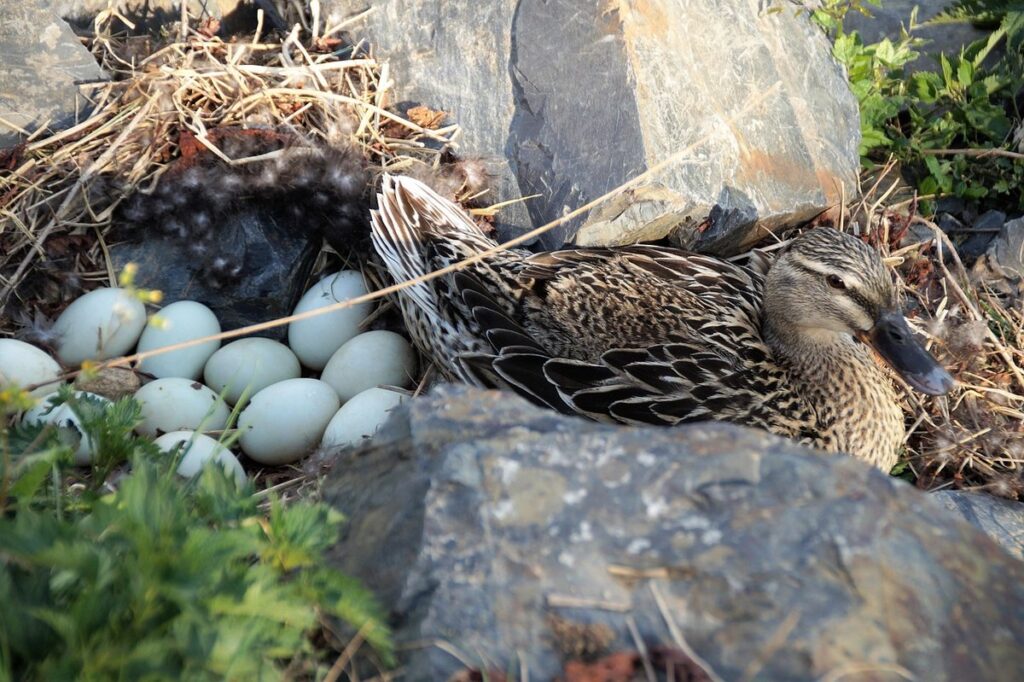
Fertilization is the first crucial step in duck egg development. This process typically occurs when a male duck mates with a female duck. The sperm from the male fertilizes the egg yolk in the oviduct of the female, resulting in a zygote. However, for artificial incubation, fertile eggs can be obtained from hatcheries or breeders.
Once the eggs are collected, they should be placed in an incubator to simulate the conditions found inside a broody hen‘s nest. The ideal temperature for incubating duck eggs is between 99°F and 100°F (37°C – 38°C). It’s essential to maintain a consistent temperature throughout the incubation period.
The incubation period for duck eggs typically lasts around 28 days, although this can vary slightly depending on factors such as breed and environmental conditions. During this time, the embryo will undergo rapid growth and development. Proper ventilation and humidity levels in the incubator are crucial to support healthy embryo growth.
Stage 2: Embryonic Growth and Pipping
During Stage 2 of duck egg development, also known as embryonic growth and pipping, the embryo undergoes significant transformations to prepare for hatching. This critical period is marked by rapid growth and differentiation of tissues, organs, and systems. The embryo’s beak starts to form and gradually pushes against the shell, creating pressure that will eventually lead to pipping.
As you approach hatch, look out for signs such as increased egg turning, louder peeping sounds from inside the egg, and a visible crack or two on the surface of the egg. This is your cue to provide a safe and stable environment for the duckling’s emergence. Ensure the incubator temperature remains consistent between 99-100°F (37-38°C), and maintain adequate humidity levels to prevent desiccation.
Keep in mind that pipping can occur anywhere from 24 to 48 hours before hatch, depending on factors like breed, temperature, and egg size. Monitor your eggs closely during this stage, as the duckling’s beak may become stuck in the shell if it encounters any obstacles or weak spots.
Factors Affecting Duck Egg Hatch Success Rates
When it comes to successfully hatching duck eggs, several key factors come into play that can either boost or hinder your chances of success. Let’s explore these crucial variables together.
Genetics and Breed Selection
When it comes to duck egg hatch success rates, genetics and breed selection play a significant role. The fertility rate of eggs from certain breeds can be significantly higher than others. For example, Muscovy ducks have been known to produce fertile eggs at a rate of around 95%, whereas Khaki Campbells tend to average around 70%. This difference in fertility rates can greatly impact the overall hatch success.
Another critical factor is embryo survival, which can also be influenced by genetics and breed selection. Some breeds are naturally more resilient than others when it comes to surviving the incubation process. For instance, Embden geese have been observed to have a higher embryo survival rate due to their robust genetic makeup.
Additionally, genetics can impact sex ratios in duck hatchlings. While some breeds tend to produce more males, others favor females. Understanding the sex ratio of your breeding stock is essential for managing flock size and achieving balanced breeding goals.
To maximize hatch success, breeders should prioritize selecting high-quality breeding stock with desirable fertility rates, embryo survival traits, and sex ratios.
Health and Nutrition of Parent Ducks
When it comes to achieving high duck egg hatch success rates, the health and nutrition of parent ducks play a crucial role. The quality of their diet directly affects the fertility and overall health of the eggs they lay. A balanced diet rich in essential nutrients such as protein, calcium, and vitamins is vital for maintaining optimal reproductive health.
Providing parent ducks with access to clean water, shelter, and regular exercise can also boost their immune systems and overall well-being. For instance, a study showed that ducks fed a diet supplemented with omega-3 fatty acids had significantly higher fertility rates compared to those on a standard commercial feed. In fact, research suggests that a nutrient-rich diet can increase egg fertility by up to 20%.
To optimize parent duck health and nutrition, ensure they have access to a diverse range of fruits, vegetables, and whole grains. You can also consider adding supplements such as probiotics or calcium powder to their feed to support reproductive health. By doing so, you’ll be taking proactive steps towards boosting egg fertility and increasing the chances of successful hatchings.
Preparation for a Successful Hatch
To ensure a successful hatch, it’s essential that you’re prepared for the arrival of your ducklings. This section will cover the key steps to take before and during hatching time.
Choosing the Right Incubator
When it comes to hatching duck eggs, having the right incubator is crucial for successful breeding. There are several types of incubators available, each with its own unique features and benefits.
Automatic incubators are a popular choice among duck breeders due to their ease of use and high hatch rates. These machines can maintain precise temperature and humidity levels, ensuring optimal conditions for egg development. Some models even come equipped with monitoring systems that alert you to any issues, making it easy to keep an eye on your eggs.
Manual incubators, on the other hand, require more attention and care from the breeder. However, they can be a cost-effective option and allow for more control over temperature and humidity levels. When choosing between these options, consider factors such as space constraints, budget, and personal preference.
It’s also essential to consider the size of your incubator in relation to the number of eggs you plan to hatch at once. A good rule of thumb is to choose an incubator with a capacity that allows for about 10-15% more eggs than the actual number you intend to hatch. This will give you flexibility and room for any unexpected additions or substitutions.
When selecting an incubator, pay attention to features such as temperature control accuracy, humidity management, and air circulation. These factors can greatly impact the health and viability of your ducklings. Look for models with multiple temperature zones or adjustable vents to accommodate different egg sizes and needs.
Ultimately, choosing the right incubator is a matter of balancing budget, space requirements, and personal preferences with the specific needs of your duck eggs. By carefully considering these factors and doing some research, you can find an incubator that meets your needs and sets you up for successful hatching.
Setting Up an Ideal Brooder Environment
When setting up a brooder environment for ducklings, it’s crucial to prioritize their comfort and safety. The ideal temperature range for ducklings is between 90°F to 95°F (32°C to 35°C) during the first week of life. As they grow, you can gradually decrease the temperature by 5°F (3°C) each week until they reach around 60°F (15°C). Ensure that the heat source is placed in one corner and avoid direct heat on the ducklings.
Maintaining proper humidity levels is also vital. Aim for a relative humidity of 50-60% to prevent respiratory issues. You can achieve this by misting the brooder with water daily or using a humidifier. Adequate ventilation is equally important to remove ammonia from the droppings and carbon dioxide from the air.
Lighting plays a significant role in regulating the ducklings’ day-night cycles. Provide a photoperiod of 24 hours for the first week, gradually decreasing it by one hour each week until they reach 10 hours of light. Use a brooder light specifically designed for this purpose to prevent overheating.
Common Challenges and Solutions
As you near the end of your duck egg hatching journey, you may encounter some unexpected challenges. Let’s tackle these common issues together to ensure a successful hatch.
Incubation Issues: Temperature Fluctuations and Imbalance
Temperature fluctuations and imbalance in temperature or humidity levels are two of the most common incubation issues that can lead to failed hatches. A consistent temperature is crucial for duck embryos to develop properly. If the temperature fluctuates, it can cause the embryo to stop developing, leading to a failed hatch.
For example, if the incubator’s temperature drops by just 1-2°F (0.5-1°C), it can lead to an increase in mortality rates among ducklings. Similarly, humidity levels that are too high or too low can also affect hatching success.
To avoid these issues, make sure your incubator has a reliable temperature control system and a precise humidity gauge. Regularly check the incubator’s readings and adjust as necessary. It’s also essential to maintain a consistent temperature gradient within the incubator to ensure even heat distribution.
A general rule of thumb is to aim for a temperature range of 99-100°F (37-38°C) for most duck breeds, with slight variations depending on specific breed requirements. Monitor your incubator closely and take action quickly if you notice any temperature fluctuations or imbalance in humidity levels.
Signs of Embryonic Death and Failure to Hatch
Embryonic death and failure to hatch can be a distressing experience for duck keepers. Fortunately, many of these issues are preventable with proper care and attention. One common sign of embryonic death is the sudden drop in fertility rate without any apparent changes in breeding practices. This could be due to factors such as poor egg handling, unsanitary conditions, or inadequate incubation temperatures.
Another indication is the high number of eggs not breaking out from the membrane during candling. If this happens, it’s essential to check for cracks on the shell and ensure they are not caused by improper storage or shipping. Failure to hatch can also be due to incorrect egg handling techniques, such as excessive tapping or rolling, which can cause physical damage to the embryo.
To improve fertility rates and reduce embryonic death, keepers must pay close attention to incubation conditions, including temperature, humidity, and turning frequency. Regular candling is crucial in monitoring progress and detecting any potential issues early on.
The Day of the Hatch: What to Expect
So you’re finally here, and the big day has arrived – it’s time to witness the miracle of duck egg hatch. Here’s what you can expect during this critical moment in your ducklings’ journey.
Monitoring the Brooder for Signs of Imminent Hatch
As you wait for the miracle of duck egg hatch to unfold, it’s essential to monitor the brooder environment closely. This will help you identify signs that a duckling is about to emerge. Start by checking the eggs regularly, ideally every 30 minutes during the peak hatching period.
Look for subtle cues such as gentle rocking or rolling motions within the egg, increased movement, or slight pipping (cracking of the eggshell). These actions indicate that the chick is preparing to hatch. You may also notice a small hole being formed at the large end of the egg.
To make this process easier, use a flashlight to gently shine light through the eggs from different angles. This will help you spot any movement or cracks without disturbing the developing duckling. Remember, experience has shown that most ducklings pip within 2-4 hours before hatching. By being vigilant and attentive, you’ll be able to catch this momentous occasion unfolding right before your eyes.
Handling Newborn Ducklings
As you welcome the newborn ducklings into the world, it’s essential to provide them with proper care during their critical first hours. This is a delicate and crucial period for their survival.
Firstly, make sure they are dry. You can gently remove excess membrane from around their beaks and eyes. Use a soft cloth or paper towel to pat them dry, paying extra attention to the vents – the area just above and below their tail feathers. Be gentle as rough handling can cause damage or even death.
Ensure good ventilation in the incubator or brooder by providing adequate airflow. You can also place a fan nearby to circulate air and prevent overheating. Keep an eye on temperature, maintaining it around 90-95°F (32-35°C) for the first few hours.
Monitor their behavior closely – if they appear lethargic or struggle to breathe, consult with a veterinarian immediately. As you care for your newborn ducklings, remember that even small changes in environment can significantly impact their health and development.
Frequently Asked Questions
Can I use a homemade incubator for duck egg hatch, or do I need to invest in a commercial one?
Yes, you can use a homemade incubator for duck egg hatch, but make sure it’s well-ventilated and maintains a consistent temperature between 99°F and 100°F (37°C to 38°C) during the first 24 hours after laying. However, commercial incubators offer precise temperature control and humidity management, which can increase hatch rates.
How often should I turn duck eggs during incubation?
You’ll want to turn your duck eggs 3-4 times a day during the first week of incubation to prevent sticking to the eggshell and promote even development. After that, you can reduce turning to once or twice a day until hatching. Use an automatic egg turner if possible.
What are some common signs of embryonic death or failure to hatch?
Watch for no pip or no movement after 30 days, as well as dark spots or brown patches on the yolk sac. If you notice any of these signs, carefully candle the eggs and discard them to prevent spreading disease.
How can I optimize my brooder environment for a successful hatch?
Ensure proper ventilation by installing windows or fans in your brooding area. Keep the temperature between 90°F to 95°F (32°C to 35°C) during the first week after hatching, then gradually decrease it over time. Maintain humidity levels above 50% but below 60%.
What if I’m away from home and can’t monitor my incubator or brooder? Are there any remote monitoring options available?
Yes, you can use smartphone apps that connect to your incubator’s temperature sensors or install security cameras with live feeds to keep an eye on your ducklings remotely. These tools will help you stay informed and intervene if necessary.