
Are you getting ready to welcome some adorable ducklings into your family? Hatching ducklings can be a thrilling experience, but it requires careful planning and attention to detail. With so many variables to consider, it’s easy to feel overwhelmed. But don’t worry, we’ve got you covered! Our comprehensive duckling hatching guide will walk you through the essential steps of preparing a breeding environment, incubating your eggs, and providing the perfect conditions for healthy embryo development. From temperature control and humidity levels to post-hatch care, we’ll cover everything you need to know to give your new feathered friends a strong start in life. Whether you’re an experienced breeder or just starting out, this guide is packed with valuable insights to ensure your ducklings thrive.
Preparing the Breeding Environment
Before you can welcome new ducklings into the world, it’s essential to create a suitable breeding environment that meets their specific needs. This involves setting up a safe and comfortable space for incubation.
Providing Optimal Temperature Conditions
Maintaining a consistent temperature between 99°F to 100°F is crucial for successful hatching. A temperature fluctuation of even 1-2°F can significantly impact the incubation process, leading to reduced fertility rates and increased chick mortality.
To put this into perspective, consider that most commercial duck breeding operations aim for an optimal temperature range of 99.5°F ± 0.5°F (37.7°C ± 0.3°C) throughout the entire incubation period. This narrow window is critical because it influences embryonic development and energy consumption.
Temperature fluctuations can lead to a condition known as “stunting,” where developing embryos become weaker due to insufficient energy reserves. This, in turn, can cause problems with hatching and chick viability. To mitigate this risk, it’s essential to maintain a consistent temperature throughout the incubation period. Ensure that your incubator is equipped with a reliable temperature control system and that you monitor temperatures frequently to prevent any deviations from the optimal range. Regular checks will help you identify and address any issues promptly, ensuring the best possible outcome for your ducklings.
Maintaining Humidity Levels and Air Quality
Maintaining optimal humidity levels within the incubator is crucial for successful duckling hatching. It’s essential to keep the environment moist but not overly saturated, as this can lead to fungal and bacterial growth. Aim for a relative humidity (RH) range between 50% to 60%, which mimics natural conditions and encourages even egg development.
Air quality management is also vital during incubation. Poor air circulation can lead to the buildup of carbon dioxide and ammonia, causing respiratory issues in ducklings. To address this, incorporate ventilation systems or employ periodic egg turning to promote airflow. You can install a small fan or use a ventilation kit specifically designed for incubators. For example, some breeders swear by automated egg turners that not only rotate eggs but also circulate the air within the incubator. This ensures a fresh exchange of oxygen and helps maintain optimal temperatures.
Remember to monitor your incubator’s temperature, humidity, and airflow settings regularly to make any necessary adjustments. By maintaining these conditions, you’ll be well on your way to creating a healthy environment for your ducklings to hatch and thrive in.
Breeding and Fertilization
Now that you’ve learned how eggs develop inside a duck, let’s dive into the crucial steps of breeding and fertilization that bring your ducklings to life. We’ll cover everything from choosing healthy parents to ensuring successful mating.
Choosing the Right Duck Breed for Hatching
When it comes to choosing the right duck breed for hatching, several factors come into play. You’ll want to consider breeds known for their fertility rates, broodiness, and hatchability. Let’s take a look at some popular breeds that fit the bill.
Khaki Campbells are a popular choice among duck enthusiasts due to their exceptional fertility rate. These ducks are known to be prolific layers, producing an average of 300 eggs per year. Their broodiness is also quite high, with many females exhibiting strong maternal instincts.
Other breeds worth considering include Cayugas and Muscovy ducks. Cayugas are renowned for their high hatchability rates, while Muscovies have a reputation for being fiercely protective of their young.
When selecting a breed, it’s essential to research the specific characteristics and needs of each variety. This will help you determine which breed is best suited to your lifestyle and hatching goals. By choosing the right breed, you’ll be well on your way to successfully hatching healthy ducklings.
The Importance of Sperm Quality and Fertility
When it comes to breeding ducks, fertilization success is just as important as egg quality. Unfortunately, poor sperm quality can significantly reduce the chances of successful hatching. This is often overlooked by duck breeders, but it’s a crucial aspect of ensuring healthy ducklings.
Healthy sperm is essential for effective fertilization. Poor sperm quality can lead to low fertility rates, which can be frustrating and costly for breeders. Factors that affect sperm quality include age, nutrition, and health conditions. For example, if a drake (male duck) is under stress or has an underlying health issue, it can impact his sperm quality.
To ensure healthy sperm, it’s essential to provide your drakes with a balanced diet, regular exercise, and a stress-free environment. You should also monitor their overall health and take steps to prevent illnesses. Regularly collecting clean water and providing adequate nesting boxes for the hens can also help promote optimal breeding conditions.
In addition, breeders can consider genetic testing to identify any potential fertility issues in their breeding stock. This can help you make informed decisions about your breeding program and improve fertilization success rates.
Incubation Process
Now that you have the eggs safely settled into their incubator, it’s time to dive into the crucial step of incubation, where temperature and humidity are carefully managed. This delicate process can make all the difference in successful hatching.
Setting Up the Incubator
Properly setting up an incubator is crucial to ensure the health and well-being of your developing ducklings. Start by placing the eggs in a single layer on the turner trays, making sure they are not touching each other. A general rule of thumb is to space the eggs about 1-2 inches apart to prevent them from getting crushed or developing unevenly. This spacing also allows for easy access when checking and turning the eggs.
Maintain a consistent temperature within the incubator between 99°F to 100°F (37°C to 38°C) with a slight variation of ±0.5°F (±0.25°C). Ensure that the temperature is evenly distributed throughout the incubator, as hotspots can lead to uneven development and embryo death.
Regular turning of the eggs is vital for even development. Most incubators come equipped with automatic turners that rotate the eggs at set intervals. However, you should also manually check and turn the eggs every 24 hours or so to ensure they are developing properly. Make sure your hands are clean before handling the eggs to prevent contamination. A clean and sterile environment is essential for a healthy start in life, so regularly wash and sanitize any equipment and surfaces that come into contact with the eggs.
Monitoring Temperature, Humidity, and Turning
Maintaining a stable temperature, humidity level, and turning frequency are crucial aspects of incubation that significantly impact embryo development. Temperature consistency is particularly vital, as it influences the metabolic rate of the embryo. A temperature range between 99°F to 100.5°F (37.2°C to 38°C) is ideal for ducklings. This narrow temperature window allows them to develop properly.
Humidity control also plays a significant role in incubation. Proper humidity levels help prevent moisture loss and promote healthy growth. Aim for a relative humidity of 50% to 60%. Failure to maintain adequate humidity can lead to chicks with underdeveloped lungs or those that struggle to breathe.
Turning the eggs daily is essential to prevent the embryos from adhering to the eggshell. This process, known as “candling,” allows you to monitor embryo development and identify potential issues early on. Turning should be done gently to avoid damaging the developing ducklings.
Identifying Normal vs. Abnormal Development
As you carefully monitor your ducklings’ development, it’s essential to know how to distinguish normal growth from potential issues that may require attention and intervention. This will help you address any problems promptly.
Signs of Healthy Embryo Development
As you monitor the development of your duck eggs, it’s essential to understand the normal stages of embryonic growth. From Day 1 to hatch day, several critical milestones occur that indicate a healthy embryo.
On Day 1, you’ll notice the air sac forming at the large end of the egg. This is a crucial sign that the embryo is beginning to develop properly. As the days pass, the yolk sac will start to absorb nutrients from the surrounding albumen, providing essential fuel for the growing duckling.
Between Days 4-6, you’ll observe the formation of three distinct blood vessels: the heart, the liver, and the yolk sac vessels. This is a vital indicator that the embryo’s circulatory system is functioning correctly. By Day 8-10, the embryonic stages will begin to resemble miniature ducklings, complete with feathers, beak, and limbs.
If you notice these developments, it’s likely your duckling is on its way to a healthy start. However, keep in mind that every egg develops at its own pace. Trust your instincts and observe closely for any signs of abnormal development or potential issues.
Recognizing Common Incubation Issues and Problems
As you monitor your duck eggs during incubation, it’s not uncommon to encounter some issues that might raise concerns about the health and development of your ducklings. One common problem is stalled development, where the embryo appears to have stopped growing or has regressed in size. This can be caused by a variety of factors, including improper temperature control, inadequate humidity, or even an issue with the egg itself.
Weak chicks are another issue that may arise during hatching. This can be due to the chick not being fully developed before hatch or experiencing difficulties breaking out of the shell. Failed hatch rates, where eggs do not hatch at all, can also occur due to various reasons such as incorrect temperature settings, inadequate turning, or a dirty or cracked egg.
To diagnose these problems, it’s essential to closely monitor your incubator and egg conditions. Keep accurate records of temperature, humidity levels, and any issues that may arise during the incubation period. Regularly inspect the eggs for cracks or other external damage. By being aware of potential issues and taking prompt action, you can often resolve problems before they affect the health of your ducklings.
Hatching Time: Preparation and Care
As you wait for your ducklings to pip, preparation is key to ensuring a smooth hatching process. This section covers essential steps to prepare your incubator and provide optimal care for your developing ducklings.
Signs of Impending Hatch
As you wait for the big moment when your duckling finally emerges from its egg, it’s essential to recognize the visual signs that indicate hatching is imminent. One of the first indicators is pip hole formation. This occurs when the developing duckling starts to break through the shell with its beak, creating a small opening called a pip.
As the pip becomes larger and more defined, you may notice the eggshell weakening around it. The weakened area can sometimes appear as a slight indentation or a faint line running across the surface of the egg. This is a critical sign that hatching is progressing rapidly. Another significant visual cue is head protrusion, where the duckling’s beak begins to emerge through the pip.
At this stage, you may notice the egg starting to rock gently from side to side as the duckling makes its final preparations for exit. Keep in mind that these signs can vary depending on the individual embryo and hatching conditions, so it’s essential to remain vigilant and attentive during this critical period.
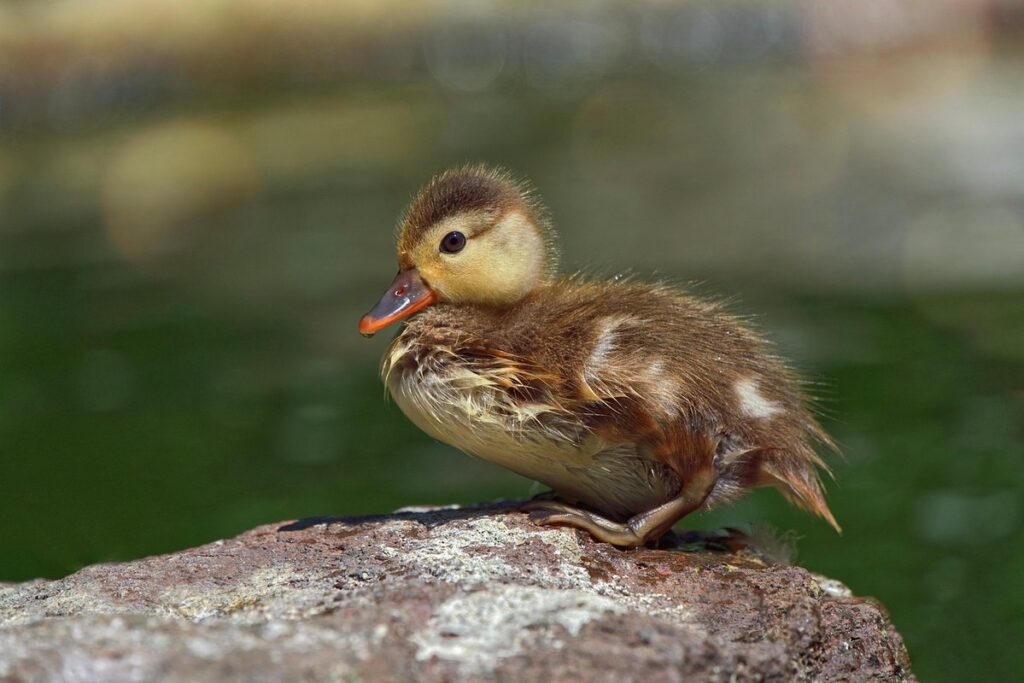
Post-Hatch Care: Brooding and Nutrition
Once you’ve successfully hatched those precious ducklings, it’s time to focus on their post-hatch care. This is a critical period in their development, and providing the right environment and nutrition will set them up for a healthy and thriving life.
A brooder is an essential tool for newly hatched ducklings. A well-designed brooder provides a safe, draft-free space that maintains a consistent temperature of around 90-95°F (32-35°C) during the first few weeks. This warmth helps regulate their metabolism, supports growth, and keeps them dry. You can purchase a commercial brooder or create one using a large plastic tub or box with ventilation holes.
A balanced diet is equally important for supporting growth and development. Ducklings require a starter feed that’s high in protein (20-25%) to meet their nutritional needs during the first few weeks. Mix this feed with water to create a shallow dish, making sure they always have access to fresh water. As they grow, you can gradually transition them to layer feed or a duck-specific pellet. It’s also essential to provide grit and oyster shells for calcium supplementation.
Conclusion
Now that you’ve successfully hatched and cared for your ducklings, it’s time to reflect on what you’ve learned and how you can apply it to future experiences. Let’s summarize the key takeaways from our comprehensive guide.
Recap of Key Incubation Factors
As we reach the conclusion of our comprehensive duckling hatching guide, let’s recap the key incubation factors that contribute to a successful and healthy start for your ducklings. Environmental control is crucial during this critical period. A stable temperature between 99°F and 100°F (37°C to 38°C) and high humidity levels around 50-60% help regulate embryo development.
During the first week, you’ll notice the embryos undergo rapid growth and development, with significant advancements in organ formation. By week two, they’ll start to develop feathers, beaks, and claws, while their lungs begin to function. Proper ventilation is essential during this stage to prevent CO2 buildup and maintain a healthy environment.
As we discussed earlier, it’s vital to monitor temperature fluctuations closely, as even slight deviations can impact the incubation process. By maintaining optimal conditions and monitoring your ducklings’ progress, you’ll be well on your way to raising healthy and thriving ducklings. Remember, attention to detail and precise control during this critical period are essential for a successful hatching outcome.
Tips for Future Improvement
As you’ve successfully hatched your ducklings, it’s essential to maintain their health and ensure they continue thriving. One key takeaway from this comprehensive guide is the importance of monitoring and adapting to the needs of your flock.
Regularly check for signs of illness or stress, such as labored breathing, lethargy, or changes in droppings. Early intervention can make all the difference in treating minor health issues before they become major problems. Keep a close eye on water quality, ensuring it remains clean and free from bacteria that can lead to disease.
Another vital aspect of maintaining a healthy flock is providing a nutrient-rich diet. Research local options for feeding ducklings, as their nutritional requirements differ significantly from adults. Supplementing with essential vitamins and minerals will help them grow strong and resilient. For example, adding calcium to their feed during critical growth stages can promote robust beak development.
By following these simple yet crucial steps, you’ll set your flock on the path to long-term health and happiness. Remember, a healthy start is just the beginning – with proper care and attention, your ducklings will thrive under your guidance.
Frequently Asked Questions
What if I’m new to duck breeding and want to start small?
Starting with a few birds can help you gain hands-on experience before expanding your flock. Consider beginning with a single pair of ducks or purchasing an incubator starter kit that includes everything you need for initial setup.
How do I maintain accurate temperature records during incubation?
Accurate temperature control is crucial, so it’s essential to keep detailed records using a thermometer and recording device. This will help you track fluctuations and make adjustments as needed to ensure optimal conditions for healthy embryo development.
Can I reuse an old incubator or start with a DIY setup?
While some people successfully reuse older models or attempt DIY setups, it’s often more practical to invest in a modern, well-designed incubator that comes equipped with built-in temperature control and humidity monitoring. These devices typically offer better results and are worth the initial investment.
How do I troubleshoot common issues like delayed hatching or stillborn chicks?
Delayed hatching can be caused by factors such as incorrect temperature settings, poor egg quality, or inadequate embryo development. Stillbirths often result from issues related to sperm quality, fertility problems, or inadequate incubation conditions. Regularly monitoring the flock and taking corrective action when needed will help minimize these risks.
Should I prioritize humidity levels over temperature control during incubation?
Humidity levels between 50-60% are ideal for duckling development. However, maintaining optimal temperature (99°F ± 0.5°F) is more critical than controlling humidity during the initial stages of incubation. Monitor both factors closely and adjust as necessary to ensure healthy embryo growth and successful hatching.