
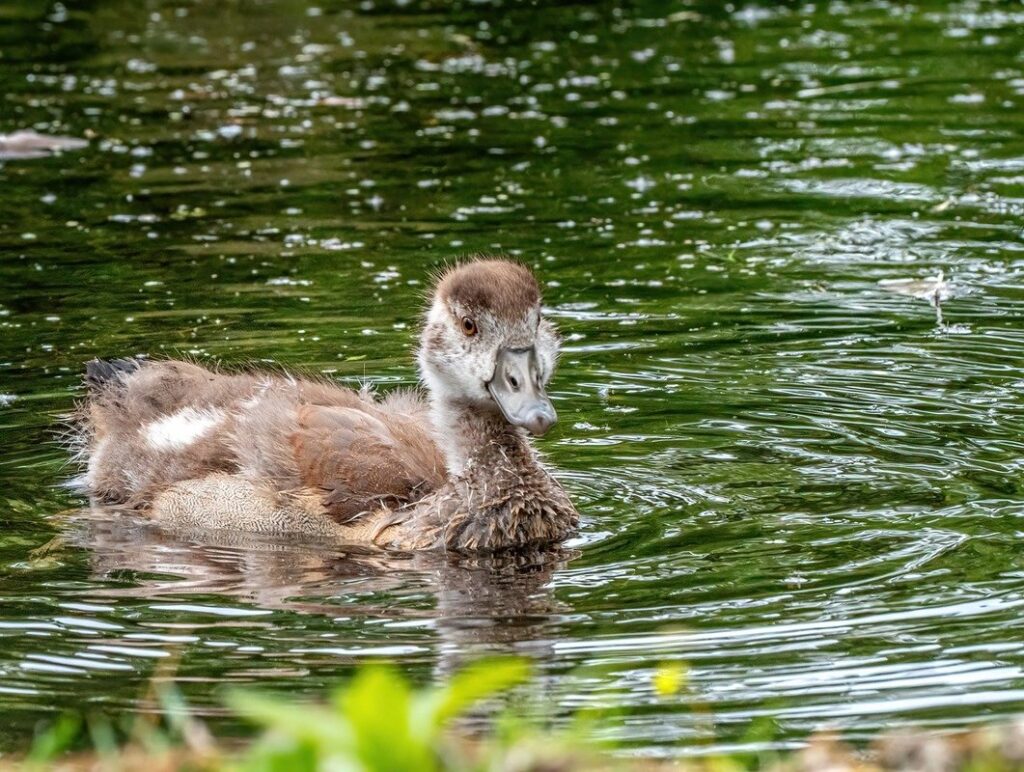
Raising ducklings requires attention to detail, especially when it comes to controlling their environment. One crucial aspect is maintaining the right temperature from day one to ensure they grow strong and healthy. A sudden drop or rise in temperature can be devastating for these tiny creatures.
As a duckling owner, you know how quickly they can adapt to their surroundings. However, improper temperature control can lead to stunted growth, weakened immune systems, and even death. Understanding the ideal temperature for each week is essential to avoid these risks. In this article, we’ll walk you through detailed advice on brooder setup, feeding schedules, and socialization strategies tailored to each week of a duckling’s development from one to twelve weeks old.
Understanding Duckling Development and Temperature
When it comes to caring for your ducklings, understanding their development and how temperature affects them is crucial. This week-by-week guide helps you navigate optimal temperatures for healthy growth.
Importance of Environmental Temperature
Understanding the importance of environmental temperature is crucial when it comes to raising healthy ducklings. The temperature range affects their growth and development, just like human babies require a specific environment to thrive. When ducklings are exposed to extreme temperatures, either too high or too low, it can lead to health problems, reduced growth rates, and even death.
A study by the American Poultry Association found that ducklings raised in a temperature range of 90-95°F (32-35°C) had higher mortality rates compared to those kept at optimal temperatures between 80-85°F (27-29°C). This highlights the significance of maintaining a stable environmental temperature for your feathered friends.
As you care for your ducklings, it’s essential to ensure their enclosure is free from drafts and direct sunlight. You can achieve this by placing them in a shaded area or providing a UV-filtering window covering. Additionally, monitor the temperature closely, especially during extreme weather conditions, to prevent any potential issues. Remember, every degree counts when it comes to raising healthy ducklings!
Stages of Embryonic Development and Temperature
As ducklings develop inside their eggs, they go through several critical stages of embryonic development. During this period, temperature plays a crucial role in shaping the growth and survival of the embryo.
The embryonic development stages can be broadly categorized into three main periods: cleavage, organogenesis, and differentiation. Cleavage occurs during the first 48 hours after fertilization, where the zygote divides multiple times to form a cluster of cells. Organogenesis takes place from day 4-7, where major organs and body systems begin to form.
Temperature affects embryonic development in two primary ways: it influences metabolic rate, which determines how quickly or slowly the embryo develops, and it impacts sex determination, with warmer temperatures sometimes leading to females and cooler temperatures to males. For instance, studies have shown that a 1°C rise in temperature can increase mortality by up to 20% in some duck breeds.
Farmers who breed ducks should monitor the incubator’s temperature closely during this period, as deviations from optimal temperatures (around 99-100°F for most duck species) can significantly impact embryonic development.
Week 1: Incubation Begins
Now that you’ve started incubating your eggs, it’s time to focus on maintaining the perfect temperature for those first critical days. This week is all about creating an ideal environment for your ducklings to develop in peace.
Setting Up the Brooder: Temperature and Humidity Requirements
Setting up a brooder is a crucial step in ensuring the healthy development of your ducklings. On day 1, it’s essential to maintain an optimal temperature range of 90-95°F (32-35°C) and humidity levels between 50-60%. This can be achieved by placing the brooder in a draft-free area or using a heat source such as a heat lamp or ceramic heat emitter.
To regulate the temperature, you’ll need to invest in a thermometer and hygrometer. These tools will help you monitor the environment and make necessary adjustments. For example, if the temperature drops below 90°F, you can increase the distance between the ducklings and the heat source or add more lighting.
Remember, maintaining optimal humidity levels is equally important. You can achieve this by placing a water bowl in the brooder or using a humidifier. Keep an eye on your ducklings’ behavior; if they appear lethargic or are having trouble breathing, it may be a sign that the environment is too dry or humid.
It’s also crucial to ensure adequate ventilation to prevent ammonia buildup from droppings. A good rule of thumb is to provide about 1 square foot of space per duckling. This will help maintain optimal air circulation and prevent respiratory issues.
Monitoring Temperature During Week 1
During week 1 of incubation, temperature fluctuations can be significant. The ideal brooder temperature is between 99°F to 100°F (37°C to 38°C), but it’s not uncommon for temperatures to drop by 2-3 degrees at night or rise by 1-2 degrees during the day.
To monitor these fluctuations effectively, you’ll need a thermometer that can provide accurate readings. There are two types of thermometers: digital and analog. Digital thermometers are more precise, but they require batteries and may be more expensive. Analog thermometers, on the other hand, are less expensive and don’t require power, but their accuracy may vary.
As you monitor temperature fluctuations, keep an eye out for any significant drops or spikes. If the temperature drops below 96°F (35°C), it’s essential to adjust the brooder as soon as possible. This can be done by adding more heat sources or adjusting the existing ones to maintain a consistent temperature. Conversely, if the temperature rises above 100°F (38°C), you may need to remove some of the heat sources to prevent overheating.
Keep in mind that it’s normal for temperatures to fluctuate during the first week, and with proper monitoring and adjustments, you can ensure your ducklings stay within a safe temperature range.
Week 2-3: Hatching and Early Development
As you welcome your new ducklings into their brooder, it’s time to focus on maintaining optimal temperatures during weeks two and three of their hatching and early development process. Proper temperature regulation is crucial during this sensitive stage.
Duckling Emergence and Initial Temperature Needs
In week 2-3 of incubation, ducklings begin to emerge from their eggs as they complete their development. This process can be a bit slow and delicate, but with the right temperature control, you’ll be able to ensure a smooth transition for both the mother duck and her young.
As ducklings start to break out of their shells, they require a specific temperature range to maintain proper growth and prevent chilling or overheating. The ideal temperature for newly hatched ducklings is around 90-95°F (32-35°C) with a humidity level of 60%. This temperature helps them adjust to the outside world gradually.
For the first few days after hatching, it’s crucial to maintain this warm environment to facilitate the ducklings’ adjustment. You can start by placing the brooder in a location with minimal drafts and direct sunlight exposure. Ensure that the temperature is consistent throughout the day, as fluctuations can be detrimental to their health.
Maintain proper ventilation in the brooder to prevent overheating while keeping it free from drafts to prevent chilling. A good rule of thumb is to provide 1-2 square feet of space per duckling to move around comfortably.
Establishing a Routine: Feeding and Health Checks
As you navigate the critical period of hatching and early development, it’s essential to establish a routine for feeding and conducting regular health checks. During weeks 2-3, ducklings are rapidly growing and require a consistent food supply to support their development.
Start by creating a schedule that ensures your ducklings receive adequate nutrition every few hours. A good rule of thumb is to provide a starter feed or a high-protein commercial duckling feed within the first hour after hatching, followed by additional feeding sessions at 2-3 hour intervals. You can also offer small amounts of fresh vegetables like leafy greens and fruits as treats.
Regular health checks are also crucial during this period. Inspect your ducklings daily for signs of illness or distress, such as labored breathing, lethargy, or changes in droppings. Check the temperature of their brooder to ensure it’s within the optimal range (90-95°F) and make adjustments as needed. Remember to keep the brooder clean by removing soiled bedding and replacing with fresh material daily.
During these early weeks, ducklings are particularly susceptible to infections, so be vigilant in monitoring their health and taking prompt action if you notice any issues.
Week 4-5: Growth Acceleration
Now that we’ve navigated the initial stages of duckling growth, it’s time to accelerate their development and focus on providing optimal temperatures for peak growth. This is where week 4-5 really take off!
Adjusting Temperature to Support Rapid Growth
As you enter weeks 4 and 5 of raising ducklings, you’ll notice an incredible surge in growth. The temperature settings that worked perfectly well during the previous weeks may need to be adjusted to accommodate this rapid development. The ideal temperature range for ducklings at this stage is between 90°F (32°C) and 95°F (35°C). However, it’s essential to consider factors like humidity levels and your specific breed’s needs.
One key factor to consider when adjusting the temperature is ventilation. As the ducklings grow, they’ll produce more waste, which can lead to ammonia buildup in the coop. Good air circulation will help prevent respiratory issues and keep your ducks healthy. Aim for a relative humidity level between 40% and 60%. You may need to open windows or install fans to achieve this.
Monitor your ducklings’ behavior closely. If they seem lethargic, panting excessively, or showing signs of stress, it’s likely that the temperature is off. Make adjustments as needed to ensure a comfortable environment for your growing ducks.
Nutrition and Supplements for Optimal Health
As your ducklings enter the growth acceleration phase, it’s essential to provide them with a balanced diet that supports their rapid development. During this period, they require a high caloric intake to fuel their growth. You can achieve this by increasing the amount of food you offer, but be cautious not to overfeed.
A good rule of thumb is to provide 10-15% more feed than before, split into four to five meals throughout the day. Supplementing with duck pellets specifically formulated for this stage will also ensure your ducklings receive essential nutrients like calcium and protein.
Some crucial supplements to consider adding during this phase include probiotics and vitamins A and E. These will support their immune system and promote overall health. For example, you can add a commercial probiotic supplement or sprinkle probiotic powder on top of their feed. Research suggests that 1-2% of their daily diet should come from probiotics.
In addition to dietary changes, make sure your ducklings always have access to fresh water and maintain good hygiene practices in the brooder area.
Week 6-7: Socialization and Temperature Regulation
Now that your ducklings are getting bigger, it’s essential to provide them with a comfortable environment for socialization, and maintain optimal temperature regulation between week 6-7. This involves slight adjustments to their surroundings.
Introducing Ducklings to Outdoor Enclosures
At this stage, it’s essential to introduce your ducklings to their outdoor enclosures safely and gradually. This process is crucial for their socialization and overall development.
Before bringing the ducklings outside, make sure their enclosure is safe and secure by checking for potential escape routes or hazards. Introduce them to a small, enclosed area first, allowing them to get accustomed to the sights and sounds of the outdoors. Gradually increase the size of the outdoor area as they become more comfortable with their surroundings.
Adjust your temperature settings accordingly when introducing ducklings to outdoor enclosures. Ensure that the outdoor enclosure is at least 5-10°F (3-6°C) warmer than the indoor area, taking into account wind chill and other environmental factors. Monitor the temperature closely during this transition period, making adjustments as necessary to prevent stress on the ducklings.
Remember, each duckling is different, so be prepared to make adjustments based on individual needs. With patience and proper planning, you’ll be able to create a safe and happy outdoor environment for your growing ducklings.
Teaching Temperature Regulation through Environmental Enrichment
As we progress with our duckling’s development, it’s essential to introduce them to varying environmental conditions that will help them learn to regulate their body temperature. This skill is crucial for their survival outside the nest.
To achieve this, provide a temperature gradient in their enclosure by placing heat sources like heating lamps or mats at one end and a cool area at the other. This setup allows ducklings to move freely between these zones, simulating natural environmental changes. For example, on warm days, they can bask in the warmth, while cooler nights require them to seek refuge in the cooler section.
To further enhance their understanding of temperature regulation, place ice packs or frozen gel packs in areas where they like to congregate. This unexpected cold stimulus will encourage them to move and find a more comfortable spot. By exposing them to such variations, you’ll be teaching your ducklings essential survival skills that will benefit them throughout their lives.
Week 8-12: Maturation and Final Development
As you approach the final weeks of duckling development, expect a significant shift from growth to maturation. This period marks a crucial stage in their transformation into healthy ducks.
Refining Temperature Settings for Maturity
As we approach week 8-12 of your ducklings’ lives, it’s essential to refine their temperature settings for optimal growth and maturation. The goal is to provide a precise environment that supports the final stages of development without compromising on health or well-being.
The ideal temperature range for ducklings during this period is between 90°F (32°C) and 95°F (35°C). However, you may need to make some adjustments based on your specific setup. For instance, if you’re keeping your ducklings indoors, a slightly higher temperature might be necessary due to the heat retention properties of buildings.
To refine their temperature settings, start by monitoring your ducklings’ behavior and activity levels. If they appear lethargic or sluggish, it could indicate that the temperature is too high. Conversely, if they’re frantically pacing around their enclosure, it may be too low. Aim for a balance where your ducklings are content, active, and growing at an optimal rate.
As you fine-tune their environment, also pay attention to factors like humidity levels, ventilation, and feeding schedules. By doing so, you’ll create a holistic setup that supports the final stages of development, setting your ducklings up for a healthy and thriving adult life.
Preparing Ducklings for Integration into Your Flock
As we approach week 8-12 of your ducklings’ development, it’s essential to prepare them for integration into your existing flock. This is a critical phase where socialization and habituation are crucial for their future well-being.
At this stage, ducklings can start interacting with adult ducks under close supervision. Begin by introducing them to each other in a neutral area, such as a fenced enclosure or playpen, to allow them to become familiar with one another’s presence, sounds, and movements. You can also try feeding them together to promote bonding over food.
When introducing the ducklings to your main flock, start with a slow and controlled introduction. Begin by placing a divider in their enclosure to prevent any sudden confrontations or stress. Once they seem comfortable with each other’s proximity, you can remove the divider and supervise their interactions closely.
Remember, every duckling is different, so it’s essential to monitor their behavior and adjust your approach accordingly. If you notice any signs of aggression or stress, separate them immediately and try again another day. With patience and careful planning, your new ducklings will soon become a happy and integral part of your flock.
Frequently Asked Questions
What if I notice a sudden drop or rise in temperature in my brooder, what steps can I take?
If you detect an abrupt change in temperature, act quickly to rectify the situation. Immediately turn off heating elements and ensure adequate ventilation to prevent further stress on your ducklings. Monitor their behavior closely for signs of distress, such as labored breathing or lethargy.
Can I use a thermometer with multiple probes to monitor temperatures in different parts of the brooder?
Yes, using a multi-probe thermometer can provide you with comprehensive temperature readings across various areas of the brooder, helping you ensure uniform warmth and comfort for your ducklings. Place probes strategically to capture accurate data from both heat sources and air pockets.
How do I adjust the temperature in my brooder as my ducklings grow and mature?
As your ducklings transition through different growth stages, adjust the temperature accordingly. For example, during rapid growth phases (weeks 4-5), aim for a slightly higher temperature range to accommodate increased metabolic needs. Conversely, during periods of slower growth, you may be able to lower the temperature to reduce energy consumption.
Can I raise my ducklings outside in warmer weather without any heating?
No, it’s essential to continue providing some form of heat even when raising your ducklings outdoors in warm weather. Sudden drops or extreme variations in temperature can still pose risks to their health and development, regardless of ambient temperatures.
How often should I check the temperature in my brooder to ensure optimal conditions for my ducklings?
Regularly inspect the thermometer at least twice a day during peak heat or cold snaps to monitor any changes. This will enable you to make timely adjustments as necessary and maintain an optimal environment conducive to your ducklings’ well-being.