
Are you excited to start your quail hatching journey? With over 130 species, choosing the right breed can be overwhelming. But don’t worry, we’ve got you covered! In this comprehensive guide, we’ll walk you through the essential steps of quail hatching, from selecting the perfect breed to setting up a successful brooder and caring for your newborn chicks.
We know that achieving a healthy hatch can be a challenge, but with our expert tips and tricks, you’ll be well on your way to raising happy, thriving quails. In this article, we’ll delve into the world of quail hatching, covering everything from breed selection to chick care. Whether you’re a seasoned breeder or just starting out, our guide is designed to help you achieve successful hatches and raise healthy quails that will bring joy to your backyard.
Choosing the Right Quail Breed
When it comes to raising quails, selecting the right breed is crucial for a successful hatching process. This section will help you narrow down your options and choose the perfect breed for your needs.
Introduction to Popular Quail Breeds
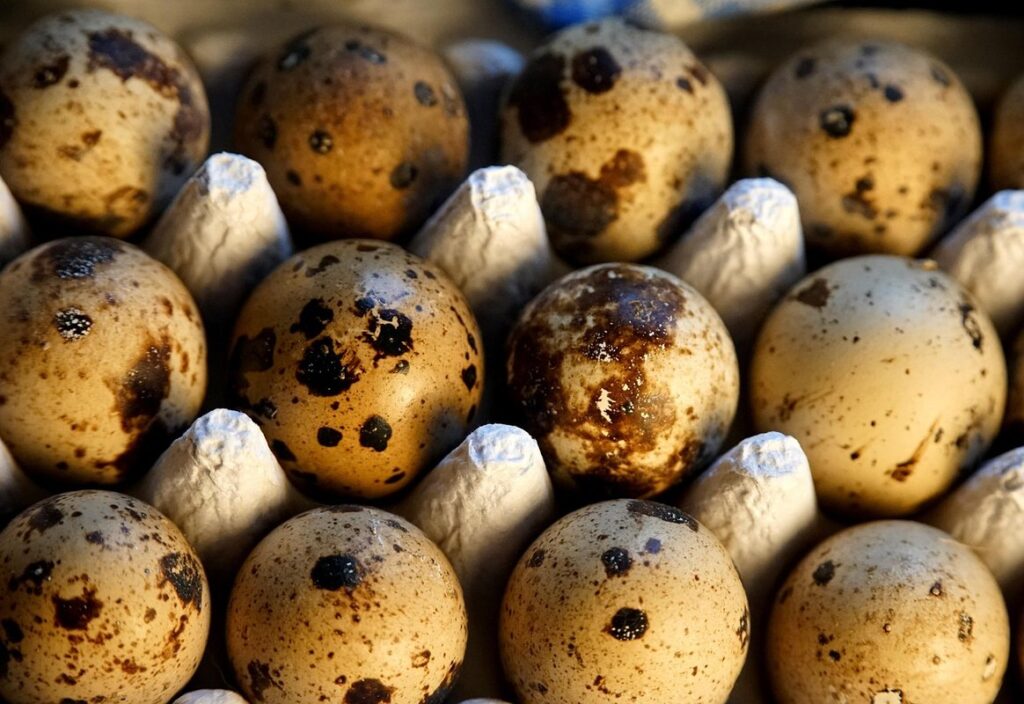
When it comes to choosing the right quail breed for hatching, you’re spoiled for choice. Some of the most popular breeds are perfect for backyard enthusiasts and experienced breeders alike. Let’s take a look at three of the most common quail breeds suitable for hatching: Coturnix, Button, and Japanese Quail.
Coturnix quails are one of the most widely kept breeds due to their high fertility rates and ease of handling. They’re also prolific egg-layers, producing an average of 200-300 eggs per year. Their calm temperament makes them an excellent choice for beginners.
Button quails are another popular breed, known for their tiny size and affectionate nature. They’re relatively low-maintenance and can thrive in small spaces. However, they do require regular social interaction to prevent stress-related issues.
Japanese Quail are also a favorite among enthusiasts due to their unique appearance and high fertility rates. They’re relatively quiet and calm, making them an excellent choice for backyard breeders who want to minimize noise disturbance.
When choosing between these breeds, consider your level of experience and the space you have available. Whichever breed you choose, make sure to provide a suitable environment with adequate food, water, and shelter.
Considerations for Beginners
When choosing a quail breed for hatching, as a beginner, it’s essential to consider several factors to ensure you’re getting a bird that’s easy to care for and will thrive in your environment. One of the primary considerations is egg-laying capacity. Some breeds, like Japanese Coturnix and Button Quails, are prolific layers, producing an average of 300-400 eggs per year. In contrast, other breeds like Pharaoh Quails may lay fewer eggs but have a higher fertility rate.
Hardiness is another crucial factor to consider. Quail breeds can vary significantly in terms of their ability to withstand disease and environmental stress. For example, some breeds are more prone to respiratory issues due to their large eyes and long beaks, making them less suitable for beginners. On the other hand, hardy breeds like Chinese Painted Quails are known for their robust health.
When selecting a breed, it’s also essential to consider ease of care. Some quail breeds are relatively low-maintenance and easy to handle, while others require more attention and specialized care. For example, some breeds may be prone to flying away if not provided with adequate enclosure space or may have specific dietary needs that require careful management.
As a beginner, it’s best to start with a breed that is known for being friendly and docile. Quail breeds like Japanese Coturnix and Button Quails are great options as they are relatively easy to handle and can thrive in small enclosures.
Preparing Your Environment for Hatching
Before you bring your quail eggs home, it’s essential to prepare a suitable environment that will support their safe and healthy hatching process. This includes setting up a proper brooder and incubator space.
Setting Up the Brooder
When it comes to hatching quails, setting up a proper brooder environment is crucial for their survival and success. A well-designed brooder ensures that the chicks receive the right temperature, humidity, and ventilation levels to thrive during this critical stage.
Temperature control is essential, as quail chicks need a warm environment to develop properly. Aim for a temperature of around 90-95°F (32-35°C) on the first day, gradually decreasing by 5°F (3°C) every few days until they reach around 70°F (21°C). You can achieve this using heat lamps or ceramic heat emitters, but be sure to monitor temperatures closely to avoid overheating.
Maintaining proper humidity levels is also vital. Quail chicks need a relatively high level of moisture in the air, typically between 50-60%. This can be achieved by misting the brooder with water daily and using a humidifier if necessary.
Ventilation is equally important to prevent ammonia buildup from droppings and keep the air fresh. Ensure good airflow by placing the brooder near a window or using a ventilation fan. Regularly cleaning the brooder will also help maintain optimal conditions for your quail chicks.
Sanitation and Biosecurity Measures
When it comes to preparing your environment for hatching quail chicks, sanitation and biosecurity measures are of utmost importance. A clean and healthy environment is crucial for the well-being of your chicks, as they will be vulnerable to diseases and infections during their early stages.
First and foremost, make sure to disinfect all equipment, including incubators, brooders, feeders, and waterers. Use a solution of 1 part bleach to 10 parts water to wipe down surfaces, paying particular attention to areas that come into contact with the chicks or eggs. Allow the solutions to dry completely before using the equipment again.
Maintaining a balanced ecosystem is also vital. Ensure good air circulation by providing adequate ventilation and keeping the area free from dust and debris. Regularly clean the floors and walls of the incubation and brooding areas, and change the bedding material frequently. This will help prevent the buildup of bacteria and other pathogens that can harm your chicks.
By taking these simple steps, you’ll be able to create a safe and healthy environment for your quail chicks to thrive in.
The Hatching Process
When you’re waiting for your quail eggs to hatch, it’s natural to wonder what exactly is happening inside that incubator. This process, while complex, can be broken down into several key stages.
Understanding Quail Embryonic Development
As you’re waiting for your quail eggs to hatch, it’s essential to understand the developmental stages they go through from fertilization to hatching. This knowledge will help you monitor their progress and ensure a successful hatch.
The journey of a quail embryo begins when the sperm fertilizes the egg, typically within 24 hours after laying. The resulting zygote then undergoes cleavage, dividing into multiple cells that eventually form a solid ball called the blastoderm (around 30-36 hours). This is followed by gastulation, where the blastoderm folds in on itself to create the embryonic layers (around 2 days).
By around day 4, the embryo has formed its major organs and structures. The incubation period for quail eggs is typically between 16 to 18 days, but it’s crucial to monitor their progress closely. External signs of readiness include a slight darkening of the egg at the air cell (around day 14), increased movement, and changes in the egg shape.
Keep an eye out for these signs, and you’ll be well-prepared to welcome your new quail chicks when they hatch!
Signs of Imminent Hatching
As you approach the end of incubation, you’ll start to notice some significant changes in your quail eggs. One of the most telling signs that hatching is imminent is increased pip activity. Pip holes are small openings made by the developing chick’s beak as it starts to break out of its shell. At this stage, the pips may appear as tiny cracks or pinpricks on the eggshell, and they can sometimes be difficult to spot.
As hatching draws near, you’ll likely see more frequent and deeper pip holes, indicating that your quail is actively working to free itself from its egg. Another sign of impending hatching is eggshell penetration. This occurs when the chick begins to use its powerful beak to chip away at the shell, creating a larger opening.
Keep in mind that these signs can be subtle, so it’s essential to keep a close eye on your eggs during this period. If you notice significant pip activity or eggshell penetration, it’s likely only hours before hatching will occur. Be prepared for the excitement of watching your quail chicks emerge from their shells and take their first breaths of fresh air!
Raising Healthy Quail Chicks
As a new quail parent, you’re likely eager to know how to care for your precious chicks and ensure they grow into healthy, happy birds. This section will guide you through the essential steps of raising quail chicks.
Initial Care and Nutrition
When it comes to raising healthy quail chicks, providing proper initial care and nutrition is crucial for their development and survival. As soon as they hatch, quail chicks are fragile and need a safe environment to grow.
For the first few days after hatching, quail chicks require a shallow dish of water and a separate feeder with starter crumbles or a specialized quail chick feed. It’s essential to place both dishes close to their brooder or enclosure to prevent the chicks from getting tired while searching for food and water. A good rule of thumb is to use one part chick starter to two parts grit, which will help them digest their food properly.
Make sure the water dish is filled frequently as chicks can drink up to 30% of their body weight in water daily. Provide a temperature-controlled brooder with a heat source and adequate ventilation to maintain a comfortable environment for your quail chicks. The ideal temperature ranges between 90-100°F (32-38°C) during the first week, gradually decreasing by 5-10°F (3-6°C) each subsequent week.
By following these care guidelines and ensuring proper nutrition, you’ll be giving your newly hatched quail chicks a solid foundation for growth and development.
Common Health Issues in Young Quails
Young quails are prone to several health issues during their first few weeks of life. Respiratory infections are one of the most common problems you may encounter. These can be caused by bacteria, viruses, or even fungal infections that take hold when the chicks’ lungs and airways are still developing.
To prevent respiratory issues, make sure your brooder is well-ventilated and kept clean at all times. Remove any damp bedding promptly and disinfect food and water dishes regularly. A balanced diet rich in vitamins and minerals will also help boost their immune system.
Nutritional deficiencies can also be a concern for young quails. These can lead to weak legs, stunted growth, or even sudden death. Ensure your chicks are receiving adequate calcium, protein, and vitamin D3 by feeding them a high-quality starter feed specifically formulated for quail chicks.
Monitor your birds closely during the first few weeks for any signs of illness, such as labored breathing, lethargy, or pale combs. If you notice any unusual behavior, consult with a veterinarian experienced in caring for quails to receive proper guidance and treatment.
Managing Your Quail Flock
Once you’ve successfully hatched your quail eggs, it’s time to focus on managing a thriving and healthy flock. This section will cover essential tips for caring for your new quail family.
Creating a Balanced Environment
When introducing new quails to your flock, it’s essential to do so gradually and under close supervision. This helps prevent stress and fighting among the birds. Start by keeping the new arrivals in a separate enclosure for a few days to allow them to acclimate to their surroundings.
Once you’re ready to integrate the new birds into the main flock, follow these steps:
* Begin with a small group of 3-4 quails to test compatibility
* Monitor the behavior and body language of both groups closely, intervening if necessary to prevent conflicts
* Provide plenty of hiding places and visual barriers to reduce stress
It’s also crucial to ensure your quail enclosure is spacious enough for all birds to thrive. Aim for at least 2-3 square feet per bird, with adequate ventilation and a balanced diet.
Regularly rotate your quails’ perches and toys to prevent boredom and promote exercise. This will keep them active and engaged, reducing the likelihood of behavioral problems.
Tips for Successful Egg Production
Maintaining peak egg-laying performance is crucial to ensure that your quail flock remains productive and profitable. A well-balanced diet is essential for optimal egg production. Provide a mix of high-quality commercial pellets, supplemented with fruits, vegetables, and grains to meet their nutritional needs. Ensure access to fresh water at all times to prevent dehydration.
Stress management is also vital in maintaining peak performance. Quails can get stressed easily due to overcrowding, loud noises, or changes in environment. Keep the coop clean, well-ventilated, and provide sufficient space for each bird (about 5-7 square feet per quail). Implement a regular routine, including regular exercise and playtime outside of their coop.
Regular health checks are also crucial to detect any potential issues early on. Monitor your flock’s behavior, appetite, and egg production regularly. Look out for signs of illness such as labored breathing, discharge around the eyes or nostrils, or changes in droppings. Consult a veterinarian experienced with quail care if you notice anything unusual.
Troubleshooting Common Issues
You’ve successfully hatched your quail eggs, but now you’re facing some unexpected issues? Don’t worry, we’ve got you covered with practical solutions to common problems.
Identifying the Root Cause of Problems
When issues arise with quail hatching or flock health, it’s essential to identify the root cause rather than just treating the symptoms. A systematic approach can help you pinpoint the problem and take corrective action. Start by reviewing your incubation procedures, including temperature, humidity, and turning schedules. Check for any deviations from recommended guidelines.
Next, consider the quail’s living conditions. Are they getting enough space, food, and water? Look for signs of stress or disease, such as lethargy, labored breathing, or unusual droppings. If you’ve recently introduced new birds to your flock, it could be a source of infection. Identify any changes in the environment that may have triggered the issue.
Monitor your quail’s behavior and health closely. Keep accurate records of hatching rates, fertility, and mortality. This data will help you identify patterns or correlations between specific events and problems. Be prepared to adjust your strategies as needed based on what you learn from this process. By following this methodical approach, you’ll be better equipped to diagnose and address common issues affecting quail hatching and flock health.
Solutions for Specific Challenges
When it comes to quail hatching, one of the most frustrating issues you may encounter is poor fertility rates. This can be caused by a variety of factors, including dirty breeding stock, inadequate incubation temperature, or improper egg handling. To address this challenge, first ensure that your breeding stock is healthy and free from disease. Perform regular health checks on your quails and maintain good hygiene practices in the breeding area.
Another common issue is embryonic death, which can be caused by incorrect incubator settings, lack of humidity, or even bacterial contamination of the eggs. To minimize this risk, carefully calibrate your incubator to the recommended temperature and humidity levels for quail eggs. Also, ensure that the eggs are stored in a clean, dry place before being placed in the incubator.
Unexplained egg losses can be just as puzzling as embryonic death. To address this issue, pay close attention to the overall health of your flock, ensuring they have access to fresh water and food at all times. Regularly inspect your eggs for signs of cracking or damage, and take steps to improve breeding stock quality by selecting birds that are known for their high fertility rates.
Conclusion and Additional Resources
Now that you’ve learned about the process of quail hatching, let’s summarize what we’ve covered so far and look at some additional resources to help you succeed.
Recap of Key Takeaways
To recap, let’s revisit the essential points discussed throughout this article on successful quail hatching and management. First and foremost, it’s crucial to choose the right breed for your climate and experience level. With over 100 recognized breeds, selecting one that suits your needs is vital.
Proper incubation techniques are also critical for ensuring healthy hatch rates. This includes maintaining a consistent temperature between 99°F and 100°F (37°C to 38°C) and ensuring adequate humidity levels. Failure to do so can result in reduced fertility or even total failure.
Another key takeaway is the importance of proper quail care during the first few weeks after hatching. Young quails require specialized feed, a clean and safe environment, and regular handling to ensure they grow into healthy adults.
To put these takeaways into practice, we recommend starting with a small flock (5-10 birds) and gradually expanding as you gain experience. Keep detailed records of your incubation and hatching processes, and be prepared to make adjustments as needed. By following these guidelines, you’ll be well on your way to successfully raising healthy quails.
Useful Online Resources and Communities
As you continue on your quail hatching journey, it’s essential to connect with like-minded enthusiasts and stay updated on best practices. Fortunately, there are numerous online resources and communities that cater specifically to quail enthusiasts.
Some excellent online forums for quail enthusiasts include Quail Forum and Backyard Chickens, both of which offer a wealth of information, advice, and support from experienced breeders and owners. You can also join Facebook groups dedicated to quails, such as “Quail Keepers” or “Raising Quails,” where you’ll find valuable tips, photos, and discussions.
In addition to online forums, there are several reputable blogs that cover various aspects of quail hatching and care. The Poultry Keeper is an excellent resource for learning about different breeds, health issues, and nutrition. You can also explore the American Bantam Association (ABA) website, which provides detailed information on breeding standards, genetics, and show preparation.
To further enhance your knowledge, consider joining local or online organizations dedicated to quail enthusiasts. The ABA is a great starting point, as it offers membership benefits, including access to expert advice, regional meetings, and show events. By connecting with these resources, you’ll be well on your way to becoming an informed and successful quail hatcher.
Frequently Asked Questions
What’s the ideal temperature range for a quail brooder?
The ideal temperature for a quail brooder is between 90-100°F (32-38°C) during the first week, and gradually decrease it to around 70-80°F (21-27°C) as they grow. This will help maintain a healthy environment for your newborn chicks.
How often should I clean the brooder and what’s the best disinfection method?
Cleaning the brooder daily is essential to prevent disease and odors. Use a solution of 1 part white vinegar to 10 parts water to disinfect surfaces, and change the bedding material completely every week. This will help keep your quails healthy and happy.
What are some common health issues in young quails, and how can I prevent them?
Common health issues in young quails include respiratory problems, mites, and bacterial infections. To prevent these, make sure to provide a clean environment, dust the brooder regularly, and quarantine new birds before introducing them to the flock.
How long does it take for quail eggs to hatch after incubation starts?
Quail eggs typically take 16-18 days to hatch after incubation begins. Keep in mind that factors like temperature, humidity, and breed can affect hatching times, so monitor your eggs closely during this period.
What’s the best way to handle newborn quail chicks, and how often should I feed them?
Newborn quails need a gentle touch – make sure to support their body and wings when handling. Feed them starter feed ad libitum (available at all times) for the first week, then gradually introduce small amounts of fresh vegetables and fruits as they grow.