
Are you eager to bring new life into your backyard with adorable quail chicks? Incubating quail eggs can be a thrilling experience, but understanding their hatching time is crucial for success. Quail eggs have a relatively short incubation period compared to chicken eggs, typically lasting around 16-18 days. However, factors such as temperature, humidity, and egg quality can influence the actual hatching time.
In this article, we’ll delve into the world of quail egg hatching times, discussing the key factors that affect incubation periods. We’ll also share expert tips on how to raise healthy quail chicks, ensuring they thrive from hatch to adulthood. Whether you’re a seasoned breeder or a beginner looking to start a new project, our in-depth guide will equip you with the knowledge necessary for successful quail egg hatching and raising happy, healthy quail chicks.
What to Expect During Quail Egg Hatching
As you eagerly await your quail eggs to hatch, it’s essential to know what to expect during the incubation period, which typically lasts around 16-18 days for most breeds. Here’s a rundown of what’s to come.
Factors Influencing Incubation Period
The incubation period of quail eggs can be influenced by several factors, and understanding these variables is crucial for successful hatching. One significant factor is the breed of quail. Some breeds, such as the Japanese Coturnix, have a longer incubation period than others, typically taking around 16-17 days to hatch. In contrast, other breeds like the Button Quail have an incubation period of approximately 14-15 days.
Temperature and humidity are also critical factors in determining the incubation period. A temperature range of 99°F to 100°F (37°C to 38°C) is ideal for quail eggs, with optimal humidity levels between 50% to 60%. Maintaining a consistent temperature and humidity level throughout the incubation period can help promote healthy development and ensure successful hatching.
It’s also essential to note that individual egg characteristics, such as weight and size, can impact the incubation period. Larger eggs may require a slightly longer incubation period than smaller ones.
Importance of Proper Temperature Control
Proper temperature control is essential for successful quail egg hatching. It plays a critical role in determining the health and viability of the developing embryo inside the egg. Quails are sensitive to extreme temperatures, and even slight fluctuations can be detrimental to their development.
If the incubation temperature is too high or too low, it can lead to various issues such as delayed hatching, embryonic mortality, or even complete failure of the eggs to hatch. Ideally, quail eggs require an incubation temperature between 99°F (37°C) and 100°F (38°C). Maintaining a consistent temperature throughout the incubation period is crucial.
To achieve this, it’s essential to invest in a reliable incubator with precise temperature control. You can also use a thermometer to monitor the temperature regularly. Some common mistakes include placing the incubator too close to heat sources or opening the lid frequently, which can cause sudden changes in temperature. By maintaining a stable temperature and following proper incubation techniques, you’ll be well on your way to successful quail egg hatching.
Average Hatching Time by Breed
When it comes to quail egg hatching, one of the most exciting aspects is watching different breeds emerge. While the average incubation period for most quail eggs is 16-17 days, some breeds take a bit longer or shorter to hatch. Here are some of the average hatching times for popular quail breeds:
Japanese Quails: These are one of the most common breeds and typically hatch between 14-16 days after incubation begins. They’re known for their hardiness and fast growth rate.
California Quails: On average, California Quails take around 15-17 days to hatch. Their larger size compared to Japanese Quails means they require slightly longer incubation periods.
Other breeds like Button Quails, Chinese Painted Quails, and Pharaoh Quails have similar hatching times ranging from 16-18 days. Keep in mind that individual eggs can vary due to factors such as temperature, humidity, and overall health of the quail parents.
To ensure accurate tracking, it’s a good idea to keep a record of egg collection dates and monitor their development closely. Remember, even with these breed-specific averages, each egg has its unique incubation period.
Understanding Quail Egg Development Stages
Understanding how quail eggs develop is crucial for predicting hatching times and ensuring a successful incubation process. In the following stages, we’ll break down the key milestones in quail egg development.
Embryonic Development (Days 1-7)
During the first week after laying, quail eggs undergo rapid and critical development. On day 1, the fertilized egg is just a tiny cluster of cells called the morula. It’s about 0.5mm in diameter and contains the genetic blueprint for the entire chick. As the days pass, the morula begins to divide and grow, eventually forming a distinct blastocyst by day 3.
By day 4, the embryo is starting to take shape, with the formation of the heart, brain, and major organs. The neural tube, which will eventually become the brain and spinal cord, starts to close around this time. On day 5, the eyes begin to form, and the beak and feathers start to develop.
It’s essential to maintain a consistent incubation temperature between 37.5°C and 38°C during these critical days. Proper humidity levels are also crucial, ranging from 50% to 60%. By day 7, the embryo has developed significantly, with all major organs in place, including the lungs, liver, and kidneys. The chick’s skeletal system is also starting to form, and it will soon be ready for hatching.
Organ Formation and Growth (Days 8-14)
At around day 8 of incubation, the quail embryo’s development accelerates rapidly. The formation of vital organs such as the heart, lungs, and liver begins to take shape. The heart starts pumping blood through its chambers, preparing for life outside the egg.
The respiratory system develops, with the lungs forming tiny sacs that will eventually inflate with air. Meanwhile, the digestive system starts to mature, enabling the embryo to process nutrients from the yolk sac. The liver also begins to produce bile and start breaking down fats.
By day 12, the quail embryo’s growth rate speeds up significantly. Its feathers, beak, and claws begin to take shape, giving it a more recognizable form. The eyes develop eyelids, and the ears start to form, although they’re still not fully functional. During this critical phase, maintaining proper temperature (around 99-100°F or 37-38°C) is essential for optimal growth.
By day 14, many of these organs are nearly fully formed, with only minor developments occurring in the following days. This stage is crucial as the embryo undergoes significant transformations, getting ready to hatch within a few more days.
Preparation for Hatching (Days 15-21)
As you approach days 15-21 of incubation, your quail eggs are entering the final stages of development before hatching. During this period, the embryo undergoes significant changes to prepare for life outside the egg.
The yolk sac, which has been providing nutrients to the chick so far, begins to contract and eventually disappears by day 18-19. This is a crucial milestone, as it allows the developing chick to start using its own stored energy reserves instead of relying on external sources.
Between days 17-20, you’ll notice the chick’s beak starting to form, and its eyes will begin to take shape. The feathers on its body will also develop, but they won’t be fully formed until after hatching. It’s essential to maintain a consistent incubation temperature (around 99°F for most quail breeds) during this period to ensure the chick develops properly.
Make sure to monitor your eggs closely around day 21, as hatching can occur within a short time frame. Be prepared to intervene if you notice any issues or irregularities in the hatching process.
Tips for Successful Quail Egg Incubation
To increase your chances of successful quail egg incubation, follow these essential tips that’ll help you care for your eggs and ensure a healthy hatch. Proper temperature control is crucial.
Choosing the Right Equipment
When it comes to quail egg incubation, choosing the right equipment is crucial for success. Not all incubators are created equal, and some may be better suited for quails than others. When selecting an incubator, consider the size of your operation, the number of eggs you plan to hatch at one time, and the level of precision you require.
A good starting point is to look for an incubator specifically designed for small poultry breeds like quails. These units typically have a smaller capacity and more precise temperature control, which is ideal for the delicate nature of quail eggs. Some popular options include digital incubators with temperature control ranges between 37-40°C (98.6-104°F) and automatic egg turning.
When shopping around, also consider factors such as ease of use, noise level, and energy efficiency. You’ll want to choose an incubator that’s user-friendly and quiet enough not to disturb your birds. In terms of energy consumption, opt for a model with low power usage to minimize costs and environmental impact.
Before making a purchase, research different brands and models to find one that meets your specific needs. Read reviews from other quail breeders or owners to get first-hand insights into the performance and reliability of various incubators.
Maintaining Optimal Humidity and Temperature Levels
Maintaining optimal humidity and temperature levels is crucial for successful quail egg incubation. The ideal temperature range for quail eggs is between 99°F to 100°F (37°C to 38°C), with slight variations allowed depending on the breed. However, maintaining this temperature consistency is just as important as achieving the right temperature.
A common mistake made by novice incubators is neglecting to control humidity levels, which can lead to complications during development. Quail eggs require a relative humidity of around 50-60% for optimal embryonic growth. If the environment becomes too dry or too humid, it can cause delays in hatching or even embryo death.
To maintain precise temperature and humidity levels, you’ll need an incubator with a built-in hygrometer and thermometer. You should also monitor these levels regularly to ensure they remain within the acceptable range. A good rule of thumb is to adjust the humidity level by 1-2% every day, based on readings from the previous 24 hours.
By paying close attention to both temperature and humidity, you’ll significantly increase your chances of successful hatching.
Monitoring Progress and Identifying Potential Issues
As you progress with quail egg incubation, it’s essential to monitor their development closely. Start by checking on the eggs daily, around the same time each day, to ensure consistency in temperature and humidity levels. Use a candle or LED light to gently shine through the egg without breaking it, allowing you to observe the embryo’s movement.
Keep track of the days that pass after incubation begins, as this will help you identify potential issues early on. Be aware that quail eggs typically hatch within 16-18 days from the start of incubation. If you notice any unusual changes or irregularities in egg size, shape, or color, investigate further.
Some common signs of trouble include excessive drooping, soft spots, or visible cracks on the shell. If you encounter these issues, it’s crucial to separate the affected eggs and prioritize the health of the rest. Regularly rotate the eggs to ensure even development and prevent any part from being subjected to extreme conditions. Keep a journal or spreadsheet to record your observations, noting specific details about each egg’s condition.
This will enable you to identify potential problems before they escalate and develop contingency plans for the affected eggs.
Common Challenges in Quail Egg Hatching
Hatching quail eggs can be a thrilling experience, but it’s not without its challenges. In this section, we’ll tackle some of the most common hurdles you may face when trying to hatch your quail eggs successfully.
Causes of Failed Hatchings
When it comes to quail egg hatching, one of the most common challenges is failed hatchings. This can be a heartbreaking experience for many breeders and enthusiasts, but understanding the causes can help prevent future losses.
Improper temperature control is often cited as one of the main reasons for failed hatchings. Quails require a consistent incubation temperature between 99°F and 100°F (37°C to 38°C), with slight variations depending on the species. If the temperature drops or rises significantly, it can cause the embryo to stop developing or even die.
Humidity control is also crucial, as quail eggs need a moist environment to hatch successfully. If the humidity level is too low, the egg will dry out and the embryo will not develop properly. Aim for a humidity level of around 50-60% during the first week of incubation and increase it to 70-80% in the last few days before hatching.
In addition to temperature and humidity control, other factors such as poor sanitation, contaminated egg surfaces, and inadequate ventilation can also contribute to failed hatchings. By paying attention to these details and taking steps to prevent them, you can significantly reduce the risk of failed hatchings and increase your chances of successful quail egg hatching.
Signs of Fertile and Infertile Eggs
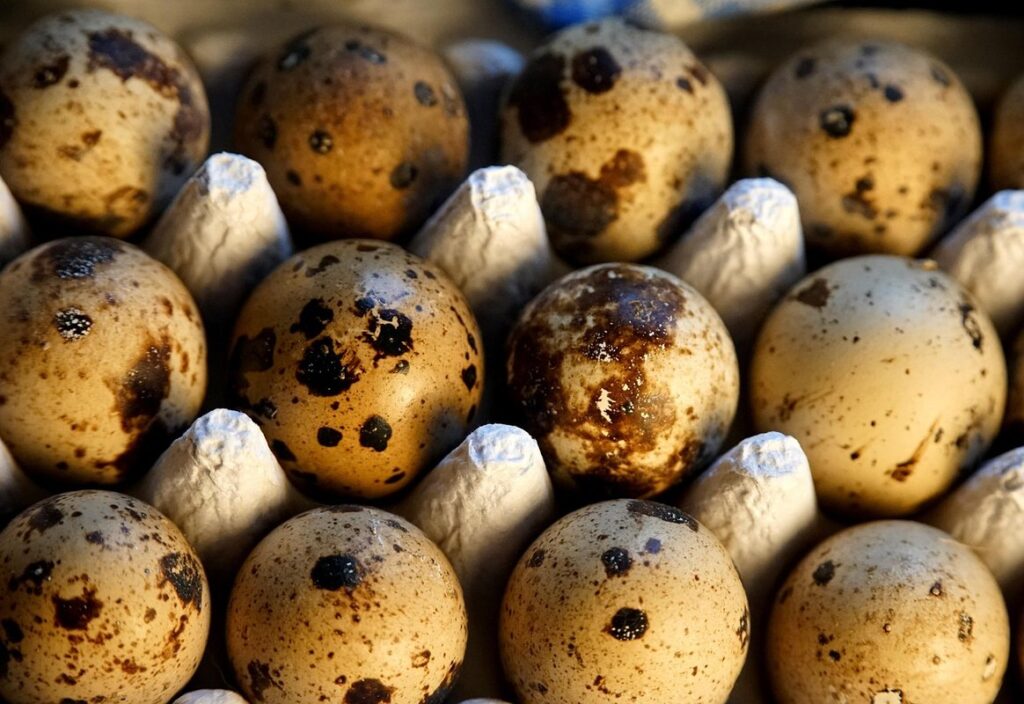
Identifying fertile eggs is crucial to ensure successful hatching. A fertile egg will have a small white spot or speck at one end, indicating the presence of a developing embryo. This mark is called the “bloom” and serves as an indicator of fertility.
Infertile eggs, on the other hand, will lack this spot altogether. However, this doesn’t necessarily mean the egg is useless – some may be suitable for cooking or baking instead.
When separating fertile from infertile eggs, make a note to set aside any that appear cracked or damaged, as these may not have developed properly even if they are fertile.
It’s also essential to monitor temperature fluctuations during incubation. Changes in temperature can affect the development of embryos inside the egg. Keep your incubator at a consistent 99-100°F for optimal hatching rates.
Post-Hatching Care for Quail Chicks
Now that you’ve successfully hatched your quail eggs, it’s time to focus on post-hatching care. This is crucial for ensuring a strong and healthy growth of your new baby quails.
Providing Adequate Nutrition
When it comes to providing adequate nutrition for newly hatched quail chicks, it’s essential to ensure they receive a balanced diet that meets their high caloric needs. Quail chicks need food rich in protein and fat within the first few hours of hatching. You can start by offering a starter feed specifically formulated for game birds or poultry, which should be 18-20% protein.
In addition to commercial feeds, quail chicks also require access to fresh water at all times. It’s crucial to provide clean, unfrozen water that’s free from contaminants. A general rule of thumb is to place two small dishes of water and feed within reach of the chicks to prevent overcrowding and maintain cleanliness.
During this critical period, it’s best to limit human interaction with your quail chicks as much as possible to minimize stress and prevent disease transmission. Ensure their feeding and watering areas are kept clean by changing the food and water frequently, at least twice a day. By providing the right nutrition and environment, you’ll set your quail chicks up for optimal growth and health.
Ensuring a Safe Environment
Quail chicks require a safe and controlled environment to grow and develop. To create an ideal setting for your newly hatched quails, ensure their enclosure is draft-free, dry, and maintained at a comfortable temperature between 90-100°F (32-38°C). A well-ventilated area with good air circulation will help prevent the spread of diseases.
Provide a shallow dish or tray filled with fresh water at all times. Quail chicks need access to clean drinking water for hydration, but be cautious not to overwater as this can lead to respiratory issues. A separate feeder is also necessary to prevent overcrowding around the water source.
Keep an eye on the quails’ surroundings and remove any debris or feces promptly to maintain cleanliness. A temperature-controlled brooder will provide a stable environment and help regulate their growth. By paying attention to these details, you can create a safe haven for your quail chicks to grow strong and healthy.
Frequently Asked Questions
What if I notice a delay in the incubation period, is it still possible for the eggs to hatch?
Yes, delays can occur due to various factors like temperature fluctuations or egg quality issues. However, quail eggs typically have a relatively short incubation period, so even with minor delays, they should hatch within 18-22 days.
How often do I need to monitor the humidity levels in the incubator during the hatching process?
Maintaining optimal humidity is crucial during the last stages of incubation. Aim to check and adjust the humidity levels every 12 hours or as recommended by your specific incubator’s guidelines, especially between day 18 and 21.
Can I reuse quail egg trays for multiple hatchings, or do they need to be replaced after each use?
While quail egg trays can be reused, it’s essential to clean and sanitize them thoroughly after each use. However, repeated washing may affect their material integrity, making it necessary to replace the trays periodically (every 2-3 uses) to ensure optimal results.
What should I do if I experience a failed hatching despite maintaining proper incubation conditions?
Failed hatchings can be frustrating! If you’ve followed all guidelines and still encounter issues, inspect your eggs for any visible cracks or damage. Also, consider the breed’s specific characteristics and adjust your temperature control accordingly. In some cases, it may be best to consult with a breeder or poultry expert for personalized guidance.
How long does it take for quail chicks to grow to maturity after hatching?
Quail chicks develop rapidly, reaching maturity within 6-8 weeks of hatching. Ensure you provide them with proper nutrition and care during this period, including adequate space, suitable temperature, and a balanced diet. This will help them thrive and reach full growth potential.