
Quail egg incubation can be a delicate process, but with the right knowledge and preparation, you’ll be well on your way to successfully hatching quail chicks. As a backyard breeder or enthusiast, choosing the right breed of quails is crucial for a successful incubation cycle. With so many breeds available, selecting one that suits your needs can seem overwhelming. But don’t worry, we’ve got you covered! In this article, we’ll walk you through everything you need to know about preparing equipment, maintaining a stable environment, and caring for newborn quails. From common issues to troubleshooting tips, we’ll share expert advice on how to ensure a healthy hatch rate and successful quail egg incubation. Whether you’re a seasoned breeder or just starting out, this guide will provide you with the essential knowledge to get started.
Understanding Quail Eggs and Their Incubation Requirements
Let’s dive into the specifics of quail egg incubation, starting with understanding these tiny eggs’ unique characteristics and requirements for successful hatching. This sets the stage for a smooth incubation process.
Choosing the Right Breeds for Incubation
When choosing breeds for incubation, it’s essential to consider their characteristics and suitability for the process. Quails come in various breeds, each with unique traits that can impact their ability to thrive during incubation.
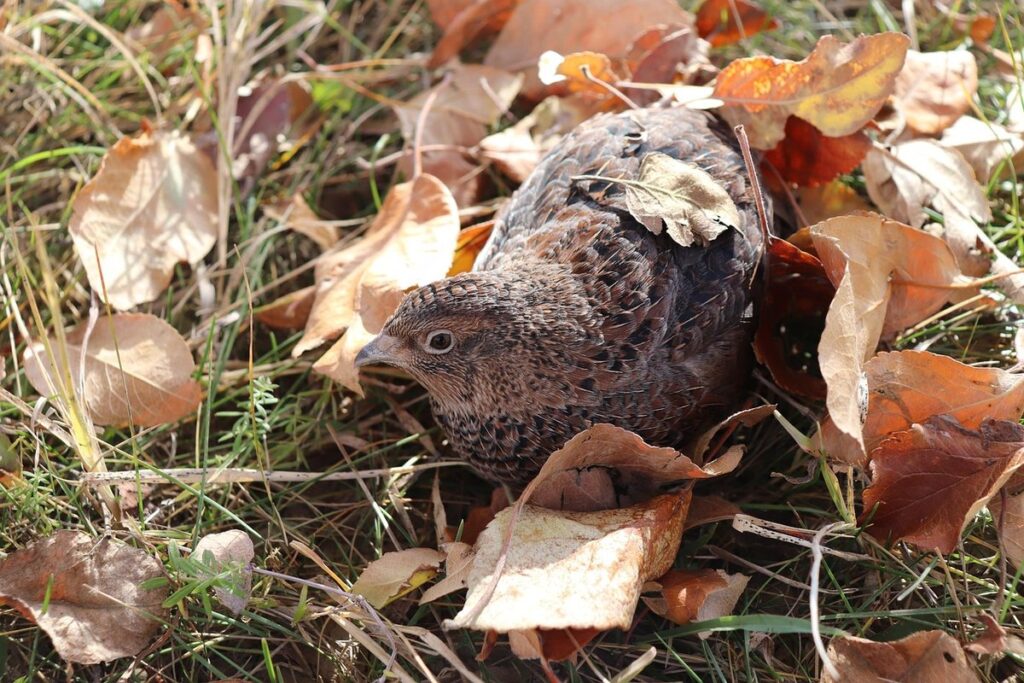
Japanese Coturnix quail eggs are a popular choice for beginners due to their high fertility rate and robust health. These birds lay around 300 large white eggs per year, making them ideal for commercial purposes. Their eggs have a higher fertility rate than other breeds, reducing the risk of failed hatchings.
On the other hand, Button Quails and King Quails are better suited for small-scale incubation due to their smaller size and lower egg production. However, they still offer excellent fertility rates and can be a great choice for hobbyists who want to experiment with different breeds.
Regardless of breed selection, it’s crucial to choose healthy, fertile eggs for incubation. This involves selecting eggs that are clean, free from cracks or visible defects, and show clear signs of fertility.
Factors Affecting Quail Egg Fertility
When it comes to quail egg incubation, fertility plays a crucial role. But what factors affect quail egg fertility? Let’s break it down.
First and foremost, breed is a significant factor. Different breeds have varying levels of fertility, with some being more reliable than others. For instance, Japanese Coturnix quails are known for their high fertility rates, while other breeds like Button or Californian quails may be less consistent.
Age also plays a crucial role in determining egg fertility. Younger quails typically take longer to reach peak fertility, usually around 18-20 weeks of age. At this stage, they tend to produce more fertile eggs. As quails mature, their fertility gradually decreases.
Nutrition and environmental conditions are equally important. A well-balanced diet rich in protein, calcium, and other essential nutrients supports healthy egg production and fertility. Similarly, proper environmental conditions such as adequate ventilation, temperature control, and cleanliness contribute to optimal fertility rates.
When collecting eggs from your flock, look for signs of fertility like a pinkish-brown spot at the large end of the egg (the air cell) or a darker color around the air pocket. Regularly monitoring these factors can help you identify fertile quail eggs and optimize your incubation success rate.
Preparing for Incubation: Equipment and Environment
Before you start incubating your quail eggs, it’s essential to set up a suitable environment that replicates the conditions of a broody hen. This section will walk you through the necessary equipment and environmental setup for successful incubation.
Setting Up a Quail Egg Incubator
When setting up an incubator for quail eggs, it’s essential to choose the right equipment. There are various types of incubators available, ranging from DIY kits to commercial models. If you’re on a tight budget or want a custom-made solution, consider building your own incubator using materials like plastic containers, thermostats, and hygrometers.
Commercial incubators offer more advanced features and better temperature control, making them ideal for large-scale operations or those who are new to incubation. When selecting an incubator, look for the following essential features:
* Automatic egg turning: This ensures consistent embryonic development and reduces manual labor.
* Temperature control: A precise thermostat is crucial for maintaining optimal temperatures between 99°F and 100°F (37°C-38°C).
* Humidity control: Maintaining humidity levels between 50% to 60% helps prevent moisture-related issues.
To set up your incubator, follow these steps:
* Place the eggs in the incubator at a 45-degree angle to facilitate air circulation.
* Set the temperature and humidity controls according to the manufacturer’s instructions or recommended settings for quail egg incubation.
* Monitor the incubator regularly to ensure optimal conditions and address any issues promptly.
Maintaining a Suitable Incubation Environment
Maintaining a suitable incubation environment is crucial for successful quail egg hatching. Temperature control is the most critical factor to consider when setting up your incubator. The ideal temperature range for quail eggs is between 99°F and 100°F (37°C to 38°C). It’s essential to ensure that the temperature remains stable within this range, as fluctuations can be detrimental to embryonic development.
Humidity levels also play a significant role in incubation. Quail eggs require a humid environment to prevent drying out, which can lead to poor hatching rates or even embryo death. Aim for a humidity level of 50-60% during the first 14 days and reduce it slightly to 40-50% thereafter.
Proper ventilation is equally important to maintain airflow around the incubator. Create a draft-free zone by placing the incubator in a well-ventilated area or using a fan to circulate air without creating drafts. This will help regulate temperature and prevent moisture buildup, ensuring a healthy environment for your quail eggs.
The Incubation Process: A Step-by-Step Guide
Now that you’ve set up your incubator, it’s time to take a closer look at the incubation process itself, where we’ll break down each critical step. This crucial part of raising healthy quail chicks is easier than you think.
Day 1-3: Candler and Turning
As we begin our quail egg incubation journey, it’s essential to focus on the first three days of incubation. On Day 1, you’ll start by carefully placing the eggs into the incubator. Make sure the temperature is set between 99-100°F (37-38°C) and humidity levels are around 50-60%.
Next, check for fertility using a process called candling. Hold an egg up to a bright light source or use a candling tool, which shines a beam of light through the eggshell. A healthy embryo will show as a pinkish-red circle about 1/4 inch from the large end of the egg. Be patient and don’t stress if you can’t see anything right away – it’s normal for some eggs to take longer to develop.
Turning is crucial during this period, especially on Day 2. Gently turn each egg 3-5 times to prevent the embryo from sticking to the shell membrane. Continue turning every hour or two until Day 7.
Day 4-14: Embryo Development and Turning
As we enter the second week of incubation, the embryo’s development accelerates dramatically. On Day 4-5, the heart begins to form and the circulatory system starts to take shape. The embryo’s growth rate increases, and by Day 6-7, all major organs start to develop.
During this critical period, it’s essential to maintain a consistent turning schedule. This ensures even heat distribution, preventing the embryo from sticking to the shell or developing unevenly. Aim for at least two turns per day, morning and evening, until Day 14. Use a turning device or manually turn the eggs in a gentle, rocking motion.
Common issues during this phase include excessive moisture accumulation inside the egg or a failure to maintain proper temperature consistency. Monitor your incubator’s humidity levels closely, adjusting as needed to prevent mold growth. Similarly, ensure that your thermometer is calibrated accurately and make adjustments if you notice any deviations from the optimal range (99-100°F for quail eggs).
Remember, careful attention during this period will set your embryos up for success in the days ahead. Keep a close eye on temperature and humidity fluctuations, and don’t hesitate to intervene if you notice any anomalies.
Troubleshooting Common Incubation Issues
Quail eggs can be sensitive, and even minor errors during incubation can impact hatch rates. In this troubleshooting guide, we’ll walk you through common issues and solutions to get your quails thriving.
Identifying and Addressing Temperature Fluctuations
When it comes to successful quail egg incubation, maintaining a stable temperature is crucial. Temperature fluctuations can have devastating consequences on embryo development and hatching rates. Prolonged exposure to temperatures outside the optimal range of 99-100°F (37-38°C) can lead to reduced fertility, increased mortality, and poor hatch rates.
To identify temperature fluctuations, monitor your incubator’s temperature regularly using a digital thermometer. You can also use a data logger to track temperature changes over time. Look for sudden spikes or dips in temperature that may indicate issues with the incubator’s heating or cooling systems.
Correcting temperature deviations requires prompt action. If your incubator is overheating, try reducing the thermostat setting or adjusting the ventilation system. Conversely, if it’s underheating, increase the heat output or use a supplemental heat source. Regularly cleaning and maintaining your incubator can also help prevent temperature fluctuations. By staying vigilant and making adjustments as needed, you can maintain a stable environment for optimal quail egg development and hatching success.
Managing Humidity Levels and Condensation
Controlling humidity levels during quail egg incubation is crucial to prevent excessive condensation and related issues. High humidity can cause eggs to absorb moisture excessively, leading to mold growth, bacterial contamination, and even embryo death.
When you notice visible condensation on the incubator’s walls or inside the egg-turning trays, it’s a clear sign that the humidity levels are too high. This is often caused by an imbalance in the temperature and humidity settings or an inefficient ventilation system.
To maintain optimal humidity levels (around 50-60% for quail eggs), monitor your incubator’s controls closely. Aim to keep the temperature between 99°F to 100°F, as this range will allow you to achieve the ideal moisture level without promoting excessive condensation.
Remember to clean and disinfect your incubation equipment regularly to prevent bacterial buildup. Regular checks on egg humidity levels can be done using a hygrometer or by gently lifting an egg out of the tray – if it feels wet, adjust the settings accordingly.
Caring for Newborn Quails: Post-Hatch Care
Now that your quail eggs have hatched, it’s time to focus on the post-hatch care of your newborn chicks. This crucial stage requires attention to their diet, environment, and health.
Providing a Suitable Brooder Environment
When introducing quail chicks to their new surroundings, it’s essential to create an environment that promotes their health and well-being. The brooder is a critical component of post-hatch care, as it provides a safe space for the chicks to grow and develop.
First and foremost, temperature control is crucial in the brooder. Quail chicks require a warm environment to thrive, with temperatures ranging from 90-95°F (32-35°C) during the first week after hatching. You can achieve this by using heat lamps or ceramic heat emitters, which should be placed at a safe distance to prevent burns.
Proper ventilation is also vital in preventing respiratory problems and ammonia buildup. Ensure that your brooder has adequate airflow by providing windows, vents, or mesh panels for air circulation.
Lighting should be carefully considered as well. Quail chicks need some light to see their surroundings, but direct sunlight can cause overheating. Use a timer to regulate the lighting cycle, providing 14-18 hours of low-intensity light per day.
Feeding and Hydration: Essential Nutrition for Newborn Quails
Newborn quails have a unique set of nutritional requirements that must be met to ensure they grow and develop properly. One common mistake breeders make is underestimating the importance of adequate hydration. Quails need access to clean, fresh water at all times, especially during the first few weeks of life when they are still developing their feathers.
When it comes to feeding, quail chicks require a nutrient-rich starter feed that includes essential vitamins and minerals such as calcium, phosphorus, and protein. A good rule of thumb is to provide 20-25% protein in the diet during the first four weeks of life. You can also supplement with crushed eggshells or oyster shells to ensure they get enough calcium.
It’s also crucial to maintain a proper feeding schedule. Quails should be fed small amounts frequently, ideally every 2-3 hours, to prevent overeating and promote digestion. Monitor their droppings closely; if they are too runny or watery, it may indicate an issue with hydration or dietary balance.
Conclusion: Success with Quail Egg Incubation
You’ve made it through the process of quail egg incubation and now you’re wondering what to expect from a successful hatch. Let’s review the key takeaways that will ensure your eggs thrive.
Recap of Key Takeaways
As we conclude our journey into quail egg incubation, let’s revisit the essential takeaways to ensure you’re well-equipped for success. To begin with, it’s crucial to select healthy and fertile eggs – this will significantly impact the chances of successful hatching. Be sure to choose eggs that have been stored properly in a cool, dry place and are free from visible cracks or damage.
Next, creating an optimal incubation environment is vital. This involves maintaining a stable temperature between 99°F and 100°F (37°C to 38°C), ensuring adequate humidity levels (50-60%), and minimizing vibrations. You can achieve this by using an accurate thermometer, a hygrometer for monitoring humidity, and placing the incubator on a level surface.
After hatching, provide proper post-hatch care for your newborn quails. This includes offering them a balanced starter diet, providing a clean and spacious enclosure, and introducing them to fresh water slowly to prevent shock. By adhering to these guidelines, you’ll be well on your way to successfully raising healthy, thriving quail chicks.
Next Steps: Expanding Your Quail Breeding Program
Congratulations on successfully incubating quail eggs and establishing a thriving breeding program! As you continue to grow and expand your operations, it’s essential to plan for the next stages of development. Let’s dive into some practical advice for managing multiple incubators, increasing egg production, and developing a marketing strategy.
When managing multiple incubators, consider investing in a centralized monitoring system to track temperature, humidity, and other critical parameters. This will enable you to identify any issues quickly and make adjustments as needed. For instance, if one incubator is running at a slightly higher temperature than the others, you can adjust the thermostat accordingly to prevent egg failure.
To increase egg production, focus on maintaining a healthy flock through regular vaccinations, parasite control, and balanced nutrition. Ensure your quail receive adequate space and light exposure to promote optimal breeding behavior. Consider implementing a rotational breeding program to maximize genetic diversity and reduce inbreeding risks.
Frequently Asked Questions
What happens if I notice temperature fluctuations during incubation?
Yes, temperature fluctuations can be a significant issue during quail egg incubation. To mitigate this, ensure your incubator is placed in a stable environment with minimal exposure to drafts or extreme temperatures. Regularly monitor the temperature and adjust as necessary to maintain a consistent range of 99-100°F (37-38°C). This will help prevent embryo damage and promote healthy hatching.
How often should I turn quail eggs during incubation?
Turning is crucial for quail egg incubation, but the frequency depends on the stage. During Day 1-3, it’s recommended to turn eggs every hour or two to prevent sticking. From Day 4-14, reduce turning to once a day, as this allows the embryo to develop and strengthens its internal organs.
Can I use a homemade incubator for quail egg hatching?
While DIY incubators can be a cost-effective option, they may not provide the same level of control or consistency as commercial units. Consider investing in a high-quality incubator specifically designed for quails, which will help ensure optimal conditions and improve hatch rates.
What are some common mistakes to avoid when preparing equipment for quail egg incubation?
Be cautious of over-cleaning your equipment, as this can introduce bacteria and compromise the incubation environment. Additionally, avoid using unsterilized water or materials that may harbor microorganisms. Properly disinfect all equipment before use to minimize contamination risks.
How long after hatching should I start supplementing newborn quails with feed?
Newborn quails typically begin pecking at food around 3-5 days post-hatch. At this stage, you can introduce a starter mix specifically formulated for young quails. Start by offering small amounts (about 1/4 teaspoon per chick) and gradually increase as they grow and develop their digestive systems.