
Are you ready to welcome some new feathered friends into your life? Raising chickens from chicks can be an incredibly rewarding experience, but it requires careful attention to detail and a solid understanding of their needs. That’s why we’re excited to share our comprehensive guide to chick care week by week with you! From setting up the perfect brooder to long-term care considerations, this article will walk you through everything you need to know to ensure your flock stays healthy and happy throughout their lives.
In this article, we’ll cover the essential steps for raising chicks from day one, including nutrition, health checks, and safety precautions. We’ll also explore tips for introducing new birds to your existing flock and strategies for maintaining a balanced ecosystem in your coop. Whether you’re a seasoned chicken keeper or just starting out, our guide will give you the confidence to provide top-notch care for your beloved backyard hens.
Introduction to Chicken Care
Let’s get started on chick care basics, where we’ll cover essential tips and must-knows for new chicken owners, setting you up for success. You’ll find all the fundamentals here.
Importance of Proper Care
Proper care is crucial for chickens’ health and well-being from day one. Chickens are living creatures that require attention to their basic needs, which includes nutrition, hydration, shelter, and hygiene. Without proper care, chicks may suffer from various issues, such as stunted growth, weakened immune systems, and even death.
Chickens need a balanced diet that is tailored to their age and nutritional requirements. A good quality starter feed should be provided for the first 4-6 weeks of life. After this period, it can be gradually switched to layer feed or grower feed as needed. Adequate water supply is also vital, with fresh water being available at all times.
A clean and dry environment is essential for preventing disease and promoting good health. Chicks need a safe place to rest and exercise, such as a coop or a run. Daily cleaning of the coop and removing soiled bedding can prevent ammonia buildup and diseases like histomoniasis. Regular monitoring of chick behavior and health will enable early detection and intervention in case of any issues.
Preparing Your Flock
As you welcome new chicks into your flock, it’s essential to set up a safe and healthy environment for them to thrive. This begins with coop design, which should provide adequate space, ventilation, and protection from predators.
When designing the coop, consider a minimum of 2-4 square feet per chick inside the enclosure. Ensure windows or vents allow for good airflow, reducing ammonia buildup from droppings. A sloping roof will also help with rainwater runoff and make cleaning easier. Don’t forget to add nesting boxes for your hens – one box per three birds is a general rule.
Maintaining high levels of hygiene within the coop is crucial to prevent disease outbreaks. Clean the coop regularly, removing soiled bedding material and replacing it with fresh pine shavings or straw. Disinfect feeding troughs, waterers, and nesting boxes weekly. Implement a ‘clean out’ schedule to avoid overstocking, which can lead to stress on your flock.
By establishing these fundamental elements of coop design and hygiene practices early on, you’ll create a solid foundation for raising healthy chicks that will reward you with eggs and joy.
Setting Up the Brooder
The brooder stage, which spans from 0 to 4 weeks of age, is a critical period for young chicks. During this time, they need a safe and nurturing environment that mimics their natural habitat as closely as possible. Setting up the brooder correctly will lay the foundation for healthy growth and development.
To begin, choose a suitable location for the brooder that’s draft-free and away from drafts. Next, decide on a heat source – most commonly, heat lamps or ceramic heat emitters are used. Position them according to the manufacturer’s instructions, usually around 1-2 feet above the bedding surface. For bedding, opt for dry, absorbent materials like pine shavings or straw, avoiding wet or moldy conditions.
Select a feeding system that allows easy access and minimizes mess. A shallow, wide dish is ideal for young chicks, as it enables them to eat comfortably without straining their necks. Ensure the feeder is placed within pecking distance of the brooder’s edges to prevent overeating. Lastly, remember to maintain proper ventilation in the brooder by providing adequate airflow – ideally, 1/4 inch gap between the bedding and any enclosure surfaces.
Week 1-2: Setting Up the Chickens
Welcome to weeks one and two of our comprehensive guide, where we’ll walk you through setting up your chick’s environment and ensuring a smooth transition into their new home. This is crucial for their health and happiness.
Day 1-3: Acclimation
When introducing new chicks to their environment on Day 1-3 of their arrival, it’s essential to acclimate them gradually. Start by placing the chicks in a separate brooder or quarantine area for the first few days. This allows you to monitor their health and behavior without exposing them to potential stressors.
Feed the chicks a starter mash or crumb that’s specifically formulated for young birds. Place the feeders on one end of the brooder, allowing the chicks to access it easily. Use shallow water dishes with fresh water at all times, as chicks need to drink frequently. You can place these near the food to encourage regular hydration.
Monitor the temperature in the brooder closely during this period. A safe temperature range for young chicks is between 90-95°F (32-35°C) on Day 1, gradually decreasing by 5°F every day until it reaches ambient temperatures by Day 5. Ensure adequate ventilation and air circulation to prevent heat stress.
Keep an eye out for signs of distress or illness, such as labored breathing, lethargy, or changes in droppings. Consult a veterinarian if you notice any unusual behavior.
Handling Chicks Safely
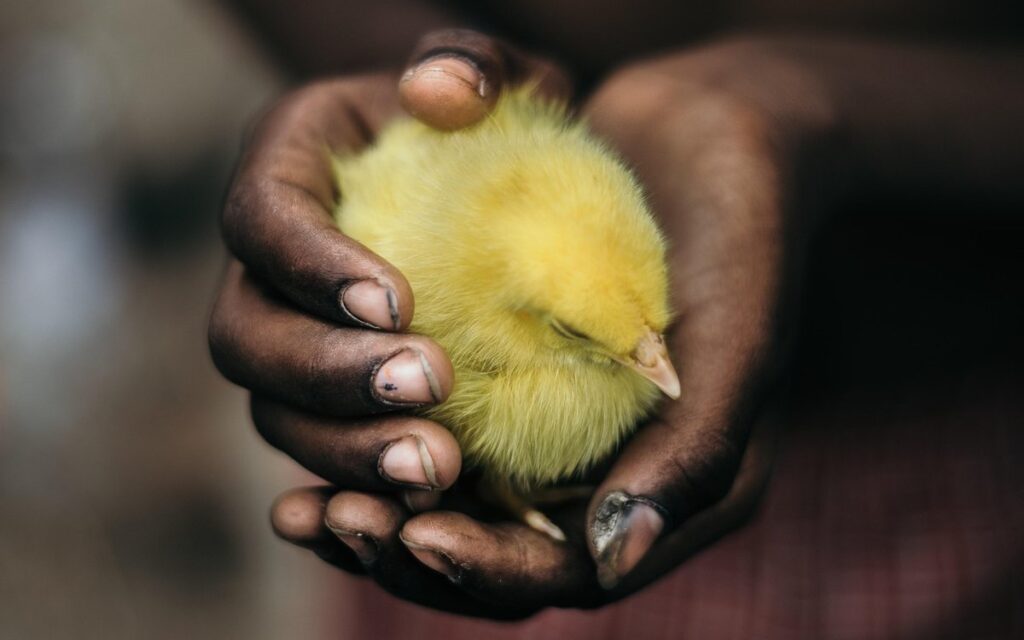
Handling young chicks requires utmost care and attention to ensure their health and well-being. One crucial aspect of chick care is safe handling, which involves maintaining cleanliness and hygiene when interacting with them. Always wash your hands thoroughly before and after touching the chicks or entering the brooder. This simple habit can prevent the spread of diseases among the flock.
Keep in mind that young chicks are fragile and susceptible to injury. Handle them gently and carefully to avoid any physical harm. Support their bodies rather than holding them by their wings or legs, which can cause damage. When picking up a chick, cup your hands around it, making sure not to constrict its movement.
Maintain cleanliness in the brooder at all times by removing soiled bedding material regularly and replacing it with fresh litter. Disinfect any surfaces that come into contact with the chicks or their waste to prevent bacterial growth. Clean food and water containers daily, and change the drinking water completely every 24 hours.
Week 3-4: Gearing Up for Growth
By week three and four, your chicks will start to grow rapidly, requiring a safe environment that supports their increasing energy levels and nutritional needs. We’ll show you how to create this perfect balance for optimal growth.
Nutrition During Rapid Growth
As your chicks approach week 3-4, they’re gearing up for a period of rapid growth. During this stage, their nutritional needs become more complex and critical to ensure healthy development. It’s essential to provide the right balance of protein intake, supplements, and feeding schedules.
At around day 21, chicks require approximately 20% protein in their diet. You can offer a starter feed with 18-20% protein content or supplement with crushed oyster shells or mealworms for an added boost. However, be cautious not to overdo it – excessive protein can lead to digestive issues.
Establish a feeding schedule that allows for free-choice access to feed, supplemented by offering treats like fresh vegetables and fruits in moderation. For example, you can provide dark leafy greens like kale, spinach, or collard greens twice a week. Also, consider adding probiotics or electrolyte supplements to their water for optimal digestion.
Monitor your chicks’ growth and adjust the nutrition plan accordingly. Ensure access to clean, unfrozen water at all times, and maintain a safe environment with adequate ventilation and space for exercise. By paying attention to their nutritional needs during this critical period, you’ll set them up for a strong start in life.
Brooder Maintenance
As we move into week 3-4 of chick care, it’s essential to focus on brooder maintenance. A clean and well-maintained brooder is crucial for preventing disease and promoting healthy growth. Chickens are naturally prone to picking up bacteria and pathogens, which can quickly spread through the brooder if not properly managed.
To keep your brooder clean, ensure you’re removing soiled bedding material daily, and changing it completely every 7-10 days. This will prevent ammonia buildup and reduce the risk of respiratory issues in your chicks. Keep an eye out for any signs of stress or discomfort in your birds, such as huddled or lethargic behavior.
Regularly disinfect all surfaces with a poultry-safe solution to maintain a hygienic environment. A dirty brooder can lead to a weakened immune system, making your chicks more susceptible to diseases like coccidiosis and respiratory infections. By keeping the brooder clean and well-maintained, you’ll be creating an optimal environment for your chicks’ growth and development.
Week 5-6: Transitioning to Outdoor Life
By week 5 or 6, your chicks will be growing rapidly and their living quarters will need to expand accordingly. It’s time to introduce them to the great outdoors, but safely!
Introducing Chickens to Outdoors
As your chicks reach 5-6 weeks of age, it’s time to introduce them to the great outdoors. This is an exciting milestone, but it’s crucial to do so safely and gradually to prevent stressing your birds. The transition from indoor to outdoor life should be a gentle one.
Begin by preparing a secure and predator-proof enclosure for your chicks to explore. Make sure it has adequate ventilation, shelter from the elements, and easy access to food, water, and dust baths. You can start by letting them into a fenced area or run adjacent to their coop, allowing them to become accustomed to the sights and sounds of the outdoors.
Gradually increase their time spent outside over the next few days, monitoring their behavior and adjusting as needed. Keep an eye out for signs of stress, such as panting or hiding, and return them to the safety of the coop if necessary. With patience and proper planning, your chicks will thrive in their new outdoor environment.
Remember to also introduce them to any new surroundings and elements, like feeders and water containers, at a slow pace. This will prevent overwhelming and ensure they feel comfortable exploring their new space.
Predator Protection
As you transition to outdoor life with your chicks, it’s essential to protect them from predators. A well-planned and executed predator protection system will give you peace of mind and ensure the safety of your flock.
Fencing is a crucial aspect of predator protection. Install hardware cloth or chicken wire around your coop and run, extending at least 12 inches below ground level to prevent burrowing animals like foxes and coyotes from entering. Bury the fencing material 1-2 feet deep to make it more difficult for predators to dig underneath.
In addition to fencing, consider using netting to cover the top of your run or coop. This will prevent aerial predators like hawks, owls, and raccoons from swooping in. Make sure the netting is at least 6 feet off the ground and securely attached to the surrounding fencing.
Other deterrents you can use include motion-activated sprinklers, ultrasonic repellent devices, and even visual deterrents like shiny reflective tape or balloons. Remember to always supervise your flock during their transition to outdoor life and be aware of potential threats in your area.
Week 7-12: Consolidating Growth Habits
Now that your chicks are growing rapidly, it’s time to reinforce good habits and ensure they continue to thrive. You’ll learn how to manage their feed and make adjustments for optimal growth during this critical period.
Managing Pecking Order
As your chicks grow and develop their personalities, it’s essential to understand the concept of pecking order. This social hierarchy is established among chickens as they learn who’s dominant and who’s submissive. It’s a natural process that can be influenced by factors such as age, size, sex, and individual temperament.
Pecking order is established through a series of interactions, including aggression, submission, and dominance displays. Chickens will establish a hierarchy to determine who gets access to food, water, and nesting boxes. To minimize conflicts, provide enough space for your chicks to roam and exercise freely. This can help reduce tension and competition among birds.
Introduce new chicks slowly and under close supervision to prevent establishing an existing pecking order. Remove any signs of aggression, such as blood or injuries, to prevent escalation. Monitor your flock’s behavior closely and separate aggressive birds if necessary. By understanding and managing pecking order, you can create a harmonious and healthy environment for your chickens to thrive in.
Egg Laying and Health Checks
At around week 7-12, you’ll start to notice a significant change in your chicks’ behavior as they begin to lay eggs. This transition can be both exciting and challenging for new chicken keepers. As your girls become egg-layers, it’s essential to monitor their health closely to ensure they’re thriving.
Signs of health issues may include changes in egg size, shell quality, or frequency. You might notice that some chickens are laying smaller eggs or having trouble producing shells at all. These symptoms can be indicative of underlying nutritional deficiencies, stress, or even a parasite infestation.
Regular health checks are crucial during this period to identify potential problems early on. Inspect your flock’s droppings daily for signs of mites, lice, or worms. Also, check the condition of their feathers and beaks for any damage or discoloration. Regularly collect eggs from the coop to inspect for cleanliness and damage. With regular monitoring and prompt action, you can prevent minor issues from becoming more serious problems down the line.
Long-Term Care Considerations
As you’ve successfully raised and cared for your chicks through their critical first weeks, it’s time to consider how you’ll support them long-term. We’ll walk you through essential care plans for a happy, healthy flock.
Disease Prevention and Management
Disease prevention and management are crucial aspects of chick care. Chickens can be prone to various diseases, especially during the first few weeks after hatching. One of the most effective ways to prevent disease is through good biosecurity practices. This includes keeping the coop clean, providing adequate ventilation, and ensuring that all equipment and feeders are sanitized regularly.
Another essential aspect of disease prevention is vaccination. The vaccination schedule for chickens typically starts at 1-2 weeks old and may include vaccinations against diseases such as Marek’s disease, Newcastle disease, and infectious bronchitis. It’s crucial to follow the recommended vaccination schedule and consult with a veterinarian if you have any questions or concerns.
Identifying symptoms of common diseases is also critical. Keep an eye out for signs of illness such as ruffled feathers, lethargy, diarrhea, and loss of appetite. If you notice any unusual behavior or physical changes in your chicks, consult with a veterinarian immediately. By prioritizing disease prevention and management, you can help ensure the health and well-being of your flock.
Integrating New Chickens into Established Flocks
When introducing new chickens to an existing flock, it’s essential to do so with care and caution. A sudden integration can cause significant stress for both the new birds and the established ones. To minimize this stress, start by keeping the new chickens separate from the main flock for a few days or even weeks before allowing them to interact.
During this initial period, provide the new chickens with their own separate enclosure, complete with food, water, and adequate space to roam. This will give them time to adjust to their new surroundings without feeling overwhelmed or threatened by the existing birds. Once they seem comfortable in their temporary quarters, begin a gradual introduction process.
This can involve starting by placing the birds in adjacent runs or enclosures, allowing them to become familiar with each other’s scents and sounds before finally introducing them under close supervision. This controlled approach will help prevent any conflicts and ensure a smooth transition for all members of your flock.
Frequently Asked Questions
What if I notice my chicks are getting too hot or cold in their brooder? How can I adjust the temperature?
To ensure a stable environment, it’s essential to monitor the temperature in your brooder closely. If you notice it’s too hot (above 90°F) or cold (below 40°F), take corrective action immediately. Use a thermometer to check the temperature and consider adding or removing bedding materials, like pine shavings, to regulate the heat. You can also move the brooder to a different location with better ventilation.
How often should I clean the brooder, and what’s the best way to do it?
Cleaning your brooder regularly is crucial for maintaining a healthy environment. Aim to clean it at least once a week, removing all bedding materials and scrubbing the surfaces with soap and water. Disinfect the area thoroughly before refilling with fresh bedding. This will help prevent the buildup of bacteria and other pathogens.
What’s the ideal ratio of chicks to adult chickens in my flock?
When introducing new chicks to your existing flock, it’s essential to balance their numbers carefully. Aim for a ratio of 1-2 chicks per 3-4 adult hens. This allows the adults to provide adequate supervision and protection while minimizing aggression towards the younger birds.
Can I keep different breeds together in the same brooder or coop?
While it’s possible to mix different breeds, it’s not always recommended. Some breeds have unique temperaments or require specific care. Research each breed’s needs before introducing them to your flock. Keep in mind that certain breeds may be more aggressive towards others, so separate areas or coops might be necessary.
What are some common signs of illness or disease in chickens?
As a responsible chicken owner, it’s crucial to recognize the signs of illness or disease early on. Look for changes in appetite, behavior, or physical condition, such as droopy wings, labored breathing, or bloody discharge around the vent area. Consult with a veterinarian experienced in poultry care if you suspect any health issues in your flock.