
Raising healthy chicks from hatch to flock integration can be a daunting task, especially for new farmers or backyard chicken enthusiasts. But with the right guidance and attention to detail, you can ensure your chicks grow into strong, thriving birds. One of the best ways to stay on track is by monitoring their progress week by week. In this article, we’ll take a visual journey through the essential milestones in your chick’s development, from hatching day to integration with the rest of the flock. You’ll learn expert tips on care, nutrition, and health, all presented through easy-to-follow weekly pictures. Whether you’re raising a small batch or building a large-scale operation, this guide will walk you through the process, giving you confidence in your ability to raise happy, healthy chicks that will thrive in their new home.
Understanding Chicks’ Development Stages
As you follow our weekly progress pictures, it’s essential to understand what’s happening with your chicks during each stage of their development. This section breaks down the milestones they’ll reach from day one through adulthood.
What to Expect in the First Few Days (0-72 hours)
In the first few days after hatching, chicks undergo rapid growth and development. The process begins with pipping, where they break through the eggshell, followed by a series of movements that help them pip out completely (around 18-24 hours). During this time, it’s essential to provide a safe environment, as they may still be fragile.
Once hatched, chicks will begin searching for food and water. Their first feed should consist of a starter feed or a nutrient-rich chick crumb, and it’s crucial to offer them fresh water at all times. To ensure proper hydration, you can place the waterer near the heat source, so they don’t have to venture far.
In terms of basic care, maintain a warm environment (around 90-100°F) with adequate ventilation. Provide enough space for movement and avoid overcrowding, as this can lead to stress and health issues. Monitor their behavior closely, as changes in appetite or activity levels may indicate potential problems.
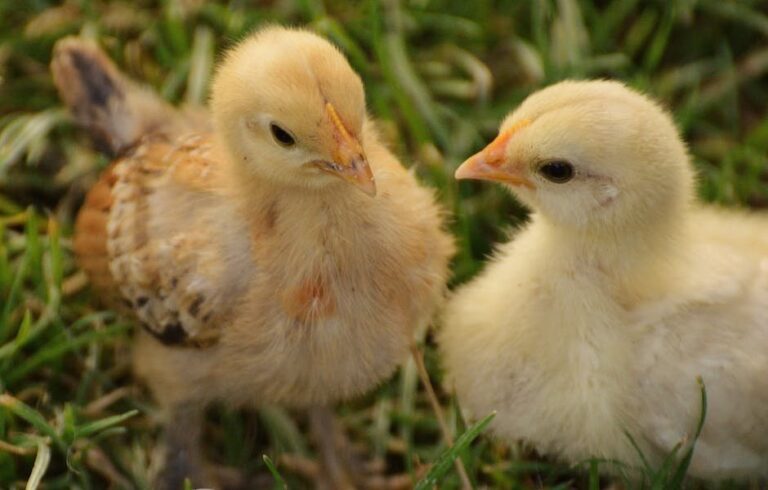
Identifying Sexing Indicators at Various Ages
As you observe your chicks grow and develop, it’s essential to learn how to identify their sex through physical characteristics and behavioral differences. However, keep in mind that sexing can be challenging, especially during the first few weeks.
One of the most critical periods for sexing is around 4-5 days old. At this stage, you can look for slight physical variations such as comb size, shape, and color. For example, females typically have a smaller, more rounded comb compared to males, who tend to have larger, more pointed combs. You may also notice differences in wattles – the hanging skin under the beak.
Between 7-10 days old, you can observe behavioral cues like pecking order establishment and dominance displays. Males tend to dominate their surroundings, while females are often more docile. Another significant indicator is the size of the chick’s cloaca – a small opening used for reproduction, digestion, and excretion. Females usually have a larger, more rounded cloaca compared to males.
Keep in mind that these indicators can be subtle, and it may take some experience to accurately sex your chicks. To improve your chances, regularly observe and record any physical or behavioral differences as they grow.
Chicks Week 1-2 Pictures: Basic Care and Nutrition
Now that your chicks are safely at home, let’s talk about their basic care during weeks one and two, including feeding and hydration essentials. Proper nutrition is crucial for healthy growth.
Providing Optimal Environment and Temperature Control
Providing optimal environment and temperature control is crucial for the health and well-being of young chicks during their first two weeks. As they grow rapidly, they require a specific balance of ventilation, temperature, and humidity levels to prevent stress, disease, and even death.
Ensure that your brooder has adequate ventilation by installing windows or vents to allow fresh air to circulate. A good rule of thumb is to provide one square foot of ventilation space per chick. For example, if you have 20 chicks, you’ll need at least a 20-square-foot area with proper ventilation.
Temperature control is also vital during this period. Chicks prefer temperatures between 90-95°F (32-35°C) for the first week and 80-85°F (27-29°C) for the second week. You can use heat lamps or ceramic heat emitters to maintain a consistent temperature. Monitor the temperature daily, ensuring it never drops below 70°F (21°C).
Humidity levels should be maintained between 50-60%. You can achieve this by misting the brooder with water daily or using a humidifier. Keep an eye on your chicks’ behavior; if they appear stressed, lethargic, or have labored breathing, it may indicate inadequate ventilation or temperature control.
Introduction to Starter Feed and Water Management
When it comes to raising healthy and happy chicks, proper nutrition and hydration play a crucial role. During their first two weeks of life, chicks have high energy demands due to rapid growth and development. As such, providing them with the right starter feed and ensuring access to fresh water is essential.
Starter feed should be introduced at day one, replacing the electrolyte solution provided initially. Choose a starter feed specifically formulated for young chicks, as it will provide the necessary nutrients for optimal growth. A good rule of thumb is to offer 1/4 cup of starter feed per chick per pound of body weight per day.
Make sure fresh water is always available and changed daily. Chickens can easily become dehydrated if their drinking water becomes contaminated or stale. To prevent this, use a waterer that’s designed for young chicks and place it in a clean, draft-free area.
Maintaining a clean environment also contributes to the overall health of your flock. Remove soiled bedding material and disinfect feeding and watering equipment regularly. This will help reduce the risk of disease transmission among your chicks.
Chicks Week 3-4 Pictures: Growth and Development
As we reach week three and four, your chicks will be growing rapidly, and you’ll start to notice significant changes in their appearance, including fluffy feathers and more defined features. Let’s take a look at some adorable photos of this exciting growth phase!
Nutritional Requirements and Feeding Strategies
As your chicks enter week 3-4, it’s essential to provide them with nutrient-dense foods that cater to their growing needs. Mealworms and crickets are excellent choices, rich in protein, calcium, and iron – all vital for healthy growth. These insects offer a nutritional profile that’s comparable to commercial chick starter feeds.
One of the significant benefits of feeding mealworms or crickets is that they can be easily digested by young chicks. This is particularly important during this stage, as their digestive systems are still developing and require minimal effort to process food. To incorporate these insects into your chicks’ diet, start by offering them in moderation (about 10-15% of their daily intake) alongside a high-quality commercial starter feed.
When feeding mealworms or crickets, make sure to provide fresh water at all times to facilitate easy digestion. A general rule of thumb is to offer about 1-2 teaspoons of live insects per chick, 2-3 times a week. Be mindful of the temperature and humidity levels in your brooder, as these can affect the insects’ nutritional value.
Feeding mealworms or crickets also encourages foraging behavior, which is beneficial for chicks. It’s essential to maintain a clean environment and ensure the health of both your chicks and the live insects by providing adequate ventilation and monitoring temperature and humidity levels closely.
Health Monitoring and Common Issues at This Age
As you observe your chicks’ growth and development during week 3-4, it’s essential to be aware of potential health issues that may arise. At this age, chicks are still vulnerable to diseases and parasites, which can significantly impact their overall well-being.
Marek’s disease is a common concern among poultry keepers. It’s a viral infection that affects the nervous system, causing symptoms such as lethargy, loss of appetite, and labored breathing. To prevent Marek’s disease, make sure your chicks receive proper vaccinations at an early age. Keep in mind that vaccines are only effective if administered before exposure to the virus.
Another concern is parasites, particularly mites, lice, and internal worms. These external and internal pests can cause discomfort, stress, and weight loss in your chicks. Regular cleaning of their enclosure, changing bedding, and monitoring for signs of infestation will help prevent parasite problems. Keep an eye out for symptoms such as excessive preening, labored breathing, or visible parasites on the feathers.
Early detection is key to addressing these issues. If you suspect any health problems, consult with a veterinarian experienced in poultry care. Regular health checks and preventative measures can ensure your chicks grow into healthy, thriving birds.
Chicks Week 5-6 Pictures: Vaccinations and Health Checks
At week five and six, your chicks are due for their vaccinations and health checks to ensure they’re developing normally. Let’s take a look at what you can expect during this critical stage of growth.
Understanding Vaccination Protocols and Schedules
When it comes to vaccinating your chicks, it’s essential to understand the common vaccinations used and their recommended schedules. Most backyard chicken keepers vaccinate against Marek’s disease, a highly contagious virus that affects young birds.
The most widely used vaccine is the live attenuated Marek’s disease vaccine. This vaccine should be administered between 5-6 weeks of age, when your chicks are still under your care. It’s crucial to follow the recommended schedule to ensure the vaccine takes effect and provides adequate protection against the virus.
Typically, a single dose of the live attenuated Marek’s disease vaccine is given on or before day 18 (about 5-6 weeks old). This early vaccination allows the immune system to develop antibodies that will protect your chicks from Marek’s disease as they grow. It’s vital to maintain accurate records of vaccinations administered, including dates and types of vaccines used.
By following a proper vaccination schedule, you can significantly reduce the risk of Marek’s disease in your flock. Be sure to consult with a veterinarian or poultry expert if you have any questions about vaccinating your chicks.
Identifying Potential Health Risks and Precautions
As you’re going through the vaccination process and health checks with your chicks at week 5-6, it’s essential to identify potential health risks and take necessary precautions. Biosecurity measures play a crucial role in preventing disease transmission within your flock.
Start by ensuring good hygiene practices, such as washing your hands thoroughly before handling the chicks or their environment. Use dedicated equipment and tools for cleaning and disinfecting areas where the chicks are housed. Keep the coop clean and free of waste to reduce the risk of disease-carrying pests like rodents and flies.
Common health risks during this period include respiratory issues, such as coccidiosis and Marek’s disease. Vaccinations can help protect against these diseases, but it’s also vital to maintain a healthy environment. Monitor your chicks’ behavior and watch for signs of illness, such as lethargy, loss of appetite, or changes in droppings.
Regular health checks with a veterinarian will help identify any potential issues early on, allowing you to take corrective action promptly. Keep a close eye on your chicks’ living conditions and adjust them accordingly to prevent disease transmission and maintain their overall well-being.
Chicks Week 7-8 Pictures: Molting and Growth Acceleration
At week 7 and 8, your chicks will undergo a significant transformation as they start to molt and experience rapid growth, which can be both exciting and challenging for new breeders. Let’s take a look at what you can expect during this period.
Understanding Chickens’ Molting Process
As you continue to observe and care for your chicks, you may notice that they’re going through a significant physical transformation around week 7-8. This is a crucial stage of their development, known as molting. Molting is a natural process where chickens shed their old feathers and grow new ones, just like humans get haircuts or change clothes to update their style.
But why do chickens molt? The primary reason is to replace old, worn-out feathers that have been damaged by environmental factors, such as weather conditions, parasites, or even molting itself. This process allows them to maintain a healthy coat and regulate body temperature more efficiently. You may also notice that your chicks are eating more during this period; this is because they need extra protein to fuel their new feather growth.
As your chicks molt, you’ll likely observe some physical changes. Their beaks might appear shorter, and their feathers will start to fall out in large quantities. Don’t worry – this is a normal part of the process! To support your chicks during molting, make sure they have access to plenty of fresh water, nutritious feed, and a clean living environment.
Strategies for Encouraging Healthy Growth and Development
As you observe your chicks during weeks 7-8, it’s essential to provide them with an environment that fosters healthy growth and development. A balanced diet is crucial at this stage, as it fuels their rapid molting process and prepares them for future egg production.
Ensure that the chicks’ feed remains nutrient-rich and tailored to their age group. You can also supplement their diet with calcium and vitamin D3 to support strong bone growth. A good rule of thumb is to provide 18-20% protein in their starter feed, which will help promote muscle development.
Adequate light exposure is also vital during this period. Provide a balanced spectrum of lighting that includes UVB rays, as these are essential for calcium metabolism and bone health. Aim for 14 hours of light and 10 hours of darkness to simulate natural day-night cycles.
Reducing stress is another critical aspect of promoting healthy growth. Make sure the chicks have ample space to move around comfortably, provide a clean environment, and minimize handling to prevent fatigue and anxiety. By implementing these strategies, you’ll be well on your way to raising robust, thriving chickens.
Common Issues and Troubleshooting in Raising Chicks
As you care for your adorable chicks, it’s not uncommon to encounter some bumps along the way. Let’s go over some common issues that may arise and how to troubleshoot them effectively.
Identifying and Addressing Health Problems Early On
As you raise your chicks from week to week, it’s essential to be aware of common health issues that may arise. Catching problems early on is crucial to prevent them from becoming severe and even life-threatening. Some common health issues in young chicks include respiratory infections, such as coryza and bronchitis, which can cause labored breathing, wheezing, and a decrease in appetite.
Another issue is pasty butt, where the droppings become stuck to the chick’s vent area, causing discomfort and potentially leading to infection. To prevent these problems, keep your chicks’ environment clean and dry, ensure proper ventilation, and maintain a balanced diet. Make sure their water and feed are always available and not contaminated.
Regularly inspect your chicks for signs of illness, such as ruffled feathers, loss of appetite, or lethargy. If you notice any unusual symptoms, consult with a veterinarian experienced in poultry care. Keeping your chicks’ health on track is vital to their growth and development. By being proactive and attentive to potential issues, you can ensure they thrive under your care.
It’s also crucial to maintain a clean and hygienic environment by removing soiled bedding material and disinfecting feeders and waterers regularly. Additionally, introduce new chicks slowly to prevent stress-induced illnesses. With proper care and attention, you can minimize the risk of common health issues and raise healthy, happy chickens.
Managing Chick Behavior and Stress Factors
Managing chick behavior and stress factors is crucial to their overall health and well-being. A stressed chick can lead to a range of issues, from reduced appetite to increased disease susceptibility. Some common causes of stress in chicks include inadequate ventilation, overcrowding, and poor light quality.
To minimize stress, ensure that your brooder or enclosure has adequate ventilation to prevent the buildup of ammonia from droppings. Keep an eye on temperature fluctuations, as sudden changes can be stressful for young chicks. A consistent temperature range between 90-100°F (32-38°C) is ideal for most breeds.
You can also promote relaxation by providing a calm environment. This includes reducing noise levels and avoiding sudden movements that may frighten your chicks. Offering a shallow water source, like a birdbath or a gentle stream of water, can be an effective stress-reliever.
Monitor your chicks’ behavior closely, watching for signs of stress such as pacing, panting, or changes in appetite. By being proactive and attentive to their needs, you can help reduce stress factors and create a happy, healthy environment for your young chickens.
Conclusion: Nurturing Healthy Chicks from Hatch to Flock Integration
As you’ve watched your chicks grow and thrive, it’s time to prepare them for integration into their flock. This final chapter shares essential tips on a smooth transition process.
Recap of Key Takeaways for Successful Chick-Rearing
As you’ve made it through our 7-week journey of nurturing healthy chicks from hatch to flock integration, we’re now at a critical point: recap and retention. To ensure the next batch of eggs hatches successfully, let’s summarize key takeaways for successful chick-rearing.
Monitoring temperature and humidity is crucial in those first few weeks; keep the brooder spotless, and adjust ventilation as needed. Adequate lighting is also vital – especially during week one and two when chicks rely heavily on it for development. Nutrition-wise, provide a balanced starter feed from day one, gradually introducing treats like scratch grains and fruits later on.
Keep your chick’s environment safe by controlling drafts, preventing overcrowding, and removing any hazardous items. Vaccination schedules are also essential; research local requirements to ensure you’re giving your flock the best start. By following these guidelines, you’ll be well-prepared for the next hatch. Remember, consistency is key – stick to established routines, and your chicks will thrive under your care.
Final Tips on Gradually Integrating New Chicks into Your Existing Flock
When it’s time to introduce new chicks into your existing flock, patience and gradual integration are key. Start by keeping the new arrivals separate from the rest of the flock for a few days to allow them to adjust to their surroundings without stress.
Begin introducing visual contact through windows or mesh panels to allow the birds to become familiar with each other’s presence. Once they seem comfortable, start allowing supervised visits between the groups in the same enclosure. Monitor body language closely: if you notice any aggression or fear-based behaviors, it may be best to slow down the integration process.
For example, imagine introducing a new chick into a flock of 10 established birds. Begin by keeping them separated and providing visual contact for a day or two before allowing supervised visits. After observing their behavior and adjusting as needed, you can gradually increase interaction time over several days until they’re fully integrated.
Frequently Asked Questions
Can I raise chicks without a specialized incubator?
Yes, you can use a brooder or a safe enclosure to raise chicks without an incubator. However, it’s essential to ensure the environment is controlled and maintained at optimal temperatures for chick development (around 90-95°F for the first week). This will help prevent health issues and promote growth.
What if I notice irregularities in my chicks’ development?
Irregularities can be a sign of underlying health issues or environmental factors affecting your chicks. Monitor their behavior, appetite, and stool quality closely. Keep an eye out for any significant changes in temperature, humidity, or light exposure. If you’re unsure about what to do, consult with a veterinarian specializing in poultry care.
How often should I clean the brooder?
Clean the brooder at least once a week, removing soiled bedding and replacing it with fresh material. Remove any debris or uneaten food from the area as well. This will help maintain optimal hygiene levels and prevent disease transmission among your chicks.
Are there specific vaccinations required for backyard chickens?
Vaccinations for backyard chickens can vary depending on factors like location, climate, and flock health. Consult with a veterinarian to determine the best vaccination protocols for your region and flock. Typically, vaccinations are recommended for diseases such as Marek’s, Newcastle, and infectious bronchitis.
What if I want to integrate my chicks into an existing flock?
Gradually integrating new chicks into an existing flock can be challenging. Start by introducing them at a young age (around 4-6 weeks) when they’re less likely to establish dominance or territorial behaviors. Quarantine the new birds for several days before release, and supervise their interactions closely to prevent any conflicts. Monitor both the new and existing birds’ behavior and health closely during this transition period.