
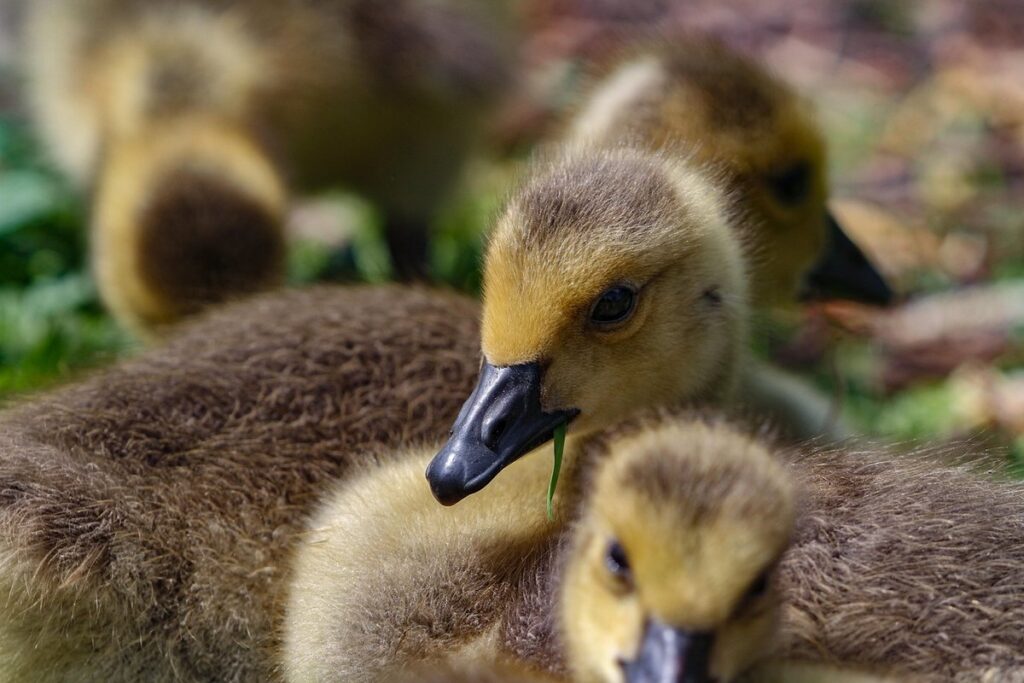
Are you getting ready to welcome new goslings into your flock? Hatching goose eggs can be an exciting and rewarding experience, but it requires careful planning and attention to detail. The incubation period is a critical stage in the process, and understanding how different factors influence hatch time is essential for success. But what exactly determines hatching time for geese? From breed-specific characteristics to environmental conditions, there are several key elements to consider. In this article, we’ll delve into the world of goose breeding, exploring average incubation periods, brooder setup, and temperature and humidity levels that promote healthy development. Whether you’re a seasoned breeder or just starting out, our expert tips will guide you through the process and help ensure a successful hatching experience for your geese.
Understanding Goose Breeds and their Hatch Times
When it comes to hatching goose eggs, understanding the unique characteristics of different breeds is crucial for predicting hatch times. This section will explore how breed-specific traits influence incubation periods.
Factors Influencing Hatch Time
When it comes to hatching time for goose eggs, several factors can influence the length of incubation. One of the most significant factors is the breed itself. Some goose breeds, such as Embden and Toulouse, have a longer hatch time due to their larger size and stronger eggshell. In contrast, smaller breeds like Chinese and African geese tend to hatch faster.
The shape and size of the egg also play a crucial role in determining hatch time. Eggs with irregular shapes or those that are significantly larger or smaller than average may not incubate as efficiently. For instance, an extra-large egg may take up too much space in the incubator, causing temperature fluctuations that can impact the embryo’s development.
To identify potential issues that may affect the incubation process, it’s essential to monitor the eggs closely for any signs of irregularity or weakness. If you notice any unusual characteristics, such as soft spots, cracks, or uneven coloration, these could indicate a problem with the eggshell or embryonic development. Regular temperature checks and gentle handling can help ensure a healthy hatch time.
Average Incubation Periods for Common Goose Breeds
When it comes to hatching goose eggs, understanding the average incubation periods for different breeds is crucial. This knowledge will help you anticipate and prepare for the arrival of your goslings.
The American Buff breed has an average incubation period of 28 days, while the Embden White Pomeranian typically takes around 29-30 days to hatch. The African species, known as the Khaki Campbell, has a slightly shorter incubation period at 26-27 days. On the other hand, the Toulouse and Sebastopol breeds tend to take longer, with an average incubation period of 31-32 days.
It’s essential to note that these are just averages, and actual incubation periods may vary depending on various factors such as temperature, humidity, and individual bird characteristics. To ensure optimal hatching success, make sure your broody hen or incubator is providing the ideal conditions for development.
By knowing what to expect from each breed, you can better plan and prepare for the arrival of your new goslings, making the entire process a more enjoyable and rewarding experience.
Preparing for Incubation: Setting Up Your Brooder
Before you start incubating your goose eggs, it’s essential to set up a safe and healthy environment in your brooder. This means choosing the right equipment and preparing a suitable space for your goslings’ first few weeks of life.
Choosing the Right Brooder Environment
When it comes to choosing the right brooder environment, there are several essential aspects to consider. Temperature control is critical for goose embryos to develop properly, with ideal temperatures ranging between 90°F to 100°F (32°C to 38°C) during the first few weeks of incubation. It’s crucial to maintain a consistent temperature within ±1°F (±0.5°C) to ensure proper development.
Humidity levels are also vital, as they affect not only the embryo but also the parent geese. A humidity level of 50-60% is recommended during the first two weeks and can be adjusted accordingly as the eggs mature. To maintain optimal humidity, a water tray or pan with a water reservoir can be placed under the brooder.
Proper lighting is another crucial aspect to consider when setting up your brooder. Goose embryos need light to develop properly, but excessive light can cause overheating. A photoperiod of 14-16 hours of light and 8-10 hours of darkness is recommended during incubation. It’s essential to position the brooder in a location with adequate ventilation to prevent heat buildup and maintain air quality.
Sanitation and Hygiene Practices in Brooder Maintenance
Maintaining a clean and hygienic brooder is crucial for goslings’ development and overall health. A dirty environment can lead to disease transmission, which may be fatal for young goslings. To prevent this, it’s essential to establish good sanitation and hygiene practices from the moment you set up your brooder.
Clean the brooder thoroughly with a solution of one part white vinegar to nine parts water before adding the eggs or goslings. Remove any debris, dust, or dirt that may have accumulated during storage or transport. Disinfect all surfaces, including feeders and waterers, using a poultry-safe disinfectant. Ensure good ventilation in the brooder by opening windows or installing a ventilation system.
Monitor the brooder’s temperature and humidity levels regularly to prevent the growth of bacteria and mold. Keep the litter dry and change it frequently to maintain a clean environment. Avoid overcrowding the brooder, as this can lead to stress and increased risk of disease transmission. By following these simple steps, you’ll create a healthy environment for your goslings to grow and thrive in.
Calculating Incubation Periods: Factors and Considerations
To accurately calculate incubation periods for goose eggs, you’ll want to consider various factors that can influence the hatching time, such as breed and size. This includes weighing these against ideal temperatures and humidity levels.
Temperature and Humidity Requirements for Goose Embryos
When it comes to incubating goose eggs, temperature and humidity play crucial roles in ensuring healthy embryo development. A well-maintained incubation environment is essential for successful hatching, and understanding the ideal temperature and humidity ranges can make all the difference.
The ideal temperature range for incubating goose embryos is between 99°F (37°C) and 100°F (38°C), with a slight drop in temperature at the end of the incubation period. It’s essential to maintain a consistent temperature within this range, as fluctuations can lead to embryonic mortality or delayed development.
Humidity levels are also critical for goose embryo growth. The ideal humidity level is between 50% and 60%, with a slight increase in humidity during the last week of incubation. Proper ventilation is crucial to prevent bacterial growth and maintain healthy air quality within the incubator. By maintaining these temperature and humidity ranges, you can ensure optimal conditions for your goose embryos to develop and hatch successfully.
To illustrate this, consider a study where goose eggs incubated at 100°F (38°C) had a higher hatching success rate compared to those incubated at 98°F (36.7°C). By understanding the ideal temperature and humidity requirements, you can increase the chances of successful hatching and healthy goslings.
Monitoring Egg Development: What to Look For
As you monitor the development of goose eggs during incubation, it’s essential to know what to look for at each stage. The fertile egg will undergo significant changes between days 1-28, and recognizing these indicators can help identify potential problems before they become critical.
Between days 3-5, you’ll notice a slight increase in egg size as the embryo’s initial growth begins. This is an excellent time to inspect the air cell, which should be around 10% of the egg’s total volume at this stage. As you move towards day 7, the embryo will begin to develop its heart and start to move.
Around days 14-16, you’ll see a noticeable darkening of the embryonic tissues as they begin to take shape. The air sac should now account for around 20% of the egg’s volume. Keep an eye out for any unusual discoloration or swelling, which can be indicative of issues like bacterial infections.
By day 21-22, you’ll see the embryo’s development accelerate rapidly, and its features will become more defined. Be on the lookout for uneven or slow growth, as this may signal underlying problems with nutrition or temperature control.
Managing Incubation Time: Tips for Success
When it comes to hatching goose eggs, managing incubation time is crucial. Here are some valuable tips to help you successfully hatch your goslings.
Ensuring Consistent Temperatures and Humidity Levels
Maintaining consistent temperatures and humidity levels is crucial during the incubation period. Goose eggs require a stable environment to develop properly, and fluctuations can lead to poor hatch rates. The ideal temperature range for incubating goose eggs is between 99°F (37°C) and 100°F (38°C). Ensure your incubator or brooder has a precise temperature control system.
Humidity levels should be maintained at around 50-60%. You can achieve this by placing the incubator in a draft-free area or using a humidifier. Monitor the humidity level closely, as it can drop significantly during the first week of incubation due to evaporation. To maintain consistent humidity, you may need to mist the eggs with water daily.
Regularly check and record temperature and humidity levels to ensure consistency. This will also help you identify any issues that may arise. Consider investing in an incubator with built-in temperature and humidity controls for a hassle-free hatching experience. By maintaining a stable environment, you’ll be well on your way to successfully hatching your goose eggs.
Rotating Eggs During Incubation
When it comes to incubating goose eggs, one crucial aspect is often overlooked: rotating the eggs regularly. This simple yet essential step can significantly impact the health and development of your goslings. By rotating the eggs, you prevent uneven development, reduce the risk of deformities, and promote healthy growth.
Imagine an egg lying in the same position for 24 hours a day, seven days a week – it’s like being stuck in a single pose forever! This can lead to developmental issues, such as one side of the embryo growing stronger than the other. To avoid this, make sure to rotate your eggs every few hours. A general rule of thumb is to turn them at least 5-7 times during each incubation cycle.
For example, if you’re using a turning mechanism in your incubator, adjust it so that it rotates the eggs approximately once an hour. You can also manually rotate them by hand when you’re checking on the eggs. This ensures that every side of the embryo gets equal exposure to heat and nutrients, promoting balanced growth and a healthy gosling.
Troubleshooting Common Issues During Incubation
We’ve all been there: a goose egg just won’t crack, and your patience is wearing thin. This next section will help you troubleshoot common issues during incubation so you can get back on track.
Recognizing Signs of Stress or Distress in Gosling Development
As you observe the developing goslings inside the incubator, it’s essential to recognize signs of stress or distress. Goslings that are experiencing stress may not reach their full potential or may even perish prematurely. Monitoring for these warning signs is crucial to take corrective action promptly.
Goslings under stress often exhibit lethargy, failing to respond to external stimuli. They might also display erratic behavior, such as rapid breathing, trembling, or changes in posture. If you notice your goslings huddled together or clustered around the turner, it may indicate a temperature imbalance. Monitor their behavior closely for signs of labored breathing, which can be indicative of respiratory issues.
Another sign of stress is unusual egg yolk sacs or membranes. Normally, the yolk sac should be fully absorbed by day 18-20 of incubation. If you notice any abnormal absorption patterns or see a cloudy or discolored membrane, it may signal an issue that needs attention. Always inspect your goslings daily for these signs and adjust their environment accordingly to ensure optimal development.
Addressing Unusual Hatch Times or Outcomes
If you’re experiencing an unusual hatch time or outcome with your goose eggs, don’t panic. It’s essential to remain calm and think clearly about the best course of action. When it comes to incubation, things don’t always go as planned, but there are steps you can take to minimize future complications.
Before we dive into strategies for addressing unexpected hatch times, let’s discuss some common reasons why issues may arise in the first place. Temperature fluctuations during incubation, poor egg quality or storage conditions, and even slight deviations from optimal humidity levels can all contribute to irregular hatch outcomes.
To reduce the risk of future complications, ensure your incubator is well-maintained and calibrated regularly. Keep a close eye on temperature readings throughout the incubation period, aiming for a consistent temperature between 99.5°F (37.7°C) and 100.5°F (38°C). Also, monitor humidity levels carefully, as excessive dryness can lead to embryonic development issues.
If you notice any unusual hatch times or outcomes, keep detailed records of the incubation process. This will help you identify potential areas for improvement in future attempts.
Frequently Asked Questions
What if I’m new to goose breeding and don’t know which breed is best for a beginner?
If you’re just starting out, it’s recommended to start with smaller breeds like Chinese or African geese, as they are relatively easy to care for and have shorter incubation periods (around 28-30 days). They also tend to be more forgiving if you make minor mistakes during the breeding process. Researching the specific needs of each breed can help you choose the best fit for your experience level.
How do I ensure consistent temperatures and humidity levels in my brooder?
To maintain consistent temperatures, use a reliable thermometer and hygrometer to monitor conditions. A temperature range of 99-100°F (37-38°C) and humidity levels between 50-60% are ideal for goose embryos. You can also consider investing in a digital incubator or using a thermostatically controlled heating source.
What if I notice unusual signs of stress or distress in my goslings during incubation?
If you observe any unusual behavior, such as lethargy, feather loss, or difficulty breathing, it may indicate temperature or humidity issues. Check your brooder’s conditions and make adjustments as needed. Additionally, monitor the eggs’ weight to detect potential problems.
Can I incubate goose eggs from different breeds together in the same brooder?
It is generally recommended to separate geese by breed when incubating, especially if they have significantly different incubation periods or specific needs. This ensures that each group receives optimal care and reduces the risk of disease transmission between breeds.
How often should I rotate my eggs during incubation, and what are the benefits of rotation?
Rotating your eggs every 12-24 hours helps prevent uneven temperature distribution within the brooder. Regular rotation also promotes healthy embryo development by allowing for consistent exposure to optimal conditions. This simple practice can significantly improve hatch rates and reduce the risk of complications.
What if I experience a delay in incubation time due to unforeseen circumstances?
If you encounter unexpected delays or setbacks, reassess your brooder environment and adjust as necessary. Consider seeking advice from an experienced breeder or consulting with a veterinarian for guidance on how to proceed. Prioritize maintaining optimal temperatures and humidity levels throughout the incubation process.
Are there any additional considerations I should keep in mind when setting up my brooder?
When preparing your brooder, consider investing in a reliable ventilation system to maintain air quality and prevent ammonia buildup from droppings. You may also want to research local regulations regarding backyard poultry breeding and ensure compliance with all relevant laws and ordinances.