
If you’re about to welcome new additions to your backyard flock, understanding the process of hen egg hatching is crucial. It’s not just about sitting back and waiting for the eggs to hatch – successful breeding requires knowledge, patience, and attention to detail.
From fertilization to the first chirp, we’ll take a closer look at the fascinating journey of hen egg hatching. We’ll explore the importance of proper nutrition, breeding techniques, and what to expect during this exciting time. Whether you’re a seasoned poultry enthusiast or just starting out, our guide will cover common issues that can impact hatch rates and provide tips on how to raise happy, healthy chicks.
In this article, we’ll delve into the ins and outs of hen egg hatching, giving you the confidence and expertise to breed and care for your flock with success.
Understanding Hen Egg Development
To fully appreciate the wonder of hatching, let’s take a closer look at how hen eggs develop from fertilization to incubation, a fascinating process that sets the stage for life.
Fertilization and Embryonic Development
When a rooster and hen mate, they produce sex cells that will eventually combine to form a fertilized egg. This process is called fertilization, and it’s the first crucial step in the development of an embryo. For fertilization to occur, sperm from the rooster must meet the yolk of the hen’s egg. The hen’s reproductive system has a special mechanism to facilitate this meeting – the infundibulum, which is a funnel-shaped structure that guides the sperm into the oviduct.
Once sperm meets the egg, it penetrates the outer layers and combines with the nucleus of the yolk, resulting in fertilization. After fertilization, the ovum (egg cell) undergoes rapid cell division, and an embryo begins to form. This early stage of embryonic development is called cleavage, during which cells multiply rapidly without significant growth.
The first few days after fertilization are critical for the development of the embryo, as it forms a blastoderm – a cluster of cells that will eventually give rise to all tissues in the chick. During this period, the egg continues to develop and mature, preparing itself for incubation, which is essential for successful hatching.
Factors Influencing Fertility and Hatch Rate
When it comes to hatching eggs, fertility and hatch rate are crucial factors that can significantly impact the success of your incubation process. Several key factors can influence these outcomes, starting with breed selection. Some breeds, like Leghorns and Rhode Island Reds, are known for their high fertility rates, while others may be more challenging to work with.
The age of the hen is also a critical factor in determining egg quality and hatch rate. Hens typically reach peak egg-laying performance between 2-5 years of age, after which their fertility declines. Nutrition plays a vital role as well; ensuring your hens have access to a balanced diet rich in protein and calcium will significantly boost the health and viability of their eggs.
A hen’s overall health status is another essential consideration. Stress, disease, and parasites can all compromise egg quality and reduce hatch rates. Regular veterinary check-ups, proper ventilation, and good biosecurity practices can help mitigate these risks and promote healthy hens that lay fertile eggs.
Preparing for Hatching: Tips for Broody Hens and Breeders
As a breeder, you want to ensure your broody hens are ready for the big moment – that’s where these essential tips come in, helping you prepare for a successful hatch.
Choosing the Right Breeds for Egg Production and Hatchability
When choosing breeds for egg production and hatchability, it’s essential to select hens that excel in both areas. For egg-laying, popular breeds like Leghorns, Marans, and Australorps are top contenders. These birds can lay up to 300 eggs per year, making them perfect for large-scale operations or those looking for consistent production.
When it comes to hatch rates, breeds like Barred Rocks, Rhode Island Reds, and Plymouth Rock hens tend to have higher success rates. Factors such as fertility, egg quality, and maternal instincts play a significant role in determining hatchability.
Consider the following when selecting a breeding program:
- Research the breed’s temperament and compatibility with your existing flock.
- Evaluate the breed’s overall health and disease resistance.
- Assess the breed’s environmental adaptability and tolerance for heat or cold stress.
- Consider the breed’s egg size, weight, and shape to ensure they meet your market demands.
Ultimately, selecting breeds that excel in both egg production and hatch rates will give you a solid foundation for a successful breeding program.
Creating an Optimal Breeding Environment
Creating an optimal breeding environment is crucial for successful hatching outcomes. As a breeder, you know that the well-being of your birds is directly linked to the quality and healthiness of their eggs. A balanced diet rich in essential nutrients is vital for optimal egg production and fertility. Ensure your flock has access to fresh water, high-quality feed, and supplements tailored to their specific needs.
Regular health checks are also crucial to detect any potential issues that may impact breeding success. Monitor your birds’ overall health, watch for signs of stress or disease, and take prompt action if you notice any irregularities. Keep a clean and well-ventilated coop to prevent the spread of diseases.
Maintain a comfortable temperature range between 60°F to 70°F (15°C to 21°C) in the breeding environment to promote optimal egg production and fertility. Natural light exposure is also essential, but be cautious not to overexpose your birds to direct sunlight, which can lead to heat stress. Aiming for a balanced environment will significantly improve your hatching outcomes and set you up for success.
The Hatching Process: What to Expect
As you wait for your hen egg to hatch, it’s natural to wonder what’s happening inside. In this next part of our guide, we’ll walk you through the hatching process step by step.
Day 1-7: Incubation and Early Development
On day 1 after fertilization, a crucial process begins. The embryo starts to develop, and its first cells begin to divide. At this stage, it’s still too early to detect any changes from the outside, but significant growth is happening within.
By day 3-4, the embryo has developed into a small cluster of cells called the morula. It’s now about 0.1 mm in diameter and starts to differentiate into different layers that will eventually form various organs and tissues.
As we move into days 5-6, the embryo’s growth accelerates rapidly. The heart begins to beat, and blood vessels start to form. This is also when the embryo’s external membranes start to develop, including the amnion and chorion, which will play a crucial role in protecting it during incubation.
By day 7, the embryo has reached about 1-2 mm in diameter and has developed its major organs and systems. The yolk sac provides essential nutrients, while the air cells within the egg start to expand as gas exchange increases. This is an exciting time for any hen egg hatcher, as you can now see the first signs of life within the egg!
Days 8-18: Embryonic Growth and Organ Formation
As we approach day 8-18 of incubation, the embryo undergoes rapid growth and development. At this stage, major organs start to form, including the heart, lungs, liver, kidneys, and pancreas. The embryo’s nervous system begins to develop as well, with nerve cells forming and extending along the body.
Sensory organs such as the eyes, ears, and nostrils start to take shape. By day 12, the embryo’s eyes are fully formed, but they won’t open until after hatching. The auditory nerve starts to form around day 14.
During this period, the chick’s beak, legs, and wings also develop. The beak begins as a small bud on the tip of the upper mandible. As it grows, the beak will start to split into its two distinct parts. The legs emerge from their folded position, with claws forming at the end.
It is essential to maintain consistent temperature during this critical period, ensuring proper growth and development. Check your incubator regularly for any signs of malfunction or temperature fluctuations.
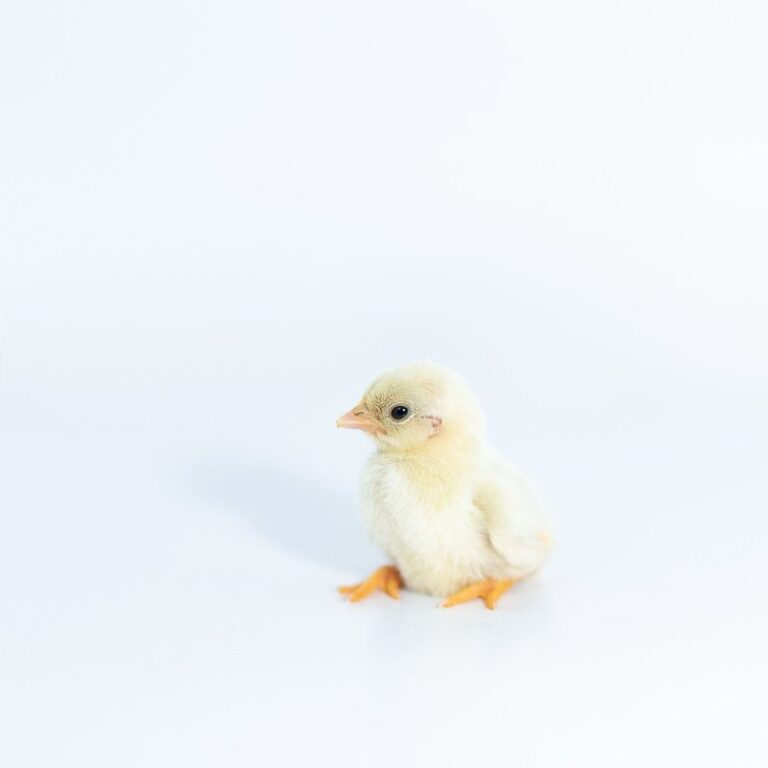
Caring for Chicks After Hatching
Now that you’ve successfully hatched your chicks, it’s time to focus on their care and well-being. This crucial next step ensures they grow strong and healthy under your watchful eye.
First Few Hours and Initial Care
The first few hours and initial care after hatching are critical for the new chick’s survival. As soon as the chicks emerge from their eggs, it’s essential to provide them with proper hydration, warmth, and nutrition.
Initially, make sure the chicks have access to fresh water. You can use a dropper or a syringe to gently place a few drops of warm water into the beak area, encouraging them to start drinking. This will help prevent dehydration and ensure they can regulate their body temperature. Keep in mind that too much water at once can cause choking, so it’s better to start with small amounts.
Maintain a consistent brooder temperature between 90-100°F (32-38°C) for the first few days after hatching. This will help regulate the chick’s metabolic rate and ensure they digest their food properly. For nutrition, offer a starter feed specifically designed for young chicks, as it contains essential nutrients for growth and development.
Monitor your chicks closely during this initial period to detect any signs of distress or health issues. Make sure you’re prepared with necessary supplies like heat lamps, thermostats, and a brooder to create a safe environment for your new arrivals.
Nutritional Needs of Young Chicks
As you welcome your newly hatched chicks into their brooder, it’s essential to provide them with the right nutrients for optimal growth and development. During the first weeks of life, young chicks have different dietary requirements than adults, and getting this right can significantly impact their overall health.
Chicks need a diet rich in protein, which is crucial for building strong muscles and developing feathers. A good starting point is to provide them with starter feed that contains around 20% protein content. This will help meet their daily needs of about 1-2 grams of protein per chick per day. You can also supplement their diet with high-protein foods like mealworms or hard-boiled eggs, but in moderation.
In terms of calories, young chicks require a lot to sustain their rapid growth and energy expenditure. A good quality starter feed should provide around 1000-1200 kcal/kg, which translates to about 10-15% of the chick’s body weight per day. Lastly, ensure your chicks get essential vitamins like vitamin A, D3, E, and K through their diet or supplements.
It’s also worth noting that over-supplementing can be detrimental, so it’s crucial to follow the manufacturer’s guidelines for starter feed and avoid giving too many treats.
Common Issues and Troubleshooting
As you embark on the thrilling journey of hatching hen eggs, you may encounter a few bumps along the way – that’s where we help you identify and resolve common problems.
Causes and Prevention of Broodiness and Fertility Problems
When it comes to hatching eggs, problems with broodiness and fertility can be frustrating for backyard chicken keepers. These issues are more common than you think, affecting up to 20% of egg-laying hens. So, let’s explore the causes and prevention strategies.
Broodiness is a natural behavior in chickens where they stop laying eggs and focus on incubating their own eggs or others. However, it can be triggered by stress, overcrowding, and nutrition deficiencies. To prevent broodiness, provide your hens with plenty of space to move around (at least 4-5 square feet per bird), a balanced diet, and adequate nesting boxes.
Fertility problems often arise from poor egg quality, inadequate sperm production, or issues during breeding. Factors such as age, nutrition, and overall health can impact fertility. To boost fertility, ensure your roosters are healthy and well-nourished, provide them with essential minerals like zinc and selenium, and monitor their behavior to detect any signs of stress.
Some hens may develop reproductive disorders like egg yolk peritonitis or oviduct problems due to genetic predisposition or age. Regular health checks, a balanced diet rich in calcium, and proper ventilation can help mitigate these risks.
Handling Chicks with Health Issues or Abnormalities
When it comes to hatching chicks, it’s not uncommon for them to exhibit health issues or abnormalities. As a breeder or enthusiast, being able to identify and address these concerns is crucial to ensure the well-being of your chicks. Some common signs of health problems include labored breathing, lethargy, or unusual droppings.
The causes of these problems can vary widely, but often stem from genetic factors, environmental conditions, or poor husbandry practices. For instance, hypovitaminosis A, a condition caused by vitamin A deficiency, can lead to respiratory issues and impaired growth. Another common issue is yolk sac edema, where the chick’s yolk sac fails to absorb properly, causing excessive fluid buildup.
If you suspect a chick has a health problem or abnormality, it’s essential to act promptly. In many cases, proper treatment involves providing a nutritious diet, maintaining optimal environmental conditions, and administering supportive care such as antibiotics or supplements. Monitor your chicks closely for signs of improvement, and consult with a veterinarian if the issue persists.
Some breeds are more prone to certain health issues than others. Researching the specific needs and predispositions of your breed can help you identify potential problems early on. With proper attention and care, many health concerns can be successfully addressed, allowing your chicks to thrive and grow strong and healthy.
Frequently Asked Questions
How long after hatching can I expect the chicks to be independent?
You can expect young chicks to start becoming more independent around 2-3 weeks post-hatching, as they begin to explore their surroundings and become less reliant on their mother’s care. However, it may take up to 4-5 weeks for them to fully wean off their brooder and start foraging on their own.
What are some common issues that can impact hatch rates, and how can I prevent them?
Common issues like low fertility, poor incubation conditions, and inadequate nutrition can all negatively affect hatch rates. To prevent these issues, ensure proper temperature control in the incubator (around 99-100°F), maintain a humidity level of around 50-60%, and provide a balanced diet for your hens.
Can I use artificial lighting to stimulate breeding behavior in my flock?
Yes, you can use artificial lighting to simulate longer daylight hours, which can help stimulate breeding behavior in your flock. However, it’s essential to note that this should be used as a supplement to natural light and not as a replacement for it. Aim to provide around 14-16 hours of light per day.
How often should I clean the incubator and brooder?
It’s recommended to clean both the incubator and brooder at least once a week, or more frequently if you notice a significant buildup of debris or contamination. This will help prevent bacterial growth and maintain optimal conditions for hatching and chick development.
What are some signs that my hen is experiencing fertility issues, and how can I address them?
Signs of fertility issues in your hen may include irregular egg production, reduced fertility rates, or failure to hatch eggs despite proper incubation. To address these issues, consult with a veterinarian or poultry expert to determine the underlying cause, which could be related to nutrition, health, or breeding practices.